
Is your Pioneer car stereo acting up or completely silent? You don’t have to spend a fortune on repairs or a new system just yet.
Fixing your car stereo yourself is easier than you think, and it can save you time and money. In this guide, you’ll discover simple steps to diagnose and repair common issues with your Pioneer stereo. By the end, you’ll feel confident getting your music back on the road—loud and clear.
Ready to bring your sound system back to life? Let’s dive in.
Credit: mobilemechanicshouston.com
Common Pioneer Stereo Issues
Identifying common issues with your Pioneer car stereo can save you a lot of frustration and unnecessary expenses. Knowing what problems typically occur helps you troubleshoot effectively and decide if you can fix the problem yourself or if professional help is needed.
From power failures to connectivity glitches, each issue has specific signs that you can look for. Understanding these will guide you toward the right repair approach and get your stereo back to delivering great sound quickly.
No Power Or Display
If your Pioneer stereo won’t turn on or the display stays blank, start by checking the fuse. A blown fuse is often the culprit and can be replaced easily. Loose wiring connections behind the stereo can also cause power issues, so ensure all cables are firmly attached.
Have you noticed your stereo cuts out when you hit a bump? That might mean a connection is loose or the wiring is damaged. Don’t overlook the simplest fixes first—they often solve the problem.
Distorted Sound
Distorted or crackling sound can ruin your listening experience. This issue might be caused by damaged speaker wires, poor grounding, or even a faulty amplifier inside the stereo unit. Try adjusting the balance and fade settings to see if the distortion moves, which can help isolate the faulty speaker.
Cleaning the volume knob and input jacks sometimes improves sound clarity as dust buildup can interfere with signals. Have you checked the equalizer settings lately? Incorrect settings can also produce unwanted noise.
Cd Or Disc Problems
When your stereo won’t read CDs or eject discs, the laser lens inside might be dirty or misaligned. Using a CD lens cleaner can fix minor issues without opening the unit. If the disc gets stuck, avoid forcing it out; instead, use the manual eject function or consult the manual for safe removal methods.
Sometimes, discs themselves are the issue. Scratches or dirt on the CD surface can prevent playback, so inspect your discs carefully before blaming the stereo.
Bluetooth Connectivity Failures
Bluetooth problems are common and often caused by pairing errors or outdated firmware. Make sure your stereo and phone are both discoverable and within range. Deleting old paired devices and re-pairing can clear glitches.
Have you tried updating your stereo’s firmware? Manufacturers often release updates to fix bugs and improve compatibility. If problems persist, resetting the stereo’s Bluetooth settings to factory defaults might help.
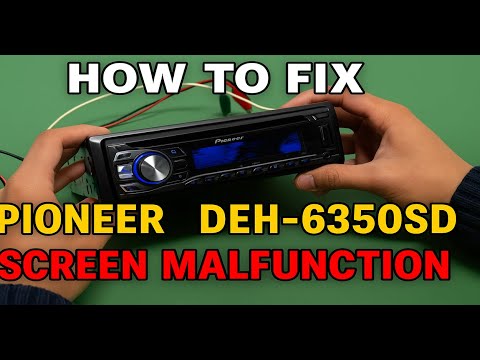
Touchscreen Malfunctions
If your Pioneer stereo’s touchscreen responds slowly or not at all, the issue could be dirt, moisture, or a software glitch. Gently clean the screen with a microfiber cloth and avoid using harsh chemicals. Restarting the unit sometimes restores touchscreen responsiveness.
Persistent problems might indicate a hardware failure requiring professional repair or replacement. Ask yourself: is the issue consistent, or does it happen only occasionally? This can help determine if it’s a software or hardware problem.
Essential Tools For Repair
Repairing a Pioneer car stereo needs the right tools. Using proper tools helps avoid damage. It also makes the repair process faster and easier. Preparing these tools before starting saves time and stress.
Screwdrivers And Pry Tools
Screwdrivers are crucial for opening the stereo casing. Use both flathead and Phillips screwdrivers. Pry tools help remove panels without scratching them. Plastic pry tools are safer than metal ones. These tools prevent damage to delicate parts and car interiors.
Multimeter For Electrical Testing
A multimeter checks electrical circuits inside the stereo. It measures voltage, current, and resistance. This helps find broken wires or faulty connections. Using a multimeter ensures accurate diagnosis. It avoids unnecessary part replacements.
Replacement Parts And Components
Keep replacement parts ready for quick fixes. Common parts include fuses, wiring, and buttons. Use parts compatible with your Pioneer model. Genuine parts last longer and fit better. Having spares saves time during repairs.
Cleaning Supplies
Cleaning supplies remove dust and grime inside the stereo. Use a soft brush or compressed air for dust. Isopropyl alcohol wipes clean contacts safely. Clean parts improve performance and prevent future issues. Avoid using water or harsh chemicals.
Safety Precautions
Safety is key before starting any repair on your Pioneer car stereo. Taking simple precautions protects you and your vehicle. It prevents damage to electrical parts and keeps your work safe.
Disconnecting The Battery
Always disconnect the car battery first. This stops electric shocks and short circuits. Use a wrench to remove the negative terminal. Wait a few minutes to let the system power down fully. This step reduces risk of sparks or injury during repair.
Handling Electrical Components
Handle wires and connectors with care. Avoid pulling on wires; gently unplug connectors instead. Keep tools insulated to prevent electric shock. Do not force parts into place. Use the right tools to avoid damage.
Avoiding Static Damage
Static electricity can harm sensitive stereo parts. Ground yourself before touching any circuit boards. Touch a metal part of the car to release static. Work on a clean, dry surface to lower risk. Avoid wearing wool or synthetic clothes that build static.
Step-by-step Repair Process
Repairing a Pioneer car stereo requires careful attention and basic tools. Follow each step closely to ensure a successful fix. This guide will help identify common issues and show how to address them safely.
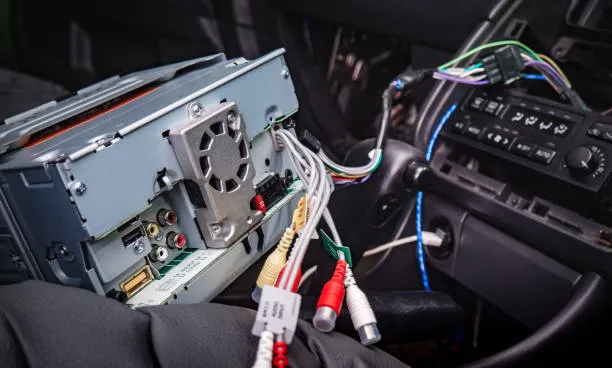
Removing The Stereo Unit
Start by disconnecting your car battery to avoid electrical shock. Use the proper tools to remove the trim around the stereo. Carefully pull out the stereo unit without forcing it. Disconnect all wiring harnesses and antenna cables gently. Place the unit on a clean surface for inspection.
Inspecting Wiring And Connections
Look for loose or damaged wires connected to the stereo. Check connectors for corrosion or dirt buildup. Ensure all cables fit securely into their ports. Use a multimeter to test wiring continuity if available. Replace any frayed or broken wires before proceeding.
Testing Fuse And Power Supply
Locate the fuse box in your car and find the stereo fuse. Remove the fuse and check if it is blown. Replace the fuse with one of the same rating if needed. Test the power supply to the stereo using a voltage meter. Confirm the stereo receives the correct voltage to operate.
Cleaning Internal Components
Open the stereo casing carefully using a screwdriver. Use compressed air to blow out dust and debris inside. Clean circuit boards with a soft brush or cloth lightly dampened with isopropyl alcohol. Avoid touching sensitive parts with bare hands. Let the components dry completely before reassembly.
Replacing Faulty Parts
Identify any damaged internal parts such as capacitors or switches. Order exact replacement parts compatible with your stereo model. Use a soldering iron to remove and attach new components if necessary. Reassemble the stereo unit and test its functionality. Replace the unit in your car once fully repaired.
Troubleshooting Bluetooth Issues
Bluetooth issues can stop your Pioneer car stereo from connecting to your devices. The problem might be simple and fixable without expert help. Troubleshooting Bluetooth helps restore your music and calls quickly. Try these steps to fix common Bluetooth problems.
Resetting The Stereo
Resetting the stereo clears temporary errors and bugs. It returns settings to default and can fix many issues. To reset:
- Turn off the stereo.
- Press and hold the reset button or use the menu to find reset.
- Confirm the reset and wait for the system to restart.
This step often restores Bluetooth function and clears pairing conflicts.
Updating Firmware
Firmware updates improve Bluetooth performance and fix bugs. Check if your stereo has the latest firmware version. Follow these steps:
- Visit the Pioneer website and find your stereo model.
- Download the latest firmware to a USB drive.
- Insert the USB into the stereo and follow update instructions.
Updating firmware ensures your stereo works smoothly with new devices.
Re-pairing Devices
Old connections can cause Bluetooth problems. Re-pairing devices refreshes the link between your phone and stereo. Follow this process:
- Delete the stereo from your phone’s Bluetooth list.
- Remove your phone from the stereo’s paired device list.
- Search for devices on both and connect again.
Re-pairing often fixes connection issues and improves sound quality.
Credit: www.diymobileaudio.com
Maintaining Your Pioneer Stereo
Keeping your Pioneer car stereo in top shape doesn’t have to be complicated. Regular maintenance can prevent many common issues and extend the life of your device. You’ll find that small efforts like cleaning and updating can make a big difference in sound quality and performance.
Regular Cleaning Tips
Dust and grime can easily build up on your stereo’s surface and buttons, affecting both appearance and function. Use a soft, dry cloth to wipe the exterior regularly. Avoid harsh chemicals that might damage the screen or buttons.
For stubborn dirt in tight spaces, try using a soft brush or a can of compressed air. This helps clean out dust from vents and control knobs without causing damage. Have you noticed your buttons sticking or the display dimming? Cleaning might be the simple fix you need.
Firmware Updates
Pioneer often releases firmware updates to improve your stereo’s features and fix bugs. Check their official website or use the device’s settings menu to see if an update is available. Installing the latest firmware can improve compatibility with new devices and enhance sound performance.
Remember to update your stereo when you have a stable power source and avoid interrupting the process. Missing these updates can leave you stuck with glitches or outdated functions. Have you checked your stereo’s firmware lately?
Protecting Against Moisture And Dust
Moisture and dust are the silent enemies of car electronics. Park your vehicle in a covered area when possible, and avoid spilling drinks near your stereo. Even humidity inside the car can cause damage over time.
Consider using a protective cover or screen guard to shield the stereo faceplate. If you notice condensation or dust inside the display, it’s a sign to take action before it worsens. How often do you inspect your car’s interior for such risks?
When To Seek Professional Help
Knowing when to call in a professional can save you time, money, and frustration. While some Pioneer car stereo issues are easy to fix at home, others require skills and tools that only an expert has. Understanding these boundaries helps you avoid making the problem worse.
Complex Electrical Problems
Electrical issues often go beyond simple wiring checks or fuse replacements. If your stereo causes your car’s electrical system to behave unpredictably, it’s a red flag. Problems like blown fuses repeatedly, erratic display behavior, or your car not starting after stereo work signal a deeper electrical fault.
Attempting to fix these without proper knowledge can risk damage to your vehicle’s entire electrical system. A professional technician has the right diagnostic tools and experience to pinpoint and repair these hidden faults safely.
Warranty Considerations
Is your Pioneer car stereo still under warranty? Opening the unit or attempting repairs yourself can void that coverage. Manufacturers often require repairs to be done by authorized service centers to keep the warranty intact.
If your stereo develops issues within the warranty period, check the terms carefully. Taking it to a certified professional can save you from costly repairs that should be covered for free or at a reduced cost.
Specialized Repairs
Some repairs need specialized parts or skills that go beyond a basic toolkit. For example, if your stereo requires replacing the internal circuit board, recalibrating advanced settings, or software updates, you should seek professional help.
Professionals also have access to proprietary tools and genuine parts, ensuring your stereo functions properly after repair. Have you ever tried fixing something only to find it worse? Specialized repairs reduce that risk and restore your stereo’s performance efficiently.

Credit: www.amazon.com
Frequently Asked Questions
How Do I Fix A Pioneer Car Stereo Not Turning On?
Check the car battery, fuse, and wiring connections first. Replace any blown fuses or damaged wires. If issues persist, test the stereo unit or consult a professional.
Why Is My Pioneer Car Stereo Sound Distorted?
Distorted sound may result from poor speaker connections, damaged speakers, or wrong audio settings. Inspect wiring and speaker condition. Adjust audio settings or replace faulty components for clear sound.
How Can I Reset A Pioneer Car Stereo?
Press and hold the reset button, usually found behind the faceplate or on the unit. Refer to the manual for exact location. Resetting clears errors and restores factory settings.
What Causes A Pioneer Car Stereo To Lose Bluetooth Connection?
Bluetooth issues often stem from outdated firmware, interference, or pairing errors. Update your stereo’s firmware and re-pair your device. Avoid interference by moving away from other electronic devices.
Conclusion
Repairing your Pioneer car stereo can save money and hassle. Follow each step carefully and take your time. Check all connections and parts for any damage. Test the stereo after repairs to ensure it works well. Keep your tools handy and stay patient throughout the process.
A working stereo makes your drives more enjoyable. Small fixes often solve common problems easily. Don’t rush; safety comes first when handling electronics. With practice, you will gain confidence in fixing your stereo. Keep this guide as a reference for future repairs.

