
Are you wondering if your car stereo is working properly but don’t want to wait until it’s installed in your vehicle? Testing it yourself with a simple battery can save you time and frustration.
In this guide, you’ll learn an easy and safe way to check your car stereo’s sound and power right now. Keep reading, and you’ll discover the step-by-step method that anyone can follow—even if you’re not a tech expert. By the end, you’ll feel confident knowing exactly how to test your car stereo quickly and effectively.

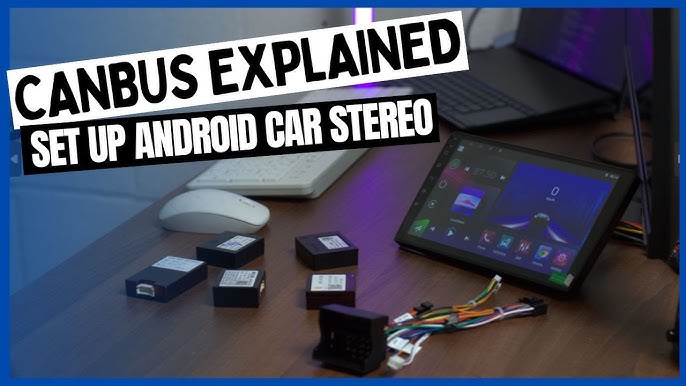
Credit: www.youtube.com
Gather Required Tools
Before you start testing your car stereo with a battery, gathering the right tools is crucial. Having everything prepared makes the process smoother and safer. It also helps you avoid frustrating delays or mistakes.
List Essential Items
- 12V Battery:A standard car battery or a reliable 12-volt power source to simulate your car’s electrical system.
- Multimeter:To measure voltage, current, and continuity, ensuring your connections work properly.
- Wiring Harness or Test Leads:These help connect the stereo to the battery without damaging the wires.
- Screwdriver Set:Useful for removing the stereo from its casing or adjusting terminals.
- Electrical Tape or Wire Connectors:To secure connections and prevent shorts.
- Fuse:A 10-amp fuse to protect the stereo and battery during testing.
Do you already have some of these tools at home? Sometimes, a quick trip to the hardware store can save hours of hassle.
Safety Precautions
Handling a car battery requires caution. Batteries can deliver strong currents that cause sparks or burns if mishandled.
Always wear safety goggles and gloves to protect your eyes and hands. Keep metal tools away from battery terminals to avoid accidental short circuits.
Make sure your workspace is dry and well-ventilated. Avoid smoking or open flames nearby because batteries can emit flammable gases.
Have you considered how a small slip could damage your stereo or cause injury? Taking these precautions upfront keeps you safe and your equipment intact.
Prepare The Battery
Preparing the battery is a crucial first step before testing your car stereo. Without the right battery setup, you might get false readings or even damage your stereo system. Taking time to prepare ensures your test is both safe and accurate.
Select The Right Battery
Choose a 12-volt battery that matches the typical voltage of your car’s electrical system. A fully charged lead-acid or deep-cycle battery works best for this purpose.
Using a smaller or weaker battery might not provide enough power, causing the stereo to perform poorly during your test. On the other hand, using a battery with too high voltage can harm your stereo components.
If you don’t have a car battery handy, a large sealed lead-acid battery from a UPS system can be a good alternative. Just ensure it’s rated at 12 volts and fully charged.
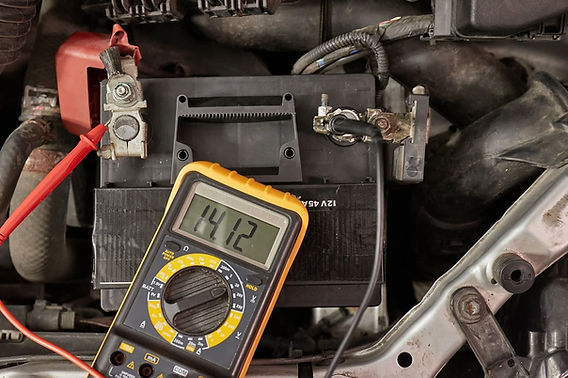
Check Battery Voltage
Before connecting your stereo, measure the battery voltage with a multimeter to confirm it’s fully charged. A healthy 12-volt battery should read around 12.6 volts or slightly higher.
If the voltage is below 12 volts, recharge the battery first. Low voltage can cause your stereo to malfunction or give inaccurate test results.
Keep the multimeter handy during testing to monitor voltage drops. This helps you catch any power issues early and avoid damaging your stereo.
Connect The Stereo To Battery
Connecting your car stereo to a battery is a simple and effective way to test its functions outside the vehicle. This step ensures the stereo powers on and works correctly before installation. Proper connection prevents damage and helps identify any wiring issues early.
Identify Wiring Terminals
Start by locating the stereo’s wiring terminals. Look for labels on the back panel or consult the user manual. The main terminals include:
- Positive (usually red):Supplies power to the stereo.
- Negative (usually black):Ground connection.
- Accessory or ignition (sometimes yellow):Powers the stereo when the car is on.
Double-check the wires with a multimeter if unsure. Correct identification avoids short circuits and damage.
Attach Positive And Negative Wires
Connect the positive wire from the stereo to the positive terminal on the battery. Use alligator clips or secure connections to prevent loose contacts.
Next, connect the negative wire from the stereo to the battery’s negative terminal. This completes the circuit and allows current to flow.
Make sure both connections are tight and stable. A loose wire can cause sparks or prevent the stereo from powering up.
Power On The Stereo
Powering on your car stereo using a battery is a crucial step in testing its functionality. This simple process helps you verify if the unit receives power correctly and operates as expected before installation. Understanding how to switch on the stereo and confirm its power supply can save you time and frustration.
Switching The Unit On
First, connect the positive and negative terminals of the battery to the matching wires on the stereo. Be sure to secure these connections firmly to avoid any intermittent power issues.
Once the connections are set, press the power button on the stereo unit. If the display lights up or you hear a startup sound, it means the stereo is powering on properly.
If nothing happens, double-check your wiring and ensure the battery is fully charged. Sometimes, a loose connection is the only thing stopping the unit from turning on.
Confirming Power Supply
After switching the stereo on, it’s important to confirm the power supply is stable. Use a multimeter to measure the voltage between the battery and the stereo’s power input wires.
You should see a consistent reading close to 12 volts if the battery is fully charged. Fluctuations or low voltage might indicate a weak battery or poor connection.
Keep in mind, some stereos require a ground connection for proper power flow. Ensure the negative terminal is properly grounded to the stereo chassis or a metal surface.
Have you noticed any unexpected behavior in your stereo’s power-up sequence? Sometimes, this can reveal hidden wiring issues or internal faults worth addressing early.
Test Audio Output
Testing the audio output of a car stereo with a battery is important. It helps confirm that the stereo works and sounds clear. This step shows if the speakers and connections function properly. Checking audio output also lets you spot any issues early. Follow the simple steps below to test the sound effectively.
Play Test Sound
Connect your car stereo to the battery securely. Turn on the stereo and select a test sound or music track. Use a clear audio file for accurate results. Listen closely to the sound coming from the speakers. Check for any distortions, crackles, or weak audio. Make sure the sound is steady and without interruptions. This confirms the stereo and speakers work well together.
Adjust Volume And Settings
Start with a low volume to avoid sudden loud noises. Gradually increase the volume to test the stereo’s range. Adjust bass, treble, and balance settings for best sound quality. Notice any changes in audio clarity and strength. Ensure the controls respond smoothly without issues. Proper adjustment improves your listening experience and verifies the stereo’s performance.
Troubleshoot Common Issues
Troubleshooting common problems helps find quick solutions for your car stereo. Testing with a battery can reveal issues easily. Understanding typical faults saves time and effort.
No Power Or Sound
Check if the stereo turns on when connected to the battery. No power often means a loose connection or dead battery. Make sure the battery terminals are clean and tight. Confirm the stereo’s power wires connect correctly. Test the ignition wire; some stereos need it to be on. If the unit powers but no sound plays, check speaker wires. Faulty or disconnected speakers cause silence.
Distorted Audio
Distortion occurs from weak connections or bad speakers. Inspect speaker wires for cuts or damage. Make sure wires attach firmly to the stereo and speakers. Lower volume to see if distortion fades. High volume may overload speakers. Try different audio sources to rule out input issues. Dirty or damaged speakers also cause poor sound quality.
Fuse And Wiring Checks
Fuses protect the stereo from electrical damage. Locate the fuse box and check the stereo fuse. A blown fuse looks black or broken inside. Replace with the same fuse type and rating. Examine all wiring harnesses for loose or broken wires. Use a multimeter to test wire continuity. Secure all connections to avoid shorts or failures. Proper wiring ensures steady power and sound.
Disconnect And Store Equipment
Disconnecting and storing your car stereo equipment properly is crucial for safety and longevity. Careless removal can cause damage or electrical issues. Proper storage prevents parts from getting lost or broken.
Follow these guidelines to handle your stereo equipment carefully after testing it with a battery.
Safely Remove Connections
Always turn off the power before disconnecting wires. Use insulated tools to avoid shocks. Gently pull connectors; do not yank wires. Label each wire with tape to remember where it goes. Keep screws and small parts in a container to avoid losing them.
Proper Storage Tips
Store components in a dry, cool place away from direct sunlight. Use anti-static bags or cloth to wrap sensitive parts. Keep wires untangled to prevent damage. Avoid stacking heavy items on top of the stereo. Check storage area regularly for moisture or pests.

Credit: www.youtube.com
Credit: www.youtube.com
Frequently Asked Questions
How Do I Safely Test A Car Stereo With A Battery?
To test safely, connect the stereo’s positive wire to the battery’s positive terminal. Ground the negative wire to the battery’s negative terminal. Use insulated tools and avoid short circuits to prevent damage or injury.
What Tools Do I Need To Test A Car Stereo?
You need a 12V car battery or equivalent power source, insulated wires, and a multimeter. These tools help connect and measure the stereo’s power and signal output accurately.
Can I Test The Stereo Without A Car Battery?
Yes, you can use a 12V power supply or a fully charged lead-acid battery. Ensure voltage matches the car battery specifications for proper testing.
How To Identify Wiring For Testing A Car Stereo?
Refer to the stereo’s wiring diagram or manual. Typically, red is positive power, black is ground, and other colors connect to speakers or accessories.
Conclusion
Testing a car stereo with a battery is straightforward. Gather the right tools. Connect the wires correctly. Ensure the stereo works by checking sound quality. Listen for clear audio. If issues arise, double-check connections. Safety is key, so work carefully.
Understanding each step makes the process easy. Enjoy your music without worry. A well-tested stereo enhances every drive. Now, you’re ready to enjoy crisp sound on the road. Remember, practice makes perfect. With time, testing becomes second nature. Happy listening!

