
Are you ready to upgrade your car stereo but worried about the wiring? Knowing how to crimp wires correctly can save you time, prevent connection problems, and make your audio system sound better.
In this guide, you’ll learn simple, step-by-step tips to crimp wires like a pro—even if you’ve never done it before. By mastering this skill, you’ll avoid common mistakes and ensure your car stereo works flawlessly. Keep reading, and you’ll soon have the confidence to handle your wiring with ease.
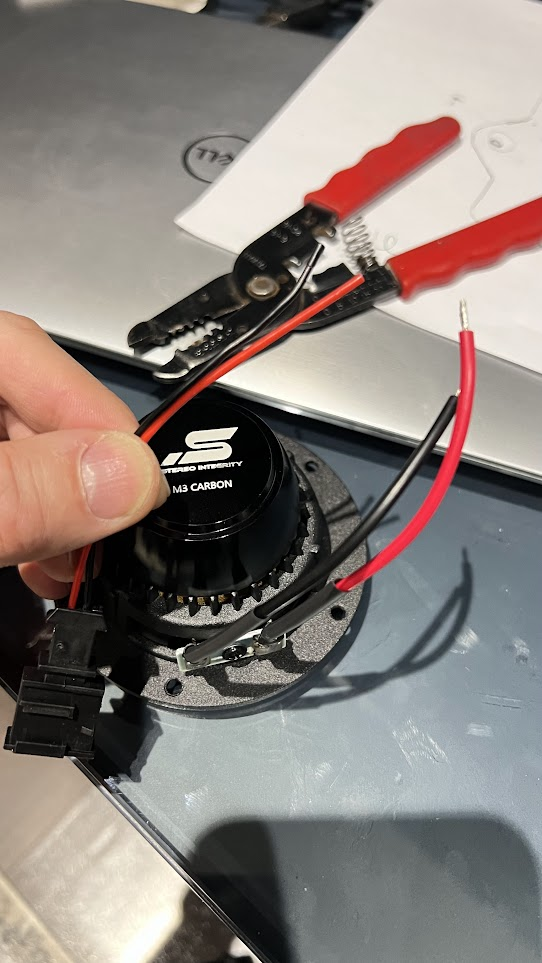
Tools Needed
Crimping wires for a car stereo needs the right tools. Using proper tools helps make strong and safe connections. It also saves time and prevents damage to wires or devices. Below are the essential tools needed for a neat and secure crimp job.
Wire Strippers
Wire strippers remove the insulation from wires without cutting the metal inside. Choose wire strippers that fit the wire size you use. Good strippers make clean cuts and avoid nicking the wire. This helps maintain a solid electrical connection.
Crimping Tool
A crimping tool presses connectors onto wires firmly. It ensures the connector grips the wire tightly. Look for a crimping tool with adjustable pressure for different connector sizes. A quality tool prevents loose or weak crimps.
Connectors
Connectors join wires securely. Use connectors made for car audio wiring, like butt connectors or spade terminals. Pick connectors that match wire thickness. Proper connectors help avoid shorts and signal loss in your car stereo.
Heat Shrink Tubing
Heat shrink tubing protects and insulates the crimped connection. Slide tubing over the wire before crimping. After crimping, heat the tubing to shrink it tight around the joint. This adds strength and guards against moisture and corrosion.
Credit: www.vweosclub.com
Preparing Wires
Preparing wires properly is essential for a secure car stereo connection. It ensures a strong electrical link and prevents future issues. Clean, well-prepared wires make crimping easier and more reliable. Follow these simple steps to get your wires ready for crimping.
Measuring And Cutting
Measure the wire length needed carefully. Avoid cutting wires too long or too short. Use sharp wire cutters for a clean, straight cut. A neat cut helps fit connectors better and prevents shorts.
Stripping Insulation
Remove the wire insulation without damaging strands inside. Use a wire stripper tool set to the wire gauge size. Strip about half an inch of insulation for a good crimp. Check for any nicked wires and trim if needed.
Twisting Wire Strands
Twist the exposed wire strands tightly together. This keeps strands from fraying and ensures a solid connection. Twist in one direction until the strands hold firm. Twisting makes the wire easier to insert into the crimp connector.
Choosing Connectors
Choosing the right connectors is key to a strong car stereo wire crimp. Connectors join wires securely and ensure good sound quality. Picking the correct type and size avoids loose connections and signal loss. This section explains how to select connectors for your car stereo wiring.
Types Of Crimp Connectors
Crimp connectors come in various styles. Each style serves a different purpose in car stereo wiring.
- Butt Connectors:Join two wires end-to-end, creating a straight connection.
- Ring Terminals:Attach wires to screws or posts with a secure ring shape.
- Spade Terminals:Fit under screws or clips, easy to connect and disconnect.
- Quick Disconnects:Allow fast wire separation without tools.
- Bullet Connectors:Provide a round, plug-and-socket type connection.
Select connectors based on the type of connection and location in your car.
Matching Connector To Wire Gauge
Wire gauge is the thickness of the wire. Connectors must fit the wire gauge perfectly.
Using a connector too large or small causes poor contact or damage. Check the wire gauge printed on the wire or measure it with a wire gauge tool.
| Wire Gauge (AWG) | Connector Size |
|---|---|
| 22-18 | Small connectors (red) |
| 16-14 | Medium connectors (blue) |
| 12-10 | Large connectors (yellow) |
Match the connector color to the wire gauge for a secure crimp.

Credit: www.reddit.com
Crimping Process
The crimping process is vital for a secure car stereo wire connection. It joins wires and connectors tightly for good signal flow. Proper crimping ensures durability and prevents loose connections.
Inserting Wire Into Connector
Strip about 1/4 inch of insulation from the wire end. Hold the wire strands together tightly. Insert the bare wire fully into the metal barrel of the connector. Make sure no strands are outside the connector.
Using The Crimping Tool
Choose a crimping tool that fits your connector size. Place the connector into the tool’s crimping slot. Squeeze the handles firmly until the connector compresses around the wire. Avoid squeezing too lightly or too hard.
Checking The Connection
Gently tug the wire to test the hold. The wire should not pull out easily. Inspect the crimp for tightness and even compression. A good crimp looks neat and secure without damage.
Securing And Testing
Securing and testing crimped wires ensures a safe and reliable car stereo connection. Proper sealing protects the wires from moisture and vibration. Testing confirms that the electrical signal flows correctly. These steps prevent future problems and keep the audio system working well.
Applying Heat Shrink Tubing
Slide heat shrink tubing over the crimped connection before crimping. After crimping, move the tubing to cover the exposed wire and connector. Use a heat gun or lighter to shrink the tubing tightly. This seals the connection from dirt and water. It also adds mechanical strength and prevents shorts.
Testing Electrical Continuity
Use a multimeter set to continuity mode. Touch the probes to both ends of the crimped wire. A beep or low resistance reading shows a good connection. No beep means the wire is broken or not connected properly. Test each wire in your stereo harness for best results.
Troubleshooting Common Issues
- Loose connections: Re-crimp or tighten the connector.
- Corrosion: Clean wires and apply fresh heat shrink tubing.
- No continuity: Check for wire breaks or incorrect wiring.
- Weak audio signals: Verify all connections and grounding points.
Addressing these issues early saves time and prevents stereo problems later.

Credit: wirefyshop.com
Safety Tips
Safety should be your top priority whenever you work on crimping wires for your car stereo. Ignoring basic precautions can lead to accidents, damage to your vehicle’s electrical system, or injury. Knowing how to protect yourself and handle tools correctly makes the job smoother and more reliable.
Working With Power Off
Always disconnect the car battery before you start crimping wires. This simple step prevents electrical shocks and avoids short circuits that could fry your stereo or other electronic parts. Have you ever experienced a sudden spark while handling wires? That’s a clear sign power was still running.
Even if you think you’re working on a non-powered section, double-check with a voltage tester. It’s better to spend a few extra minutes verifying than risk permanent damage or personal harm. Remember, car electrical systems can be complex, and power can flow in unexpected ways.
Proper Tool Handling
Using the right tools is crucial, but using them correctly is even more important. Keep your crimping tool clean and free from rust to ensure it grips wires firmly without slipping. Slipping can cause incomplete crimps or injury if the tool suddenly moves.
Hold the tool firmly and position the wire properly in the crimping slot before squeezing. Avoid forcing the tool if it feels stuck—inspect and adjust instead. Have you ever tried to rush through a crimp and ended up with a loose connection? That’s usually due to poor tool handling.
- Wear safety glasses to protect your eyes from wire strands.
- Keep your fingers clear of the crimping jaws.
- Store tools in a safe place after use to prevent accidental injury.
Frequently Asked Questions
What Tools Are Needed To Crimp Wires For Car Stereo?
You need wire strippers, crimping tool, connectors, and electrical tape. These tools ensure secure and reliable wire connections for your car stereo installation.
How Do You Strip Wires Properly Before Crimping?
Use wire strippers to remove about 1/4 inch of insulation. Avoid nicking the wire strands to maintain a strong electrical connection.
What Type Of Connectors Are Best For Car Stereo Wires?
Use insulated butt connectors or spade connectors. They provide good insulation and a durable connection for car stereo wiring.
Can Crimped Wires Handle Car Stereo Power Safely?
Yes, properly crimped wires ensure a stable and safe connection. This prevents shorts and signal loss in your car audio system.
Conclusion
Crimping wires for your car stereo isn’t too hard. Follow the steps. Get the right tools. Make sure wires are clean and stripped. Crimp tightly for a secure fit. Always double-check connections. Enjoy clear sound from your stereo. Safe and neat wiring enhances performance.
Feel confident in your DIY skills. Practice makes perfect. Soon, you’ll be a pro at this. Remember, patience is key. Proper crimping ensures long-lasting results. Happy listening!

