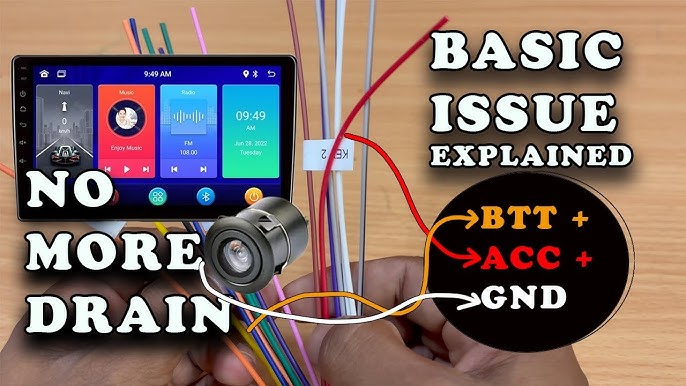
Are you ready to upgrade your car’s sound system but feel stuck on how to connect the car stereo wire harness? You’re not alone.
Many people find this step confusing and worry about damaging their vehicle’s electronics. The good news is, with the right guidance, you can do it yourself quickly and safely. You’ll discover simple, clear instructions that will make connecting your car stereo wire harness easy—even if you have no prior experience.
Keep reading, and soon you’ll be enjoying your favorite music with crystal-clear sound in your car.
Credit: www.myjeepcompass.com
Tools And Materials Needed
Connecting a car stereo wire harness requires the right set of tools and materials to make the process smooth and safe. Without the proper equipment, you risk damaging your car’s electrical system or ending up with a loose connection that ruins your listening experience.
Before you start, gather everything you need to avoid interruptions and frustration. Having the correct wire harness and tools not only speeds up the job but also ensures a reliable and professional finish.
Essential Tools
- Wire Strippers:These help you remove the insulation cleanly without cutting the wire itself.
- Crimping Tool:Use this to securely connect wires with crimp connectors.
- Screwdrivers:Both Phillips and flathead screwdrivers are necessary for removing panels and securing connections.
- Electrical Tape or Heat Shrink Tubing:To insulate and protect the wire connections from short circuits.
- Multimeter:A handy device to check voltage and ensure proper connections.
- Wire Connectors:Butt connectors or quick splice connectors simplify joining wires.
From personal experience, skipping a crimping tool and relying on twisting wires together led to a poor connection that cut out during drives. Don’t make that mistake—use the right tools for secure and lasting results.
Choosing The Right Wire Harness
Not every wire harness fits every car or stereo model. You need one compatible with your vehicle’s make and model to avoid rewiring headaches.
Look for a harness that matches your stereo’s wiring colors and connectors. This match simplifies installation and reduces the risk of wiring errors.
Ask yourself: does the harness include all necessary adapters for your car’s factory plugs? Choosing a universal harness might seem flexible but can add complexity if it lacks proper connectors.
Spend time researching or consult your car’s manual to select the perfect harness. The right choice saves you from damaging your stereo or vehicle wiring and makes the installation process straightforward.
Preparing Your Car Stereo
Preparing your car stereo is a key step before installation. It ensures safety and functionality. Taking time to prepare avoids damage and connection issues.
Start by carefully removing the old stereo. This creates space for the new unit. Next, inspect the wiring to check for any problems. Clean and organize wires to make connections easier.
Removing The Old Stereo
Begin by disconnecting the car battery. This prevents electrical shocks and shorts.
Use the proper tools to remove screws or clips holding the stereo. Gently pull the stereo out of the dashboard. Disconnect the wire harness and antenna cable from the back. Keep all screws and parts safe for later use.
Inspecting The Wiring
Check the wire harness for any signs of damage. Look for frayed wires, corrosion, or loose connections.
Use a wire stripper to clean damaged ends. Match wire colors with the new stereo harness for easy connection.
- Check ground wire condition.
- Ensure power wires are intact.
- Verify speaker wires are connected correctly.
Organize wires by grouping them together. Use electrical tape or zip ties to keep wires neat. This prevents shorts and makes installation smoother.
Matching Wire Colors
Matching wire colors is a key step to ensure your car stereo installation goes smoothly. Wires carry different signals like power, ground, speakers, and more. Getting the colors right helps you avoid mistakes that could damage your system or cause it to malfunction.
Pay close attention to the color coding on your car’s wire harness. Different manufacturers may use slightly different colors, but many follow common standards. Knowing these can save you time and frustration when connecting wires.
Common Wire Color Codes
Here are some common wire colors and their usual purposes in car stereo wiring:
| Wire Color | Function |
|---|---|
| Yellow | Constant 12V Power (Battery) |
| Red | Switched 12V Power (Ignition) |
| Black | Ground |
| Blue | Power Antenna or Amplifier Turn-On |
| White / White with Black Stripe | Front Left Speaker (+/-) |
| Gray / Gray with Black Stripe | Front Right Speaker (+/-) |
| Green / Green with Black Stripe | Rear Left Speaker (+/-) |
| Purple / Purple with Black Stripe | Rear Right Speaker (+/-) |
Do you notice any colors on your harness that don’t match this list? That’s where you need to be extra cautious and check your car’s specific wiring guide.
Using A Wiring Diagram
A wiring diagram is your best friend when matching wire colors. It shows exactly which wire does what in your specific car model and stereo system. Without it, you risk guessing and causing a wiring mishap.
Look for the wiring diagram in your car’s manual or search online using your car’s make, model, and year. You’ll find diagrams that clearly label wire colors and functions.
Keep the diagram handy while you work. Cross-check each wire before making connections. Have you ever tried wiring without a diagram and ended up with a blown fuse? Avoid that hassle by using this simple tool.

Credit: www.reddit.com
Connecting The Wire Harness
Connecting the wire harness is a crucial part of installing a car stereo. It ensures that all the electrical signals flow correctly between your stereo and your car’s power, speakers, and other systems. Getting this connection right can save you from frustrating issues like no sound or blown fuses.
Stripping And Twisting Wires
Start by carefully stripping about half an inch of insulation from each wire. Use a wire stripper for a clean, damage-free cut. Avoid nicking the metal inside, as it weakens the wire and can cause problems later.
Once stripped, twist the exposed copper strands together tightly. This step is essential for a strong electrical connection. If the wires aren’t twisted well, they might come loose or create poor contact.
Securing Connections
After twisting, hold the wires firmly and connect them to their corresponding wires on the stereo harness. Make sure to match colors accurately—this is critical for proper function. Double-checking here can prevent hours of troubleshooting.
Once connected, gently tug on each wire to ensure it’s secure. Loose connections can cause intermittent sound issues or electrical shorts. Don’t rush this step; a solid connection is key to a reliable setup.
Using Crimp Connectors And Electrical Tape
Crimp connectors offer a durable way to join wires without soldering. Slide the stripped wire ends into the connector, then use a crimping tool to squeeze them tightly. This method creates a stable mechanical and electrical bond.
Wrap any exposed wire or connector with electrical tape for extra protection. This prevents short circuits by insulating the connection from metal parts in your car. Have you noticed how a small piece of tape can save you from a major headache later?
Testing The Connection
Testing the connection after wiring your car stereo harness is essential to ensure everything works perfectly before finalizing the installation. This step helps you catch wiring mistakes early, saving time and frustration. Let’s look at simple ways to verify your setup is correct and your stereo is ready to rock.
Powering On The Stereo
Once you’ve connected the harness, turn on your car’s ignition to power the stereo. If the stereo doesn’t light up or respond, double-check the wiring connections, especially the power and ground wires. Loose or reversed wires can prevent the unit from powering on.
Pay attention to any unusual behavior like flickering lights or the stereo turning off unexpectedly. These signs often point to poor grounding or a weak connection. Have you checked the fuse in the car’s fuse box? A blown fuse could be the culprit behind no power.
Checking Speaker Output
After confirming the stereo powers up, test each speaker to ensure sound output. Play some music and listen carefully to every speaker in your vehicle. If one or more speakers don’t produce sound, inspect the corresponding wires for loose connections or wrong colors.
You can also use a simple multimeter to measure speaker continuity if the audio test is inconclusive. Remember, connecting the wrong wires may cause distortion or no sound at all. How clear is your audio now compared to before? This quick check helps you avoid costly speaker damage later.
Troubleshooting Common Issues
Connecting a car stereo wire harness can sometimes lead to unexpected issues that stop your system from working as it should. Troubleshooting these problems early saves you time and frustration. Let’s look at some common issues you might face and how to tackle them effectively.
No Sound Or Static
If your stereo powers on but you hear no sound or just static, the wiring connections might be loose or incorrect. Double-check that each wire is connected to the right terminal, especially the speaker wires. Sometimes, reversing the polarity on a speaker wire causes distortion or no sound at all.
Also, verify the antenna connection if radio reception is poor or nonexistent. A weak signal can sound like static, but it’s often just a loose or damaged antenna cable. Have you tested the speakers individually to confirm they work?
Power Problems
When your stereo won’t turn on, the issue often lies in the power supply. Inspect the harness for a solid connection to both the constant 12V and switched ignition power wires. A common mistake is mixing these up, which prevents the stereo from powering correctly.
Check if the ground wire is firmly attached to a clean, bare metal surface. A poor ground connection can cause intermittent power loss. If you feel stuck, try using a multimeter to test voltage at the harness wires—you might find an unexpected power drop.
Blown Fuses
Blown fuses are a clear sign something’s wrong electrically. Always replace a blown fuse with one of the exact same rating; using a higher rating risks damaging your stereo or wiring. If the new fuse blows immediately, a short circuit could exist in your wiring.
Inspect the wiring harness for any exposed wires touching metal parts or the car chassis. Sometimes, wire insulation gets nicked during installation, creating a short. Have you traced the entire wire path to spot any potential damage?
Tips For A Clean Installation
A clean installation of your car stereo wire harness not only looks professional but also ensures safety and reliability. Messy wiring can cause shorts, signal issues, or make future repairs a nightmare. Taking a little extra time to organize and secure your wires pays off every time you get behind the wheel.
Organizing Wires
Start by sorting the wires according to their function—power, ground, speakers, and accessories. Use color coding or labels to keep track of each wire’s purpose. Bundling wires together with zip ties or Velcro strips keeps them neat and reduces the chance of tangling.
Think about the path your wires will take. Avoid running them near moving parts or sharp edges that could damage the insulation. Planning the layout before you connect anything can save a lot of headaches later on.
Securing The Harness
Once your wires are organized, secure the harness firmly to prevent movement. Loose wires can wear out quickly from vibrations or get caught in steering or pedals. Use clamps, adhesive mounts, or cable ties to fasten the harness against the car’s body or existing wiring channels.
Remember, a harness that stays put avoids accidental disconnections. Have you ever experienced a stereo cutting out because a wire came loose? Securing your harness properly helps you avoid that frustration.
Avoiding Signal Interference
Signal interference can ruin your audio quality and cause static or humming noises. Keep your audio wires separate from power cables to minimize electrical noise. If you need to cross wires, do so at a 90-degree angle to reduce interference.
Shielded wires or adding ferrite beads can also help reduce unwanted noise. Try to route your antenna cable away from other wiring. Have you noticed how some wires seem to ‘talk’ to each other? Taking these steps will ensure your sound stays clear and crisp.

Credit: www.renntech.org
Frequently Asked Questions
How Do I Identify Stereo Wire Colors?
Identifying stereo wire colors is crucial for correct installation. Typically, wires are color-coded by function: red for power, black for ground, yellow for memory, and blue for the antenna. Speaker wires usually have unique color pairs. Always refer to your car’s manual for accurate color coding.
What Tools Do I Need For Wiring?
To connect a car stereo wire harness, you’ll need wire strippers, crimping tools, and electrical tape. A multimeter is useful for verifying connections. Having a screwdriver set helps in accessing the stereo compartment. Ensure you have the correct wiring diagram for your vehicle model.
How Can I Avoid Wiring Mistakes?
Avoid wiring mistakes by carefully following the wiring diagram specific to your car model. Double-check wire colors and their corresponding functions. Use a multimeter to test connections. Secure all connections properly with electrical tape to prevent loose wires or short circuits.
Why Is My Stereo Not Powering On?
If your stereo isn’t powering on, check the power and ground connections first. Ensure the red power wire and the black ground wire are correctly connected. Inspect the fuse for the stereo circuit. A blown fuse may need replacement to restore power.
Conclusion
Connecting a car stereo wire harness is simple with the right steps. Take time to match each wire carefully. Use tools to make secure connections. Test the stereo before finalizing everything. This helps avoid common problems later. Follow safety tips to protect yourself and your car.
Clear instructions make the process faster and easier. Enjoy better sound and control in your vehicle. Small effort brings great results. Stay patient and double-check your work. You can handle this project with confidence.


