
Have you noticed scratches on your car stereo screen that make it hard to see or annoy you every time you drive? Scratches don’t just look bad—they can also affect how well your screen works.
But don’t worry, you don’t have to replace the whole unit or spend a fortune on repairs. You’ll discover simple, effective ways to remove those scratches and bring your car stereo screen back to life. Keep reading, and you’ll learn easy steps you can try right now to make your screen look clear and smooth again.
Common Causes Of Scratches
Scratches on your car stereo screen can be frustrating and distracting. Understanding what causes these scratches can help you avoid them and keep your screen looking new. Let’s break down the most common reasons your car stereo screen might get scratched.
Everyday Wear And Tear
Even regular use can slowly wear down your stereo screen’s surface. Frequent touching, especially with rings or fingernails, can create tiny scratches over time.
Think about how often you adjust settings while driving—each touch adds up. Small particles like dust or dirt trapped under your fingers can also contribute to these scratches.
Accidental Damage
Accidents happen. Maybe your keys or other sharp objects brush against the screen when you’re reaching into your pocket or glove compartment.
Sometimes, a sudden bump or drop of an item inside the car can cause noticeable scratches. Have you ever noticed how a quick, careless movement can leave a mark you didn’t expect?
Improper Cleaning Tools
Using the wrong cloth or cleaning solution can be worse than not cleaning at all. Rough fabrics, paper towels, or abrasive cleaners can scratch the delicate surface.
Even some “screen-safe” wipes contain chemicals that might degrade the protective coating. Are you sure your cleaning routine isn’t causing more harm than good?
Materials Needed For Scratch Removal
To remove scratches from your car stereo screen, having the right materials on hand makes a huge difference. Choosing the appropriate items depends on the scratch’s depth and the product’s compatibility with your screen type. Before starting, gather everything you need so the process runs smoothly and you avoid any accidental damage.
Household Items
Sometimes, common household items can do the trick for minor scratches. Toothpaste is a popular choice because it contains mild abrasives that can gently buff out small marks.
- Non-gel toothpaste (plain white)
- Soft, lint-free cloth or microfiber cloth
- Water for cleaning
Have you ever tried using toothpaste on glass or plastic surfaces? It can surprise you how well it works if applied carefully. However, avoid anything with whitening agents or gels as they can be too harsh.
Specialized Products
If you want a more reliable and safer option, specialized scratch removers designed for electronic screens are the way to go. These products are formulated to protect sensitive screens while reducing scratches.
- Screen polishing kits made for plastic or glass
- Car stereo screen protectors that come with scratch removal solutions
- Liquid screen cleaners with anti-scratch properties
Investing in a product tailored for your device can save you time and worry. Are you ready to spend a little more for peace of mind and better results?
Tools And Accessories
Having the right tools helps you apply materials evenly and safely. Using improper tools can cause more harm than good.
- Microfiber cloths to avoid new scratches
- Cotton swabs for precision application
- Plastic applicator pads or soft foam sponges
- Masking tape to protect edges during treatment
Think about how these tools can give you control over the process. For example, a cotton swab can help target tiny scratches without spreading the product to unwanted areas.
Preparing The Screen For Repair
Before you dive into fixing scratches on your car stereo screen, getting the surface ready is crucial. Proper preparation sets the stage for effective repair and helps avoid making the damage worse. Taking a few careful steps now will save you time and frustration later.
Cleaning The Surface
Start by gently cleaning the screen to remove dust, dirt, and oils. Use a microfiber cloth slightly dampened with water or a screen-safe cleaner. Avoid harsh chemicals that could damage the screen’s protective coating.
Make sure the screen is completely dry before moving on. Have you ever tried fixing something only to find dirt trapped underneath? It’s a simple step that many overlook but makes all the difference.
Assessing Scratch Depth
Not all scratches are created equal. Run your fingernail lightly over the scratch—if it catches, the scratch is deep and may need more intensive repair. Shallow scratches, on the other hand, might be polished out with mild abrasives.
This quick test helps you decide how much effort the repair will take. Could a minor scratch be hiding a deeper problem? Careful inspection prevents surprises later.
Choosing The Right Method
Different scratch depths require different approaches. For light scratches, polishing compounds or toothpaste might do the trick. Deep scratches often need specialized kits or professional help.
Consider the materials and tools you have available. Is it worth trying a DIY fix, or is this a job for an expert? The right choice depends on your comfort level and the scratch’s severity.
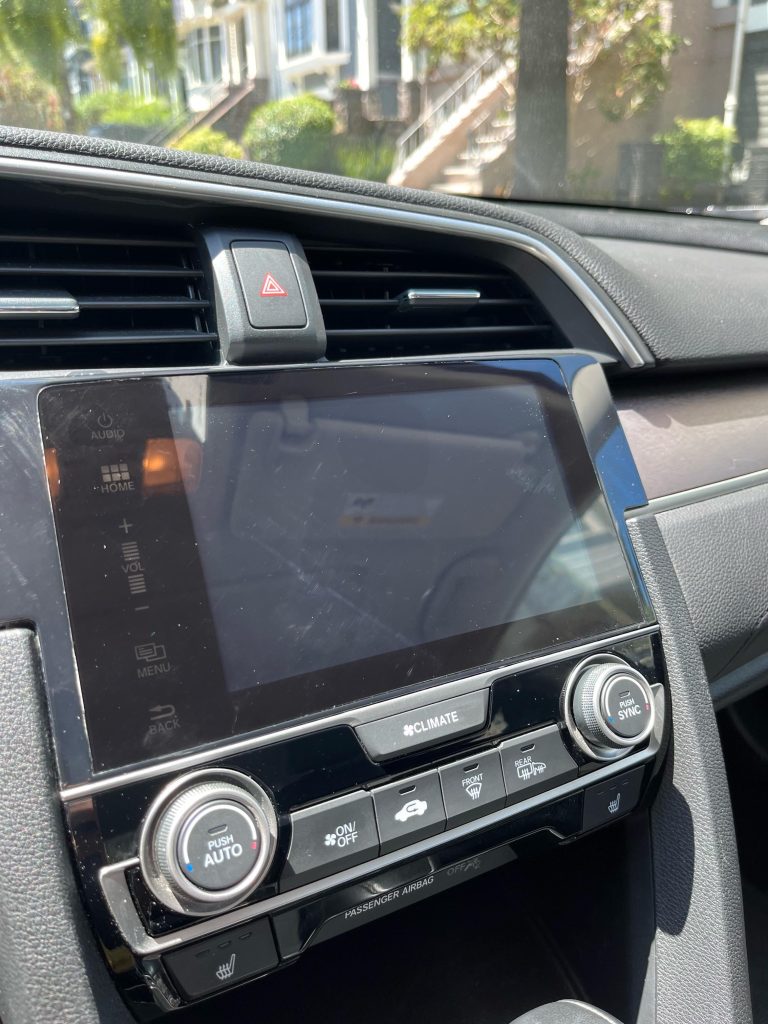
Credit: www.toyotanation.com
Diy Scratch Removal Methods
Scratches on your car stereo screen can be frustrating and distracting. Luckily, you don’t always need to spend money on professional repairs. Several DIY methods can help reduce or even remove those pesky scratches using items you might already have at home.
These simple techniques can save you time and money while restoring your screen’s clarity. Would you believe that common household products like toothpaste or baking soda can work wonders? Let’s look at some effective ways you can try yourself.
Using Toothpaste
Toothpaste isn’t just for your teeth—it can also polish minor scratches on your car stereo screen. Use a small amount of non-gel toothpaste on a soft, lint-free cloth.
Gently rub the scratched area in circular motions for about 30 seconds. Then, wipe off the residue with a clean, damp cloth and check the results.
If you’re careful, this method can smooth out light scratches without damaging the screen. Have you ever tried toothpaste on anything other than teeth? It might surprise you how versatile it is.
Applying Baking Soda Paste
Baking soda acts as a mild abrasive that can help erase light scratches. Mix two parts baking soda with one part water to form a thick paste.
Apply the paste to the screen using a soft cloth, rubbing gently in circular motions. After a minute or two, wipe off the paste with a damp cloth and dry the screen.
This method requires patience but can deliver noticeable improvements. Could this simple kitchen staple be your stereo screen’s new best friend?
Using Plastic Polish
Plastic polish is designed to restore clarity to scratched plastic surfaces and works well on many car stereo screens. Apply a small amount to a microfiber cloth and rub it onto the screen in gentle circles.
Let it sit for a moment, then buff it off with a clean part of the cloth. You might need to repeat the process a few times for deeper scratches.
Plastic polish can offer a more professional finish than household remedies. Do you want your screen to look as good as new without replacing it?
Using Screen Repair Kits
Screen repair kits include specially formulated compounds and tools tailored to fix scratches on electronic displays. These kits often come with detailed instructions and all materials needed for the job.
They can handle a wider range of scratch depths compared to DIY household items. While slightly more expensive, they provide a targeted solution that many car enthusiasts trust.
Would investing in a repair kit save you from costly replacements down the line? It might be worth considering if your scratches are stubborn or deeper.
Step-by-step Repair Process
The step-by-step repair process helps restore your car stereo screen. Follow each phase carefully for the best results. Patience and attention to detail are key. This guide uses simple tools and easy techniques anyone can do.
Applying The Solution
Choose a scratch removal product made for screens or fine plastics. Apply a small amount of solution on a soft cloth. Gently rub the scratched area in a circular motion. Avoid pressing too hard to prevent further damage. Cover the entire scratch evenly. Let the solution sit for a few minutes to work deeply.
Buffing Techniques
Use a clean microfiber cloth or a buffing pad for this step. Move the cloth in small circles over the treated area. Keep the pressure light and steady to smooth the screen surface. Repeat the circular motion several times to reduce scratch visibility. Check progress often under good light. Stop buffing once the scratch fades.
Cleaning After Repair
Remove any leftover solution or dust from the screen. Use a slightly damp microfiber cloth to wipe the area gently. Dry the screen with a clean, dry cloth to avoid streaks. Avoid harsh chemicals or rough cloths to protect the screen. Your car stereo screen should now look clearer and smoother.
Preventing Future Scratches
Keeping your car stereo screen free from scratches extends its life and maintains clear visibility. Preventing damage starts with simple daily habits and smart accessories. Small actions can protect the screen and keep it looking new for a long time.
Screen Protectors
Screen protectors act as a shield against scratches and dust. They are thin, clear films designed to fit your stereo screen perfectly. Applying one is easy and affordable. It stops keys, coins, or other objects from touching the screen directly.
Choose a high-quality protector with anti-glare and smudge-resistant features. Replace it if it gets scratched to keep your screen safe. This small investment saves money on repairs or replacements later.
Proper Cleaning Habits
Cleaning the screen gently helps avoid scratches. Use a soft microfiber cloth instead of rough materials. Never use paper towels or tissues, as they can cause damage.
Spray a small amount of screen cleaner or water on the cloth, not directly on the screen. Wipe the screen in soft circles to remove dust and fingerprints. Clean the screen regularly but avoid over-cleaning, which can wear down the surface.
Safe Usage Tips
Handle the stereo screen with care. Avoid touching it with sharp objects or fingernails. Do not place heavy items on the dashboard near the screen.
Keep the car interior tidy to prevent accidental scratches from loose items. Avoid pressing too hard on the screen while operating it. Teaching passengers to be careful also reduces the risk of damage.
When To Seek Professional Help
Knowing when to seek professional help is key to protecting your car stereo screen. Some scratches require expert care to avoid more damage. Trying to fix serious issues alone can worsen the problem. Professionals have the right tools and skills for difficult repairs. Recognizing the signs of deep damage or warranty needs saves time and money.
Deep Or Extensive Damage
Scratches that cut through the screen surface need expert repair. Professionals can assess and restore layers beneath the top glass. Large cracks or multiple scratches may affect touch sensitivity. Experts use special equipment to polish or replace damaged parts safely. Avoid DIY fixes for deep damage to prevent further harm.
Warranty And Repairs
Check your stereo’s warranty before attempting any fix. Many warranties cover screen repairs or replacements. DIY repairs can void the warranty and lead to costly charges. Professionals follow manufacturer guidelines to keep your warranty valid. Contact authorized service centers for warranty-covered repairs.
Cost Considerations
Minor scratches often have low-cost DIY solutions. Deep damage or screen replacement involves higher expenses. Professional services might be costly but ensure lasting results. Compare repair costs with replacement prices for informed decisions. Investing in expert help can save money over time.
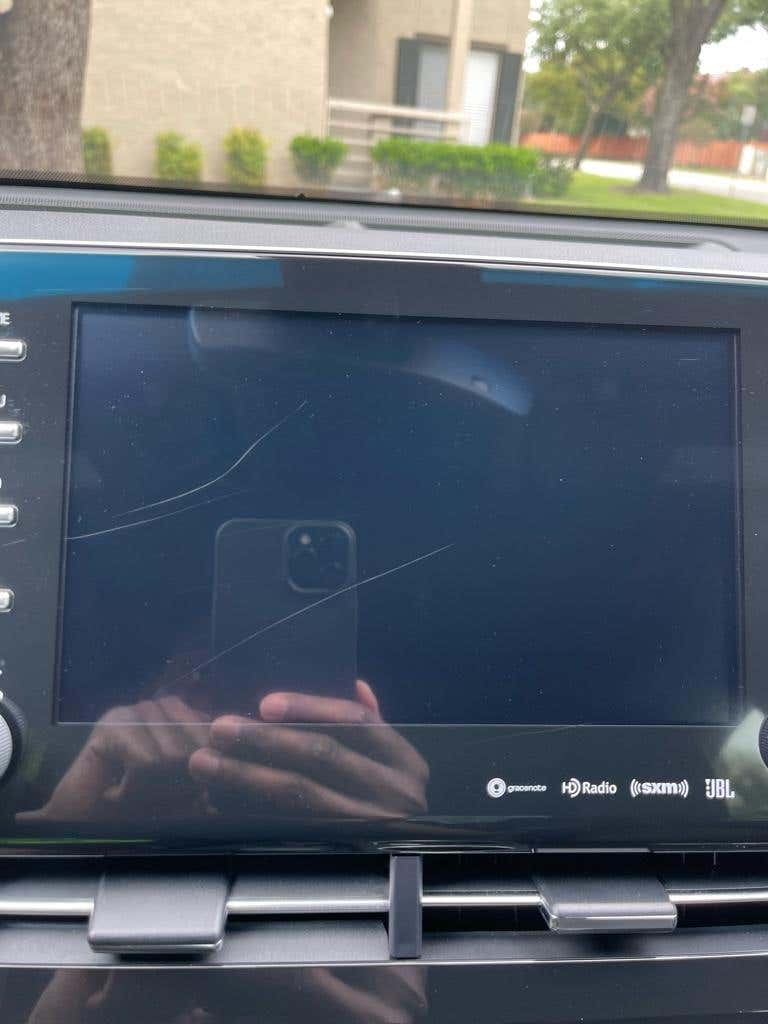
Credit: www.k5owners.com
Credit: www.k5owners.com
Frequently Asked Questions
How Can I Remove Scratches From A Car Stereo Screen?
Use a soft microfiber cloth and a mild polishing compound designed for plastic screens. Gently buff the scratches in a circular motion. Avoid harsh chemicals that may damage the screen’s surface. Always test on a small area first to ensure safety.
What Household Items Help Fix Car Stereo Screen Scratches?
Toothpaste or baking soda paste can gently reduce minor scratches. Apply a small amount with a soft cloth and rub in circular motions. Wipe clean with a damp cloth. Use caution, as abrasive materials may worsen deeper scratches.
Is It Safe To Use Screen Protectors On Car Stereo Screens?
Yes, screen protectors can prevent scratches and reduce damage. They act as a barrier against dust and debris. Choose protectors made specifically for car stereo screens for the best fit and clarity.
Can Professional Repair Restore Deep Scratches On Car Stereo Screens?
Yes, professional repair services can polish or replace severely scratched screens. They use specialized tools to restore clarity and function. Consider this option if DIY methods do not improve the screen’s appearance.
Conclusion
Fixing scratches on your car stereo screen is simple. Gather the right tools. Clean the screen first. Use a scratch remover product. Apply it gently in circular motions. Wipe off any excess. Check the results in good light. Repeat if needed.
Regular maintenance prevents future scratches. Enjoy a clearer, scratch-free display. Keep your car stereo looking new. Follow these steps for the best results. Practice makes perfect. Your stereo screen deserves care and attention. Ensure a smooth, enjoyable driving experience. Happy driving with your refreshed stereo!

