
If you want to boost your car’s sound system, wiring an amplifier to your car stereo is the key. But where do you start?
You might feel overwhelmed by the wires and technical terms. Don’t worry—this guide will walk you through each step clearly and simply. By the end, you’ll know exactly how to connect your amplifier for powerful, crystal-clear sound. Ready to transform your driving experience?
Let’s get started!
Gather Necessary Tools
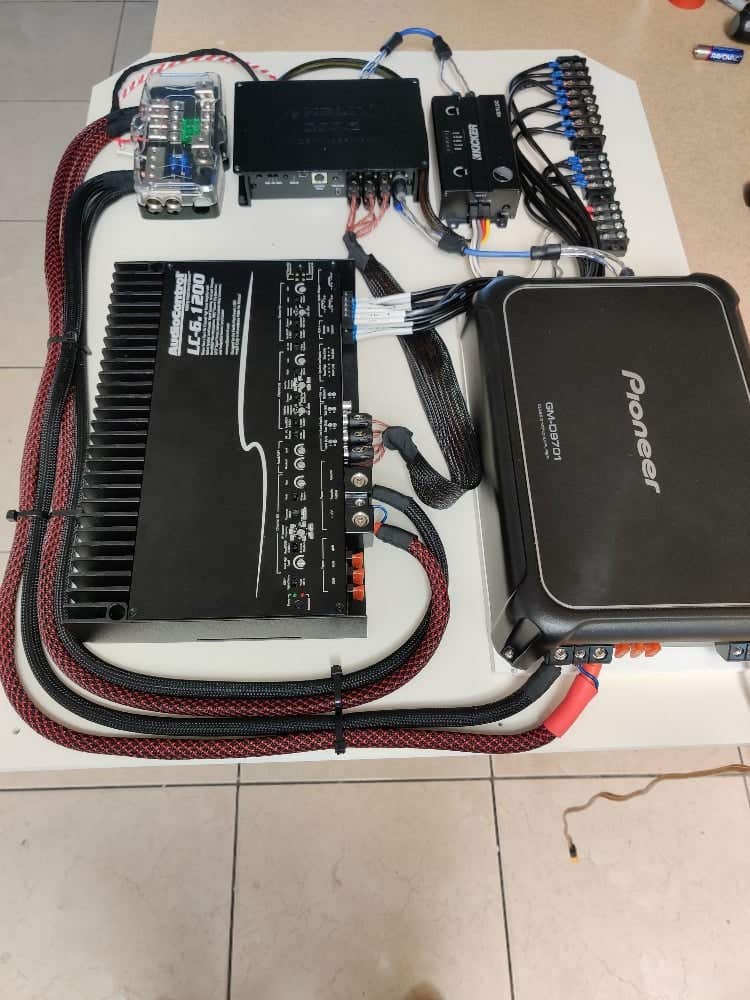
Before you start wiring your amplifier to your car stereo, gathering the right tools is crucial. Having everything at hand saves time and prevents frustration during installation. Plus, the right tools make your work cleaner and safer.
List Of Required Tools
Make sure you have these essential tools ready:
- Wire strippers:For removing insulation without damaging wires.
- Crimping tool:To securely attach connectors to wires.
- Screwdrivers:Both flathead and Phillips for loosening and tightening screws.
- Multimeter:To check voltage and continuity, ensuring correct connections.
- Electrical tape or heat shrink tubing:To insulate and protect wire connections.
- Socket wrench set:Useful for grounding the amplifier properly.
- Utility knife or scissors:For cutting wires to the right length.
- Fuse holder and fuse:To protect your electrical system from shorts or overloads.
Do you have any of these tools already? It might save you a trip to the hardware store.
Choosing The Right Materials
Picking the right materials affects your sound quality and safety. Use amplifier wiring kits designed for car audio to ensure proper gauge wires and connectors. Thicker wires handle more power and reduce signal loss.
For power wires, 8 or 4 gauge is common, depending on your amplifier’s power needs. Ground wires should match the power wire gauge to prevent voltage drops. RCA cables for audio signals should be shielded to avoid interference from your car’s electrical system.
Have you checked the length of wires you need? Buying a little extra length can prevent stretching or pulling that might damage connections later on.
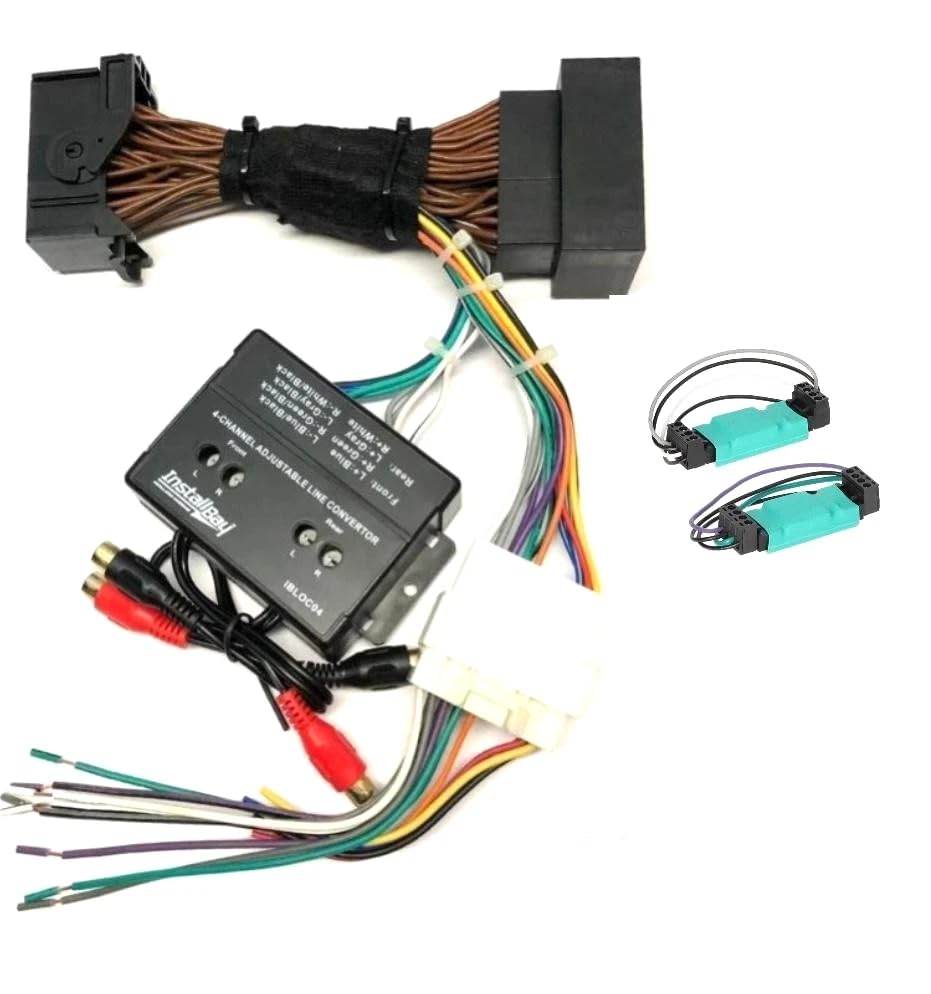
Prepare Your Car Stereo
Preparing your car stereo is an essential step before wiring an amplifier. This ensures a safe and smooth connection. Taking time to get ready helps avoid damage to your equipment. It also makes the wiring process easier to manage.
Locate The Stereo Wiring
Find the wires behind your car stereo. These wires carry power, ground, and audio signals. Use your car’s manual or a wiring diagram to identify each wire’s function. Common wires include:
- Power wire (usually red)
- Ground wire (usually black)
- Remote turn-on wire (usually blue)
- Speaker wires
Label the wires if needed. This will help you connect the amplifier correctly later.
Disconnect The Battery
Always disconnect the car battery before working on stereo wiring. This prevents electrical shorts and shocks. Use a wrench to loosen the negative terminal first. Then remove the cable from the battery. Keep the battery disconnected while wiring your amplifier.
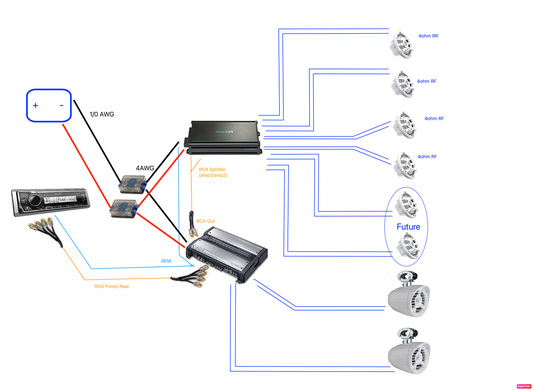
Plan The Wiring Route
Planning the wiring route is a crucial step before you start connecting your amplifier to the car stereo. A well-thought-out path not only ensures safety but also improves sound quality and system reliability. Taking time to map out each wire’s journey can prevent future headaches and make troubleshooting easier.
Identify Power Source
Your amplifier needs a stable power supply directly from the battery or a suitable fuse box connection. Locate a power source that delivers consistent voltage without interruption. Avoid running the power wire near moving parts or hot engine components to prevent damage.
Think about how long your power wire should be. Too short, and it won’t reach; too long, and it risks voltage drops and interference. You want the shortest, safest path from the battery to the amplifier.
Select Grounding Point
Choosing the right grounding point is just as important as the power source. Find a clean, bare metal spot on the car’s chassis close to the amplifier. Scrape off any paint or rust to ensure a solid electrical connection.
A poor ground can cause unwanted noise and reduce your system’s performance. Does the spot you picked feel secure? Give it a tug to check if it’s firmly connected before attaching the ground wire.
Determine Signal Wire Path
Signal wires carry audio from your car stereo to the amplifier and should be routed away from power cables. This minimizes noise and interference that can degrade sound quality. Plan a path that keeps the signal wires separate, ideally running them along the opposite side of the vehicle.
Consider the ease of access for future maintenance. Can you easily reach these wires without dismantling large parts of your car? Clear routing means less hassle if you need to upgrade or fix your system later.
Credit: www.diymobileaudio.com
Connect Power Wires
Connecting power wires is crucial for your car amplifier’s performance. These wires supply the necessary electricity from the battery to the amplifier. Proper connection ensures a steady power flow and prevents damage.
Take safety precautions. Use wires with the right thickness. Avoid loose connections to prevent shorts or power loss.
Install Fuse Holder
Place the fuse holder close to the battery. This protects your wiring from sudden power surges. Use a fuse rated for your amplifier’s power needs.
Cut the power wire and attach the fuse holder in line. Secure all connections tightly. Without a fuse, your amplifier and car wiring face risk of damage.
Attach Power Wire To Battery
Strip the wire end and connect it directly to the positive battery terminal. Tighten the nut firmly to avoid loose contact. Use a ring terminal for a secure fit.
Route the wire carefully through the car’s engine bay. Avoid sharp edges and moving parts. Secure it with zip ties to prevent movement and wear.
Connect Ground Wire
Connecting the ground wire is a crucial step in wiring an amplifier to your car stereo. A solid ground connection ensures the amplifier runs smoothly without unwanted noise or interference. Skipping this can lead to poor audio quality or even damage to your equipment.
Find Suitable Ground Spot
Look for a bare metal surface close to your amplifier’s location. This spot should be free of paint, rust, or dirt because these materials can block the electrical path.
Common grounding points include the car’s chassis or metal parts of the frame. Use a wire brush or sandpaper to clean the area until it shines, ensuring a direct metal-to-metal contact.
Secure Ground Wire Properly
Once you find the spot, attach the ground wire tightly using a ring terminal and a screw or bolt. The connection must be firm to prevent vibration from loosening it over time.
Double-check the wire gauge matches your power wire to avoid electrical issues. You don’t want to experience sudden audio dropouts because of a loose or thin ground wire.
Credit: www.amazon.com
Wire The Remote Turn-on Lead
Wiring the remote turn-on lead is a key part of connecting your amplifier to your car stereo. This wire signals the amplifier to power up only when your stereo is on, preventing battery drain. It’s a simple connection but vital for smooth operation.
Locate Remote Wire On Stereo
First, you need to find the remote turn-on wire on your car stereo. This wire is usually blue or blue with a white stripe, but check your stereo’s manual to be sure. It’s often labeled as “Remote,” “REM,” or “Remote Turn-On.”
Sometimes, this wire is tucked behind the stereo unit, so gently pull out your stereo to access the wiring harness. If you’re unsure which wire it is, use a multimeter to test for 12V power only when the stereo is switched on. This helps avoid mistakes that could damage your system.
Connect To Amplifier Remote Terminal
Once you have identified the remote wire, connect it to the amplifier’s remote terminal. This terminal is usually marked as “REM” or “Remote.” Secure the connection with a crimp connector or solder it for a solid link.
Make sure the wire is long enough to reach the amplifier without stretching or tension. Use electrical tape or heat shrink tubing to protect the connection from moisture and vibration. This small step ensures reliability and keeps your sound system running smoothly.
Have you checked if your remote wire is in good condition? Sometimes, a frayed or broken wire can cause the amp not to turn on, leading to frustration.
Connect Rca Cables
Connecting RCA cables is a key step when wiring an amplifier to a car stereo. These cables carry the audio signal from the stereo to the amplifier. Proper connection ensures clear sound and prevents noise interference. Take care with cable quality and placement. This helps maintain strong signal strength and clean audio output.
Choose Quality Rca Cables
Use RCA cables made with good shielding and thick insulation. This reduces noise and interference from other electrical parts. Look for cables with gold-plated connectors. They resist corrosion and improve signal transfer. Avoid cheap cables that can cause static and weak sound.
- Check for durable outer material
- Pick cables with strong connectors
- Choose shielded cables for less interference
- Use cables long enough for your setup
Run Rca Cables To Amplifier
Route the RCA cables from the stereo to the amplifier carefully. Keep them away from power cables and electronic devices. This prevents electrical noise affecting the audio signal. Secure the cables along the car’s frame or under trim panels. Avoid sharp bends or kinks that can damage the cables.
- Run cables along the passenger side if possible
- Use cable ties to hold cables in place
- Leave some slack to avoid tension
- Check connections at both ends for tight fit
Connect Speaker Wires
Connecting speaker wires is a key part of wiring an amplifier to your car stereo. This step ensures sound signals travel from the amplifier to the speakers clearly and without interruption. Proper wiring helps avoid sound distortion and electrical issues.
Use quality speaker wires designed for car audio. Keep wires away from power cables to reduce interference. Check the length to reach from the amplifier to each speaker without stretching.
Identify Speaker Wire Polarity
Speaker wires have two parts: positive and negative. Correct polarity keeps sound clear and balanced. Usually, the positive wire has a red stripe or a plus sign. The negative wire is often plain or marked with a minus sign.
Check your car stereo and amplifier manuals for wire color codes. Match the positive wire on the speaker to the positive terminal on the amplifier. Do the same for the negative wires. Wrong connections cause weak or distorted sound.
Run Speaker Wires To Amplifier
Plan the wire path before installation. Avoid sharp bends and moving parts. Secure wires with clips or zip ties to keep them in place.
Run each speaker wire separately to the amplifier terminals. Keep wires organized to make troubleshooting easier later. Make sure each wire reaches its correct amplifier channel.
Strip about half an inch of insulation off each wire end. Connect wires firmly to the amplifier terminals. Loose connections can cause sound loss or crackling noises.
Test The System
Testing your amplifier system after wiring it to your car stereo is crucial. It ensures everything works properly and prevents damage to your equipment. This step lets you catch any issues early, saving you time and frustration.
Reconnect Battery
Before testing, make sure to reconnect your car’s battery. This restores power to your electrical system, allowing you to check the amplifier and stereo. Always double-check that the battery terminals are clean and tight to avoid poor connections or sparks.
Power On And Check Connections
Turn on your car stereo and amplifier carefully. Listen closely for any unusual noises like buzzing or crackling—these often indicate loose or incorrect wiring.
Watch your amplifier’s indicator lights. A steady green or blue light usually means it’s working correctly, while red or blinking lights can signal problems.
- Verify that your subwoofer produces clear, distortion-free bass.
- Check all speakers for balanced sound without interruption.
- Make sure the amplifier isn’t overheating or shutting off unexpectedly.
If something feels off, don’t ignore it. Could a loose ground wire or a poor fuse connection be the culprit? Testing carefully helps you pinpoint and fix these issues before hitting the road.
Secure And Organize Wiring
Keeping your amplifier wiring secure and organized is key to a clean install and reliable performance. Messy wires can lead to shorts, interference, or even damage over time. Taking the time to properly manage your cables not only protects your equipment but also makes future upgrades or troubleshooting much easier.
Use Wire Ties And Clips
Wire ties and clips are your best friends for keeping cables neatly bundled and fixed in place. Use zip ties to group wires together, preventing them from dangling or rubbing against sharp edges. Clips can attach wires firmly to the car’s frame or panels, reducing movement and vibration noise.
Choose reusable ties if you want flexibility to adjust your setup later. Make sure not to overtighten ties; squeezing wires too hard can damage their insulation. Instead, aim for a snug but gentle hold that keeps everything tidy without stressing the cables.
Avoid Interference And Damage
Think about where your wires run inside the car. Avoid routing power and signal cables together to reduce electrical interference that can cause unwanted noise in your sound system. Keep audio wires away from high-heat areas like the engine bay or exhaust components.
Protect wires from sharp edges by using split loom tubing or electrical tape at bends and contact points. This simple step can prevent cuts or frays that might lead to shorts or signal loss. Have you ever checked wires for wear after a few months? Regular inspection can catch damage early before it affects your audio quality.
Credit: www.tccoa.com
Frequently Asked Questions
How Do I Connect An Amplifier To A Car Stereo?
To connect an amplifier, use RCA cables from the stereo’s output to the amp’s input. Connect the amp to the car battery with a power wire and ground it properly. Lastly, link the amp to your speakers using speaker wires.
What Tools Are Needed For Wiring A Car Amplifier?
You need wire strippers, crimp connectors, screwdrivers, a multimeter, and electrical tape. These tools help ensure safe and secure wiring connections. Having the right tools makes the installation easier and prevents damage to your car’s electrical system.
Can I Wire An Amplifier Without A Professional?
Yes, with basic knowledge and proper tools, you can wire an amplifier yourself. Follow a detailed guide and safety precautions closely. Avoid shortcuts to prevent electrical issues or damage to your car stereo system.
How To Ground A Car Amplifier Correctly?
Ground the amplifier to a clean, bare metal surface near the amp location. Use a short, thick wire for grounding to reduce noise. A solid ground connection ensures better sound quality and prevents electrical interference.
Conclusion
Wiring an amplifier to a car stereo is simple with the right steps. Start by gathering all necessary tools and materials. Follow the step-by-step guide for clear instructions. Safety is key, so disconnect the car battery first. Connect wires securely for optimal sound quality.
Test the setup to ensure everything works perfectly. Enjoy your enhanced car audio experience. With patience, anyone can achieve great sound. This process enhances your driving enjoyment. Keep exploring and learning for better sound systems. Happy listening!

