

Wiring up a car stereo system might seem tricky at first, but with the right steps, you can do it yourself and enjoy crystal-clear sound on every drive. Whether you’re upgrading your old stereo or installing a brand-new one, knowing exactly how to connect the wires will save you time and frustration.
In this guide, you’ll discover simple, clear instructions that anyone can follow—no special tools or expert skills needed. Ready to transform your car’s audio experience? Keep reading, and you’ll have your stereo wired up and sounding great in no time.
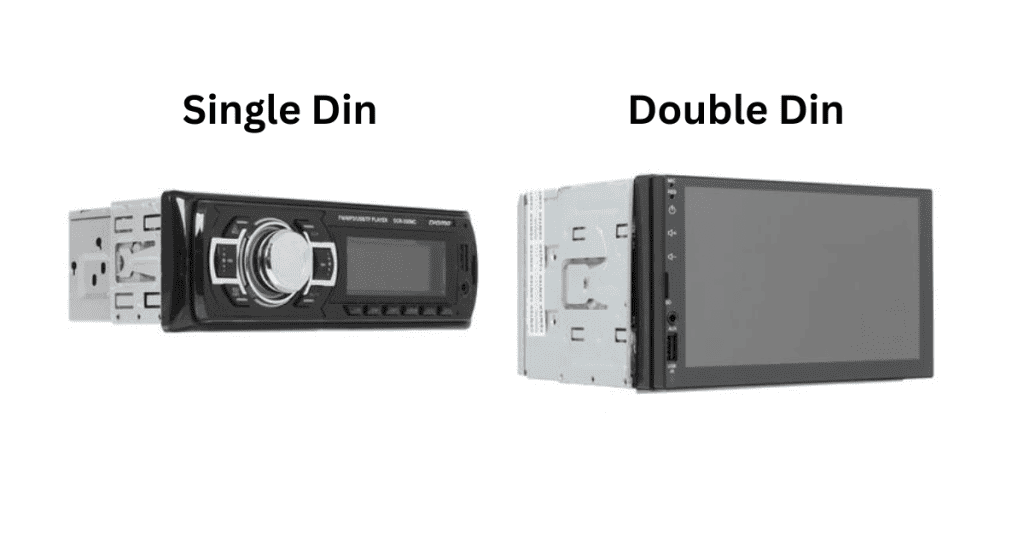
Credit: www.santaclaritaautosound.com
Tools And Materials Needed
Before you start wiring up your car stereo system, gathering the right tools and materials is crucial. Having everything on hand saves time and spares you from frustrating interruptions. It also ensures a safer and cleaner installation process.
Essential Hand Tools
- Wire Strippers:These help you remove insulation from wires without damaging the metal inside.
- Screwdrivers:Both Phillips and flat-head screwdrivers are necessary for removing panels and securing connections.
- Crimping Tool:Use this to attach connectors to wires securely.
- Electrical Tape:This protects your connections and prevents short circuits.
- Multimeter:It’s handy for checking voltage and continuity to make sure everything is connected properly.
Wiring Materials
- Speaker Wire:Typically 16 to 18 gauge, depending on your speaker’s power requirements.
- Power Wire:Use a thicker gauge, usually 8 or 10, to handle the amplifier’s power draw.
- Ground Wire:Same gauge as your power wire to ensure a solid ground connection.
- Fuse Holder and Fuse:Protect your system from electrical surges by installing a fuse close to the battery.
- Connectors:Butt connectors, ring terminals, and spade terminals make wiring neat and reliable.
Additional Items To Consider
- Wire Loom or Sleeving:This keeps wires organized and protects them from heat and abrasion.
- Cable Ties:Use these to bundle wires and prevent them from moving around.
- Panel Removal Tools:Plastic pry tools help remove interior panels without scratching them.
Have you ever tried to install a stereo only to realize you’re missing a simple tool? I learned that the hard way, which cost me extra trips to the hardware store. Preparing your workspace and tools beforehand makes the wiring process smoother and more enjoyable.
Preparing The Car Stereo
Preparing the car stereo is a key part of installing a new audio system. It involves removing the old stereo and checking the wiring harness. These steps ensure a smooth and safe installation. Taking time here prevents future problems with your stereo’s performance.
Removing The Old Stereo
Start by disconnecting the car battery to avoid electrical shocks. Use the correct tools to remove the trim around the stereo. Carefully pull the old stereo out without damaging the dashboard. Disconnect the wiring harness and antenna plug from the back of the unit. Keep all screws and parts safe for reassembly or disposal.
Inspecting Wiring Harness
Check the wiring harness for any signs of damage or wear. Look for frayed wires, corrosion, or loose connections. Clean any dirty connectors with electrical contact cleaner. Match the wires to the new stereo’s color codes. Use a multimeter to test the wiring if needed. Secure all connections tightly to avoid shorts or power loss.
Identifying Wire Colors And Functions
Knowing how to identify wire colors and their functions is key to wiring up your car stereo correctly. Each wire color corresponds to a specific role, helping you avoid mistakes that could damage your system or cause poor sound quality. Take a moment to get familiar with these colors—this knowledge will save you time and frustration during installation.
Power Wires
Power wires bring electricity to your stereo, so they are essential for operation. The red wireusually connects to the ignition switch, providing power only when the car is on. The yellow wireconnects directly to the battery to keep the memory settings alive, even when the car is off.
Make sure you don’t mix these up—connecting the yellow wire to the ignition can cause your stereo to reset every time you turn off the car. Have you checked if your stereo’s manual matches these standard colors? Sometimes manufacturers use different shades, so double-checking helps.
Speaker Wires
Speaker wires carry sound signals from your stereo to your car’s speakers. These wires come in pairs with one solid color and one with a stripe. Common colors include white and white/blackfor the front left speaker, gray and gray/blackfor the front right, green and green/blackfor the rear left, and purple and purple/blackfor the rear right.
Pairing the right wires is crucial for proper stereo balance. You might want to label each wire or take a photo before disconnecting your old system to keep track. Would you rather spend an extra few minutes labeling or troubleshoot later with no sound on one side?
Ground Wire
The ground wire is usually black and connects your stereo to the car’s metal frame. It completes the electrical circuit and prevents interference or static noise. Using a clean, unpainted metal surface for grounding ensures a stable connection.
If you skip this step or connect to a rusty spot, you may hear annoying humming or no sound at all. Have you found a good grounding point yet? Sometimes under the dash or near the stereo mounting spot works best.
Antenna And Additional Connections
The antenna wire is often blue or blue with a white stripe. It connects to your car’s antenna input to receive radio signals. Some stereos also have additional connections like remote turn-on wires (often blue) for amplifiers and illumination wires to sync with your dashboard lights.
Don’t forget these extras if you want full functionality. Missing out on the remote turn-on wire means your amplifier won’t switch on with the stereo. What extra features does your stereo support that you want to wire up?
Connecting The Wiring Harness
Connecting the wiring harness is a key part of installing a car stereo. This harness links the stereo to the car’s power, speakers, and other systems. Proper connection ensures the stereo works well and safely. Careful handling of wires is important to avoid damage and poor sound quality.
Matching Wire Colors
Car stereo wires follow a color code to help match connections. Each color wire has a specific purpose. For example:
- Red: Power from ignition
- Yellow: Constant power from battery
- Black: Ground wire
- White and gray: Front speakers
- Green and purple: Rear speakers
Match the wires by color from the harness to the stereo wires. This prevents wiring mistakes that cause no sound or shorts. Use a wiring diagram from your stereo or car manual to confirm colors.
Using Connectors And Crimping
Connectors secure wires without damage. Crimp connectors are common and easy to use. They hold wires tightly and keep a good electrical connection. Follow these steps:
- Strip a small section of wire insulation
- Insert wire into the connector
- Use a crimping tool to squeeze the connector
A proper crimp prevents wires from coming loose. Avoid twisting wires together or using electrical tape alone. Heat shrink tubing can protect the connection from moisture and wear. Good connectors make the stereo installation safe and reliable.
Installing The Stereo Unit
Installing the stereo unit is a crucial part of wiring up your car’s audio system. This step ensures your new stereo fits securely and functions properly. You’ll want to handle this carefully to avoid damage to your dashboard or wiring.
Securing The Stereo
Once your stereo is connected to the wiring harness, test it before securing it in place. Turn it on and check for power, sound output, and responsiveness to controls. This simple check can save you from taking everything apart again.
To secure the stereo, slide it gently into the mounting bracket or dash opening. Most stereos have brackets or clips that lock them in place. If your unit came with screws, use them to fasten it firmly without over-tightening.
Have you noticed how some stereos wiggle even after installation? That often means the mounting hardware isn’t tight enough. Don’t rush this step—secure your stereo firmly to prevent rattles and possible damage during driving.
Reattaching The Dashboard
After securing the stereo, it’s time to put your dashboard back together. Start by aligning any panels or trim pieces you removed. Make sure all clips and screws line up properly to avoid cracks or broken tabs.
Reconnect any electrical connectors for lights, buttons, or controls on the dashboard. Test these functions before fully snapping the panels back in place to catch any loose wires early. Taking a moment here can save you from troubleshooting later.
Press the dashboard panels firmly but carefully into place. Listen for the click of clips engaging to confirm a secure fit. How often have you left your dashboard slightly loose and regretted it? Avoid that by taking your time now.
Credit: www.diymobileaudio.com
Testing The System
After completing the wiring of your car stereo system, testing it thoroughly is crucial. This step ensures everything works correctly and helps you catch any issues early. Let’s dive into how you can effectively test your system to enjoy flawless sound on your drives.
Powering On
Start by turning on your car’s ignition without starting the engine. This powers the stereo system and lets you see if the unit boots up properly. Watch for any unusual behavior like flickering displays or failure to start.
If the stereo doesn’t power on, double-check your wiring connections, especially the power and ground wires. A loose or reversed wire here is often the culprit. Have a multimeter handy to verify voltage at the power terminals if needed.
Checking Sound Quality
Once powered, play a variety of music tracks that you know well. This helps you listen for clarity, balance, and volume levels across all speakers. Pay close attention to the bass output from your subwoofer—does it hit the right notes without distortion?
Adjust the equalizer settings to see if they respond correctly. If any speaker sounds weak or distorted, you might need to revisit your wiring or speaker placement. Does the sound feel immersive and balanced throughout your car’s interior?
Troubleshooting Common Issues
If you encounter problems, start with the basics: check all wire connections again, especially those to the battery, ground, and speakers. Loose connections can cause intermittent sound or no power at all.
Another common issue is blown fuses, so inspect the fuse box carefully. If your system has a remote turn-on wire for an amplifier, verify it’s connected correctly. Remember, patience during troubleshooting saves you frustration later.
Have you noticed any buzzing or static? That often points to grounding problems or interference from other electronics. Try repositioning wires or adding a noise filter if needed.
Adding Optional Features
Adding optional features can improve your car stereo system’s sound and usability. These extras let you enjoy music with better quality and convenience. Many car owners like to include amplifiers and Bluetooth or USB connections. These features make listening more enjoyable and modern.
Connecting Amplifiers
An amplifier boosts your stereo’s sound power. It makes music louder and clearer without distortion. Start by choosing an amplifier that matches your speakers. Use quality wires to connect the amplifier to the stereo system.
- Locate the amplifier’s input and output terminals.
- Connect the stereo’s RCA output cables to the amplifier input.
- Run power cables from the car battery to the amplifier.
- Attach a ground wire from the amplifier to the car’s metal frame.
- Connect speaker wires from the amplifier to each speaker.
Secure all connections tightly. Check wiring instructions for your amplifier model. Proper wiring prevents noise and damage.
Integrating Bluetooth Or Usb
Bluetooth and USB add wireless and wired music options. Bluetooth lets you play music from phones without cables. USB allows direct playback from flash drives or phones.
- Install a stereo head unit with Bluetooth and USB ports.
- Connect the head unit to the car’s power and speaker wires.
- Pair your phone with the Bluetooth system following the manual.
- Plug USB devices into the USB port for instant music access.
Test Bluetooth and USB features before finalizing the installation. These options give easy access to your favorite songs on the go.

Credit: www.youtube.com
Frequently Asked Questions
How Do I Choose The Right Car Stereo?
Choosing the right car stereo involves considering your budget, the features you need, and compatibility with your car. Look for models that support Bluetooth, USB inputs, and have a good power output. Ensure it fits your car’s dashboard and matches your audio quality preferences.
What Tools Are Needed To Install A Car Stereo?
To install a car stereo, you’ll need a screwdriver set, wire strippers, crimpers, and electrical tape. Additionally, a panel removal tool can help prevent damage to your car’s interior. Having a wiring harness adapter can simplify the process by matching your car’s wiring to the stereo.
Can I Install A Car Stereo Myself?
Yes, you can install a car stereo yourself with the right tools and a basic understanding of car electronics. Follow the stereo’s manual and ensure you disconnect the car battery before starting. This ensures safety and prevents electrical issues during the installation process.
How Long Does It Take To Install A Car Stereo?
Installing a car stereo typically takes between one to three hours. The time varies based on your experience and the complexity of the system. Preparing all necessary tools and reading the installation manual beforehand can help streamline the process and reduce installation time.
Conclusion
Wiring a car stereo system can seem tricky at first. Take your time and follow each step carefully. Double-check all connections before turning on the power. Using the right tools makes the job easier. Enjoy clear sound and better music in your car.
Practice helps you gain confidence with wiring tasks. Keep this guide handy for future reference. Your car stereo will bring joy on every drive. Simple steps lead to great results.

