
Is your Pioneer car stereo showing the wrong time? It can be frustrating when your clock doesn’t match the real time, especially when you rely on it during your drives.
Luckily, changing the time on your Pioneer car stereo is easier than you might think. In this guide, you’ll learn simple, step-by-step instructions to get your clock set correctly in no time. Keep reading, and you’ll never have to guess the time while on the road again.
Locate The Clock Button
Changing the time on your Pioneer car stereo starts with finding the clock button. This button controls the clock settings and allows you to adjust the time. It is important to locate it quickly to save time and avoid confusion.
The clock button is usually labeled clearly. Sometimes it is marked as “Clock,” “CLK,” or has a small clock icon. Knowing this will help you spot it faster on your stereo panel.
Most Pioneer models place the clock button near the display or around the main control area. It might be a dedicated button or part of a multi-function key. Checking the user manual can also help if you have trouble finding it.
Check The Front Panel Buttons
Look closely at the front panel of your stereo. The clock button is often among the main control buttons. It might be grouped with other functions like audio settings or source selection.
Use The Menu Or Setup Button
Some Pioneer stereos hide the clock setting inside the menu. Press the “Menu” or “Setup” button to access different settings. Scroll through options until you find the clock or time setting.
Refer To The User Manual
If the button is hard to find, check your Pioneer stereo’s manual. It shows exact button locations and instructions. Manuals are often available online if you lost the paper copy.

Credit: usa.pioneer
Access Clock Settings
Accessing the clock settings on your Pioneer car stereo is the first step to changing the time. The process is simple and does not require any special tools. Knowing where to find these settings saves time and makes the adjustment easy.
Most Pioneer models have a dedicated menu for clock settings. This menu allows you to set the hour and minute accurately. You can access it through the main interface of the stereo system.
Locate The Home Or Menu Button
Start by pressing the Home or Menu button on your stereo. This button usually appears on the front panel. It opens the main menu where you find various settings.
Navigate To The Clock Or Settings Option
Use the touchscreen or control knob to scroll through the menu. Look for an option labeled “Clock,” “Time,” or “Settings.” Selecting this will take you to the clock adjustment area.
Enter Clock Adjustment Mode
After selecting the clock option, enter the adjustment mode. This mode lets you change the hour and minutes. Some models require holding a button to start editing the time.
Use Buttons Or Touchscreen To Change Time
Adjust the time by pressing the up or down arrows. On touchscreens, tap the plus or minus signs. Make sure to set the correct AM or PM if your stereo uses a 12-hour format.
Save And Exit Clock Settings
Once the correct time is set, save your changes. Look for a “Save,” “OK,” or “Exit” option. Confirming this saves the new time and exits the clock settings menu.
Adjust The Hour
Adjusting the hour on your Pioneer car stereo is simpler than you might think. Getting the time right ensures your drives are always on schedule. A small tweak here can save you from the hassle of guessing or relying on your phone for time.
Locate The Clock Or Setup Button
Start by finding the button labeled “Clock,” “Setup,” or “Menu” on your stereo. This button gives you access to the time settings. If you’re unsure, glance at your stereo’s manual or look for a clock icon on the display.
Enter The Clock Adjustment Mode
Press and hold the clock or setup button until the time digits start blinking. This blinking means your stereo is ready to accept changes. If nothing happens, try pressing the button multiple times or check if you need to press a combination of buttons.
Adjust The Hour Setting
Use the volume knob or tuning buttons to change the hour. Turning or pressing these controls will increase or decrease the hour value. Notice how the digits move smoothly, letting you set the exact hour you want.
Confirm And Save The Time
Once you have the correct hour, press the clock or setup button again to confirm. Some models save changes automatically after a few seconds. Double-check the display to ensure the hour is set correctly.
Have you ever found yourself driving off with the wrong time on your stereo? Adjusting the hour is a quick fix that keeps your day on track and your trips hassle-free.

Credit: www.youtube.com
Set The Minutes
Setting the minutes on your Pioneer car stereo ensures your clock shows the correct time. It helps keep your daily schedule on track while driving. This section guides you through adjusting the minutes quickly and easily.
Access The Clock Setting Mode
Press the “Clock” or “Menu” button on your stereo. Hold it for a few seconds until the time display starts blinking. This means the clock setting mode is active.
Navigate To The Minute Adjustment
Use the tuning knob or arrow buttons to move from the hour setting to the minutes. The minutes digits will begin blinking, showing they are ready to be changed.
Adjust The Minutes
- Turn the tuning knob clockwise to increase minutes.
- Turn it counterclockwise to decrease minutes.
- Press arrow buttons up or down to change minutes.
Set the minutes to the correct number carefully. Each press or turn changes the time by one minute.
Save The New Minute Setting
After setting the minutes, press the “Clock” or “Menu” button again. This saves the new time and exits the setting mode. The time display will stop blinking.
Save And Exit
Saving and exiting is the final step after adjusting the time on your Pioneer car stereo. It confirms your new settings and returns you to the main screen. Without saving, changes will be lost. This process is simple and quick.
Confirm The Time Setting
After setting the correct hour and minute, look for the save option. Usually, pressing the volume knob or a dedicated button confirms the time. Watch the display to see if it shows a confirmation message.
Use The Menu Or Back Button
Press the menu or back button to exit the time setting mode. This action saves the changes automatically on most Pioneer models. If not, the stereo will ask you to save before exiting.
Check The Display
Once saved, the main screen will show the updated time. Verify that the time is correct and steady. If the time flashes or resets, repeat the process to save properly.

Credit: www.youtube.com
Troubleshooting Common Issues
Changing the time on a Pioneer car stereo usually works smoothly. Sometimes, small problems can stop the clock from updating or showing the correct time. Troubleshooting these issues can save time and avoid frustration.
Most problems have simple fixes. Understanding common issues helps keep your stereo clock accurate and responsive.
Clock Not Responding
The clock may not respond due to a weak connection or system glitch. Try pressing the reset button on the stereo. If your model has no reset button, disconnect the car battery for a few minutes. This action can restart the stereo system and fix minor errors.
Check the fuse for the stereo. A blown fuse can cause the clock to freeze. Replace the fuse if needed to restore power.
Time Reset After Power Off
When the time resets after turning off the car, the backup battery might be dead. This small battery keeps the clock running when the car is off. Replacing the battery inside the stereo unit can solve this problem.
Ensure the stereo is properly connected to the car’s power source. Loose wires can cause power loss and reset the time.
Buttons Not Working
Buttons may stop working due to dirt or wear. Gently clean around the buttons with a soft cloth. Avoid using liquids that can damage the stereo.
If cleaning does not help, the button contacts inside may be faulty. Consult a professional for repair or replacement.
Alternative Methods For Different Models
Changing the time on a Pioneer car stereo varies by model. Different models have unique controls and menus. Knowing the right method saves time and frustration. This section covers alternative ways to set the clock on various Pioneer stereos.
Touchscreen Models
Touchscreen models let you change time quickly through the display. Start by pressing the “Home” or “Menu” icon. Look for the “Settings” or “Clock” option. Use your finger to tap and open the clock settings.
Adjust the hours and minutes by tapping the up or down arrows. Some models allow you to swipe to change the numbers. Confirm the new time by tapping “OK” or “Save.”
Touchscreen models may also let you sync time with GPS or radio signals. This option keeps your clock accurate without manual input.
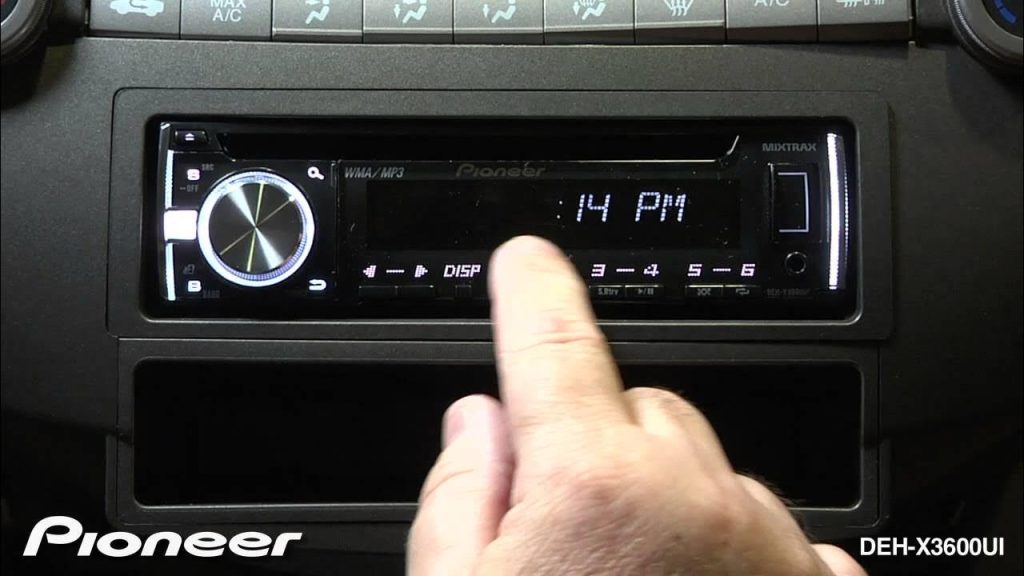
Button-only Models
Button-only models use physical buttons to set the time. Press and hold the “Clock” or “Disp” button until the time starts flashing. Use the “Seek” or “Tune” buttons to change the hour first.
Press the “Clock” or “Disp” button again to switch to minutes. Change the minutes using the “Seek” or “Tune” buttons. Press the “Clock” or “Disp” button once more to save the time.
Some button-only models require pressing and holding two buttons together to enter clock settings. Check your manual for the exact combination.
Tips For Maintaining Accurate Time
Keeping the time accurate on your Pioneer car stereo can save you from the hassle of constantly resetting it. It also helps maintain your schedule, especially if you rely on your car’s clock for appointments or travel plans. Here are some practical tips to help you maintain accurate time effortlessly.
Keep Your Car Battery In Good Condition
A weak or dying car battery can cause the stereo clock to reset or display incorrect time. If you notice your clock frequently losing time or resetting, check your battery health first.
Regular battery maintenance helps prevent unexpected clock resets. Have you checked your battery voltage lately? It’s a simple step that can save you frequent time adjustments.
Use The Auto Time Setting Feature
Many Pioneer stereos offer an auto time sync option, often linked to radio signals or GPS. Enabling this feature means your stereo updates the time automatically without manual input.
This can be a huge time-saver and reduces human error. Have you tried enabling this feature on your stereo yet? It’s worth a look in your settings menu.
Adjust Time After Daylight Saving Changes
Daylight Saving Time can throw off your car stereo clock if it doesn’t adjust automatically. Make it a habit to check and update the time when the clocks change in spring and fall.
Setting a reminder on your phone can help you avoid driving with the wrong time displayed. What’s your strategy for remembering these seasonal changes?
Regularly Check And Reset The Clock
Even with auto settings, occasional manual checks ensure your stereo clock stays accurate. A quick glance during your weekly car cleaning or fuel stops can prevent time drift.
Have you ever caught your clock running slow and fixed it before it became an issue? Small habits like this keep your stereo running smoothly.
Keep Firmware Updated
Pioneer occasionally releases firmware updates that improve device functions, including clock accuracy. Check their website or app for updates related to your stereo model.
Updating firmware can solve bugs that cause time errors. When was the last time you updated your car stereo software?
Frequently Asked Questions
How Do I Set The Clock On My Pioneer Stereo?
To set the clock on your Pioneer stereo, press and hold the “SRC” button to turn off the unit. Then, press and hold the “MULTI-CONTROL” knob until the clock appears. Rotate the knob to adjust hours and minutes. Finally, press the knob to save your settings.
Why Is My Pioneer Stereo Showing The Wrong Time?
Your Pioneer stereo may show the wrong time due to battery disconnection or incorrect settings. Check if the battery was recently disconnected. If so, follow the manual to reset the time. Always ensure your settings are saved correctly to avoid losing the correct time.
Can I Change The Time While Driving?
It’s not recommended to change the time while driving due to safety concerns. Adjusting settings can be distracting. It’s best to park safely before making any changes to your stereo settings. Always prioritize safety over convenience when using vehicle electronics.
Does Every Pioneer Model Have The Same Time Setting Method?
No, different Pioneer models may have varying methods for setting the time. It’s crucial to refer to your specific model’s manual for accurate instructions. However, many models share similar steps, so familiarizing yourself with general procedures can be helpful.
Conclusion
Changing the time on your Pioneer car stereo is quick and simple. Follow the steps carefully, and you will set the clock right. This helps you stay on schedule and enjoy your drives more. No need to guess the time or use your phone often.
A correctly set clock adds to your car’s comfort. Try it now, and see how easy it is to keep track of time while driving. Small changes can make a big difference.

