
Struggling to set the clock on your JVC Car Stereo KD-R200? You’re not alone.
Having the correct time displayed makes your drive smoother and keeps you on schedule. In this guide, you’ll learn simple, step-by-step instructions to set your clock quickly—no confusing tech talk or complicated menus. By the end, you’ll feel confident managing your stereo’s settings and never miss a beat while on the road.
Keep reading to master your JVC KD-R200 clock in minutes.
Locate The Clock Button
Finding the clock button on your JVC car stereo KD-R200 is the first crucial step to setting the time correctly. Without locating this button, you won’t be able to adjust the clock, which might leave you guessing the time while driving. Let’s take a close look at where this button might be and how you can identify it easily.
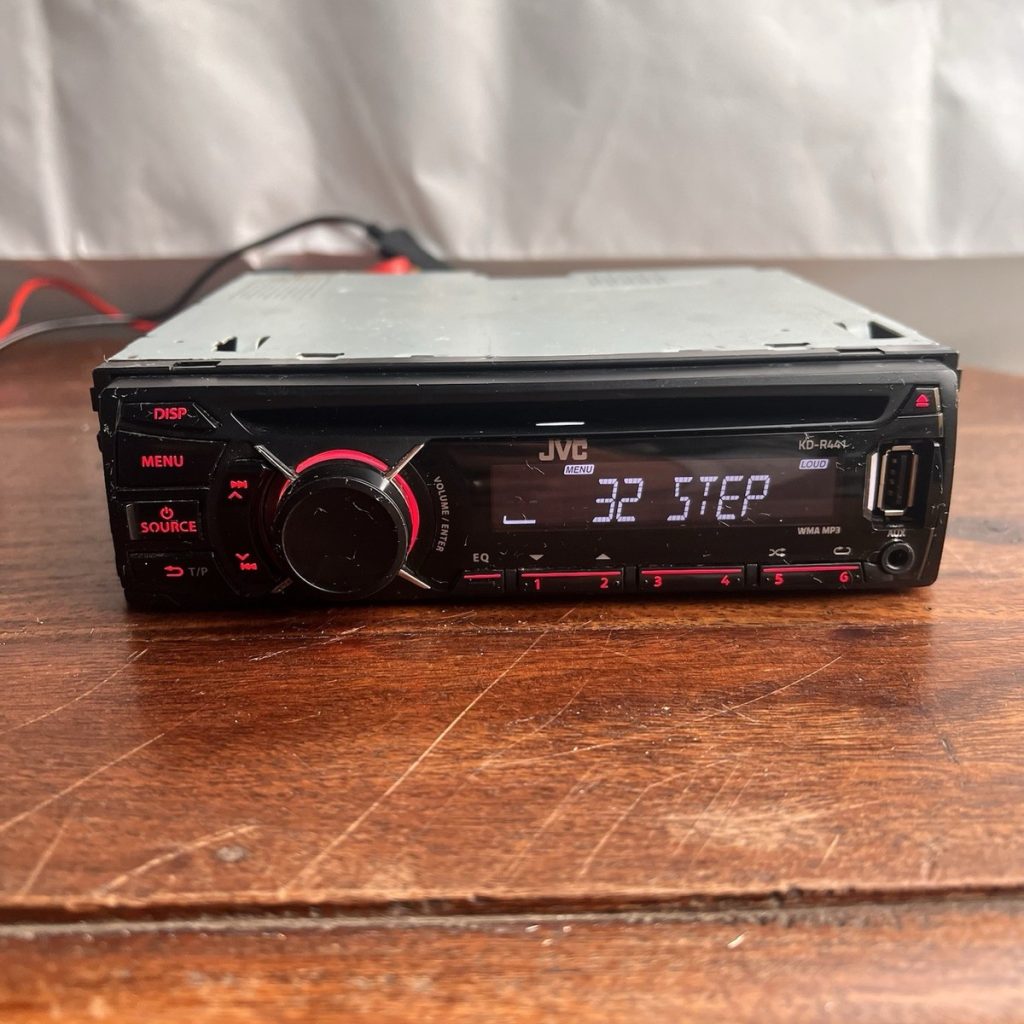
Check The Front Panel Of The Stereo
The clock button is usually on the front panel of the KD-R200. Look for a button labeled “Clock”or sometimes just “CLK”. It might be combined with another button like “Display”or “Menu”, so keep an eye out for those as well.
If you don’t see a dedicated clock button, try pressing and holding buttons related to display or settings. Often, pressing and holding the “Menu”or “Disp”button will bring up the clock adjustment mode.
Refer To The User Manual For Exact Location
Sometimes the button can be tricky to spot, especially if the stereo has many controls. The user manual for the KD-R200 will clearly show you which button adjusts the clock. It’s worth pulling out the manual or downloading a PDF version online if you don’t have a physical copy.
Reading the manual can save you time and avoid frustration. You’ll find diagrams and step-by-step instructions that make the process simpler. Have you ever ignored a manual only to spend hours guessing? This is one of those times where the manual truly helps.
Use Trial And Error On Similar Buttons
If you don’t have the manual handy, try experimenting with buttons like “Menu”, “Audio”, or “Setup”. Sometimes these buttons serve multiple purposes, including clock settings. Press and hold one of these buttons and watch the display for any changes.
Don’t worry about causing harm by pressing these buttons; modern stereos are designed to handle user input safely. Be patient and try a few different options. This approach often leads you straight to the clock setting mode.

Credit: www.youtube.com
Enter Clock Setting Mode
Setting the clock on your JVC Car Stereo KD-R200 starts with entering the clock setting mode. This step allows you to adjust the time accurately so you never miss an appointment or lose track of time while driving. Getting into this mode is straightforward once you know the right buttons to press.
Locate The Clock Button On Your Stereo
First, find the Clock (CLK)button on the front panel of your stereo. On the KD-R200, this button is usually labeled clearly and may share a function with the “Display” button. If you’re unsure, check the user manual or glance at the faceplate for any button marked “CLK.”
Having used this stereo myself, I remember how easy it was to confuse the buttons at first. A quick look at the manual helped me avoid unnecessary frustration. Do you have your stereo’s buttons memorized yet?
Press And Hold The Clock Button
Press and hold the Clock (CLK)button for about 2 to 3 seconds. The display will start flashing, signaling that the stereo is now in clock setting mode. This flashing is your cue that you can begin adjusting the time.
This small step is crucial because a quick tap won’t activate the setting mode; the hold is necessary. It took me a couple of tries to get this right, so don’t rush. Patience here saves you time later.
Confirm You Are In Clock Setting Mode
Once the display flashes, check that the hour digits are blinking. This confirms you can now change the hour first. If the minutes are flashing instead, pressing the Clock button again usually switches between hours and minutes.
Being attentive at this point prevents wrong time settings. How confident are you in navigating your car stereo’s settings without getting lost? This small check ensures you’re on the right track.
Adjust The Hour
Adjusting the hour on your JVC Car Stereo KD-R200 is simple and quick. Setting the correct hour ensures your clock shows accurate time while driving. This step helps you avoid confusion and keeps your schedule on track.
Focus on the hour setting first before moving to minutes. The process uses the stereo buttons clearly marked for easy access. Take your time to follow each action carefully to set the hour right.
Access The Clock Setting Mode
Press and hold the “Clock” or “CLK” button on the stereo. Hold it for a few seconds until the hour digits start blinking. This blinking means the stereo is ready for hour adjustment.
Use The Tune Or Seek Buttons To Change Hour
- Press the “Tune” or “Seek” button to increase the hour.
- Some models let you use left/right arrow buttons instead.
- Keep pressing until the desired hour appears on the display.
Confirm The Hour Setting
Press the “Clock” or “CLK” button again to save the hour. The blinking will stop, locking in your chosen hour. Now, your stereo clock shows the correct hour.

Credit: www.kiut.com.ec
Set The Minutes
Setting the minutes on your JVC car stereo KD-R200 is a simple task. It lets you keep the clock accurate while driving. This helps you stay on time and manage your day better.
The process involves using the stereo’s buttons to adjust the minute value. You will see the minutes blink, showing it is ready to be changed. Then, you press the right controls to set the exact minute you want.
Access The Clock Setting Mode
Start by turning on your car stereo. Press and hold the “Clock” or “CLK” button. Wait until the time display starts flashing. This means the clock setting mode is active.
Choose The Minute Setting
Once the hour digits flash, press the “Tune” or “Seek” button. This moves the flashing to the minute digits. The minutes will now blink, ready for adjustment.
Adjust The Minutes
- Press the “Tune” or “Seek” up button to increase minutes.
- Press the same button down to decrease minutes.
- Hold the button for faster changes.
Save The Minute Setting
After setting the correct minutes, press the “Clock” or “CLK” button again. This saves the time and exits the clock setting mode. The display stops blinking.
Save The Time Settings
Saving the time settings on your JVC Car Stereo KD-R200 ensures the clock stays accurate after power loss. It helps avoid resetting the time every time you start your vehicle. This section shows how to keep the time stored properly.
Once the correct hour and minute are set, the next step is to save these changes. The stereo needs a specific command to lock in the time. Without saving, the clock may revert to a default time or reset.
Confirm The Time Display
Check the screen to see if the time is blinking or solid. Blinking means the clock is in setting mode. A steady display indicates the time is saved.
Press The Clock Button
Press the “Clock” or “CLK” button to exit the time setting mode. This action usually saves the current time on the stereo.
Use The Source Or Menu Button
Sometimes pressing the “Source” or “Menu” button also saves the time. This depends on the stereo model and may exit the clock setting screen.
Verify The Saved Time
Turn off the car and restart it. Check the clock to ensure it shows the correct time. If it resets, repeat the saving steps carefully.

Credit: www.ebay.com
Tips For Accurate Timekeeping
Keeping the time accurate on your JVC Car Stereo KD-R200 is more than just a convenience; it helps you stay on schedule and enhances your driving experience. Small mistakes during setup can cause the clock to drift, making it frustrating to rely on. Let’s look at simple yet effective tips to ensure your car stereo clock always shows the right time.
Set The Clock With The Car Fully Powered On
Make sure your car ignition is in the “Accessory” or “On” position before setting the clock. This ensures the stereo receives stable power, preventing resets or errors while adjusting the time.
Have you ever set your clock only to find it reset after turning the car off? Power interruptions during setup often cause this. Avoiding that by setting the clock with the car on saves you repeated efforts.
Use The Manual Clock Setting For Precision
Instead of relying on automatic time updates, use the manual setting feature to input the exact hour and minute. This method gives you control and eliminates errors caused by signal delays or interference.
Take your time adjusting the numbers carefully. Even a one-minute difference can throw off your schedule if you depend on the stereo clock daily.
Regularly Check And Adjust For Daylight Saving Time
Remember to adjust your clock when daylight saving time starts or ends. The KD-R200 won’t do this automatically, so it’s essential to update the time yourself.
Ask yourself: When was the last time you adjusted the clock? Keeping this in mind prevents confusion during seasonal time changes.
Keep The Stereo Firmware Updated
Occasionally check JVC’s website for firmware updates for your KD-R200 model. Updated firmware can fix clock-related bugs and improve overall functionality.
Think of firmware updates as regular maintenance. Ignoring them might cause minor glitches that affect your clock’s accuracy.
Reset The Unit If Timekeeping Issues Persist
If the clock keeps losing time or resets unexpectedly, try a factory reset on the stereo. This clears any internal errors that might be causing the problem.
Make sure to note your preferred settings before resetting, as you’ll need to re-enter them afterward. A fresh start often solves persistent timekeeping troubles.
Troubleshooting Common Issues
Setting the clock on a JVC Car Stereo KD-R200 is usually simple. Yet, some users face common issues that block the process. Troubleshooting these problems saves time and frustration. This section guides you through common hurdles and their fixes.
Display Does Not Show Clock Setting Mode
The stereo may not enter clock setting mode easily. Press and hold the SELbutton until the display changes. If nothing happens, check if the stereo is in the correct mode. Sometimes, pressing the SRCbutton switches modes. Try pressing SELagain after switching.
Buttons Are Unresponsive
Buttons may not respond due to a system freeze or power issue. Turn off the car and stereo. Wait a few minutes, then turn them back on. This resets the system. If buttons still don’t work, check the car battery’s power level. Low voltage can cause this issue.
Clock Time Does Not Save After Setting
Setting the time but losing it after turning off the car is common. This happens if the stereo loses power or the backup battery is dead. Confirm the stereo has constant power from the car’s battery. If not, visit a technician to check wiring or replace the backup battery.
Clock Shows Wrong Time Continuously
If the clock resets or shows the wrong time, the stereo might need a firmware update. Visit the JVC website to find updates for the KD-R200 model. Follow instructions carefully to update. Also, double-check the time zone or daylight saving settings if available.
Frequently Asked Questions
How Do I Set The Clock On Jvc Kd-r200?
To set the clock, press and hold the “Clock” button until the time flashes. Use the tuning knob to adjust hours and minutes. Press the “Clock” button again to save the settings.
Can I Sync The Jvc Kd-r200 Clock Automatically?
No, the JVC KD-R200 does not support automatic time syncing. You must manually set the clock using the tuning controls.
What If The Clock On Kd-r200 Resets Frequently?
Frequent resets may indicate a weak or disconnected car battery. Check your vehicle’s electrical system to ensure stable power supply.
How To Adjust Clock From 12-hour To 24-hour Format?
Press and hold the “Clock” button until the time blinks. Rotate the tuning knob to switch between 12-hour and 24-hour formats. Press “Clock” to confirm.
Conclusion
Setting the clock on your JVC KD-R200 is simple. Just follow the steps mentioned. First, power on your stereo. Next, access the settings menu. Adjust the hours and minutes carefully. Double-check your time to ensure accuracy. Remember, correct time is crucial for timely drives.
Now, your JVC car stereo is ready with the right time. Enjoy your music and on-time arrivals. Stay connected with your schedule, effortlessly. Happy driving with your newly set clock!

