
Are you tired of that annoying buzzing sound coming from your car stereo? It can ruin your driving experience and make your favorite songs hard to enjoy.
The good news is, you don’t have to live with it. Installing a noise filter on your car stereo is a simple fix that can bring back clear, crisp sound. In this guide, you’ll learn exactly how to install a noise filter step-by-step, even if you’re not a tech expert.
Keep reading, and soon you’ll be enjoying music without distractions every time you hit the road.
Credit: www.trifive.com
Choosing The Right Noise Filter
Choosing the right noise filter is essential for a clear sound in your car stereo. The wrong filter might not block the noise or could affect sound quality. Understanding the types, compatibility, and sources helps you pick the best filter for your setup.
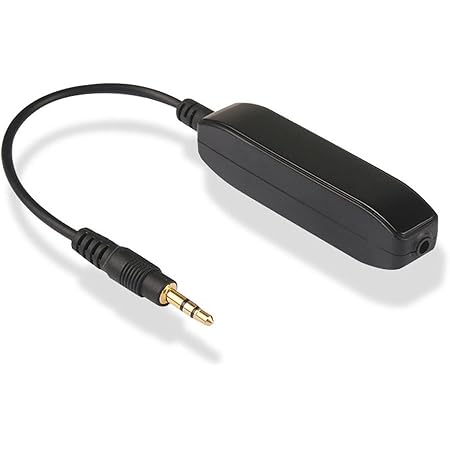
Types Of Noise Filters
Noise filters come in several types, each serving different needs. The main types include:
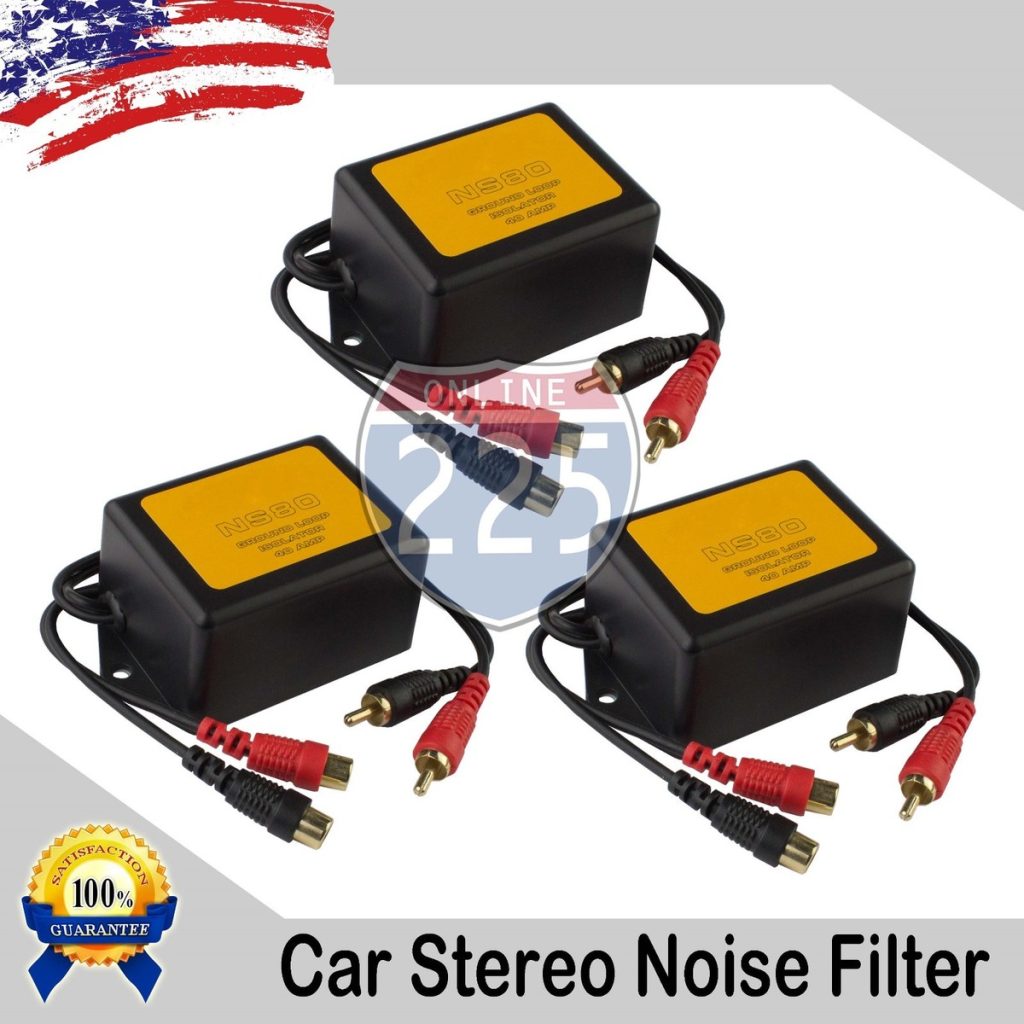
- Ground Loop Isolators:These stop hum caused by ground loops. They are common and easy to install.
- Capacitive Filters:These reduce high-frequency interference. They help with static and buzzing sounds.
- Ferrite Bead Filters:Small and simple, these block high-frequency noise on wires.
- Inline Noise Filters:These connect directly to power or audio lines to cut noise.
Choose a type based on the noise problem and your car’s wiring.
Compatibility With Your Car Stereo
Noise filters must match your stereo’s power and audio system. Check the voltage and current ratings of the filter. Use a filter designed for your car’s audio input type, like RCA or speaker wires. Some filters work only with certain brands or models. Read the manual or product details to ensure a perfect fit. A wrong filter can cause poor sound or damage.
Where To Buy Quality Filters
Buy noise filters from trusted stores or online shops. Auto parts stores often stock reliable brands. Electronics retailers also carry good options. Search for filters with good reviews and clear specifications. Avoid very cheap or no-name products. They may fail quickly or not work well. Quality filters offer better noise reduction and last longer.
Tools And Materials Needed
Before you start installing a noise filter on your car stereo, gathering the right tools and materials can make the process smoother and safer. Having everything ready saves you from frustrating interruptions and helps you focus on the task. Let’s look at what you’ll need to get the job done efficiently.
Essential Tools
- Screwdrivers:Both flathead and Phillips types are useful for removing panels and screws.
- Wire Stripper and Cutter:These help you prepare wires for connections without damaging them.
- Multimeter:This tool checks for voltage and continuity, ensuring your connections are correct.
- Crimping Tool:Needed if you plan to use crimp connectors for secure wire joins.
- Electrical Tape:For insulating wires and preventing shorts after making connections.
Have you ever tried to install electronics without the right tools? It quickly becomes a frustrating puzzle.
Safety Gear
- Gloves:Protect your hands from sharp edges and accidental cuts.
- Safety Glasses:Shield your eyes from debris or sparks, especially when cutting wires.
- Disconnect Battery:Always disconnect the car battery before starting electrical work to avoid shocks or damage.
Safety gear isn’t just a recommendation—it’s your first line of defense. Would you skip wearing gloves if you knew you could avoid a painful cut?
Additional Supplies
- Noise Filter Kit:Make sure the filter is compatible with your car’s stereo system.
- Connectors and Terminals:Ring terminals or butt connectors help create secure and lasting connections.
- Zip Ties:Use these to organize and secure wires neatly under the dashboard.
Having extra connectors and zip ties can prevent last-minute runs to the store. It’s a simple way to keep your workspace clean and your installation professional.
Preparing Your Car Stereo
Preparing your car stereo for a noise filter installation is essential. This preparation ensures safety and helps you work efficiently. It involves disconnecting the battery, opening the stereo unit, and spotting noise sources. Each step clears the way for a smooth noise filter setup.
Disconnecting The Battery
Start by disconnecting the car battery to avoid electrical shocks. Use a wrench to loosen the negative terminal first. Removing the negative cable stops power flow to the stereo. Then, loosen and remove the positive terminal if needed. Keep the cables away from the terminals to prevent contact.
Accessing The Stereo Unit
Remove the dashboard panels covering the stereo. Use plastic pry tools to avoid damage. Unscrew any bolts holding the stereo in place. Gently pull the stereo out to access the wiring behind it. Keep track of screws and panels for reassembly.
Identifying Noise Sources
Look at the wiring connected to the stereo. Check for loose or frayed wires that might cause noise. Notice any ground wires that may be poorly connected. Identify cables running near the car’s power lines. These can carry interference. Mark these spots to address during the filter installation.
Credit: www.diymobileaudio.com
Installing The Noise Filter
Installing a noise filter on your car stereo helps eliminate static and humming sounds. It improves sound clarity and overall listening experience. The process involves understanding wiring, connecting the filter, and securing it properly. Follow these simple steps to install the noise filter correctly.
Wiring Basics
Identify the power wire and ground wire in your stereo system. The noise filter connects between the stereo and the power source. Use a wire stripper to prepare the wires for connection. Keep wires clean and free from damage to ensure good contact.
Connecting The Filter
Connect the noise filter’s input wires to the stereo’s power wires. Match the colors carefully—usually red for power and black for ground. Use crimp connectors or solder the wires for a secure connection. Cover exposed wires with electrical tape or heat shrink tubing.
Securing The Filter In Place
Find a dry and stable location near the stereo to mount the filter. Use zip ties or mounting brackets to hold the filter firmly. Avoid placing the filter near heat sources or moving parts. Ensure the wires are not stretched or pinched to prevent damage.
Testing The Installation
Testing the installation of a noise filter is crucial to ensure it works correctly. This step confirms the noise filter is properly connected and reduces unwanted sound interference. Follow these checks to verify your setup.
Reconnecting The Battery
After installing the noise filter, reconnect your car battery. This restores power to the stereo system. Ensure the battery terminals are secure and free from corrosion. A loose connection may cause the stereo to malfunction.
Checking For Noise Reduction
Turn on your car stereo and listen carefully. Play music at different volumes to detect any remaining noise. The noise filter should reduce humming or buzzing sounds significantly. Test with the engine on and off to compare noise levels.
Troubleshooting Common Issues
- If noise persists, check all wiring connections again.
- Make sure the noise filter is grounded properly.
- Verify the noise filter is installed on the correct wire.
- Replace the filter if it shows signs of damage.
These steps help identify and fix common problems. Ensuring proper installation leads to clear and enjoyable sound quality.
Maintaining Your Noise Filter
Maintaining your noise filter is key to keeping your car stereo sound clear and free from annoying interference. Over time, dust, moisture, and wear can reduce the filter’s effectiveness. Taking a little time to care for it can save you from frustrating static and buzzing sounds during your drives.
Regular Inspections
Check your noise filter at least once every few months. Look for signs of corrosion, loose connections, or dirt buildup around the filter and its wiring. A quick visual scan can reveal issues before they affect your audio quality.
Try gently cleaning the filter with a dry cloth or compressed air if you see dust. Avoid using liquids that might damage the internal components. Remember, a clean filter works better and lasts longer.
When To Replace The Filter
If you notice persistent noise despite cleaning, it might be time to replace the noise filter. Filters don’t last forever; age and exposure to harsh conditions can break down their internal parts.
Listen for unusual sounds like humming, buzzing, or crackling that won’t go away. These are clear signs your filter isn’t doing its job. Replacing it is often a simple and affordable fix that restores your stereo’s sound quality.
Preventing Future Noise Problems
Keep your car’s electrical system in good shape to reduce noise issues. Secure all wiring and avoid running audio cables near power wires, which can create interference.
Consider using additional shielding or ferrite beads on cables prone to noise. Also, parking your car in a dry place helps prevent moisture-related damage to your noise filter.
Have you ever thought about how much small maintenance steps could improve your listening experience? Taking care of your noise filter protects your investment and keeps your music sounding great every time you hit the road.
Credit: www.hitransportes.com.br
Frequently Asked Questions
What Is The Purpose Of A Noise Filter In Car Stereos?
A noise filter reduces electrical interference causing static in car audio systems. It improves sound clarity by blocking unwanted noise from the power source. Installing one ensures a cleaner, clearer audio experience while driving, especially with aftermarket stereos.
How Do I Install A Noise Filter On My Car Stereo?
First, disconnect the car battery for safety. Then, locate the stereo’s power wire and connect the noise filter inline. Secure all connections and ground the filter properly. Finally, reconnect the battery and test the stereo for noise reduction.
Can A Noise Filter Fix Static Noise In All Car Stereos?
Yes, a noise filter can reduce most static noises caused by electrical interference. However, it might not fix issues from faulty wiring or damaged speakers. Proper installation is key to maximizing its effectiveness in improving audio quality.
Where Should I Place The Noise Filter In The Stereo System?
Place the noise filter on the power wire close to the stereo unit. This location helps block interference right before it reaches the stereo. Avoid placing it near other electronic devices to prevent additional noise pickup.
Conclusion
Installing a noise filter improves your car stereo experience. Say goodbye to annoying interference. Follow the steps carefully to ensure success. Gather your tools and materials before you begin. Double-check connections for the best results. Enjoy crystal-clear sound without distractions.
This upgrade enhances your car rides. No more buzzing or static in your music. Feel the difference immediately. A simple yet effective solution. Share this guide with friends who face similar issues. Happy listening!

