
Do you want to enjoy your favorite music or podcasts through your car stereo without hassle? Installing an aux input can make that possible, even if your car didn’t come with one.
Imagine plugging your phone or MP3 player directly into your stereo and hearing clear, high-quality sound every time you drive. It’s easier than you think, and you don’t need to be a tech expert to do it. In this guide, you’ll discover simple steps to install an aux input in your car stereo quickly and safely.
Keep reading—you’re just moments away from transforming your driving experience with better sound.

Credit: www.reddit.com
Tools And Materials Needed
Installing an aux input in your car stereo requires specific tools and materials. Having the right items ready makes the process smoother and safer. This section lists all essentials for a successful installation.
Essential Tools For Installation
- Screwdrivers (Phillips and flathead)
- Wire strippers and cutters
- Multimeter for testing connections
- Panel removal tool
- Soldering iron (optional but recommended)
- Electrical tape or heat shrink tubing
- Drill with small drill bits (only if needed)
Materials Needed For Aux Input
- Aux input adapter compatible with your car stereo
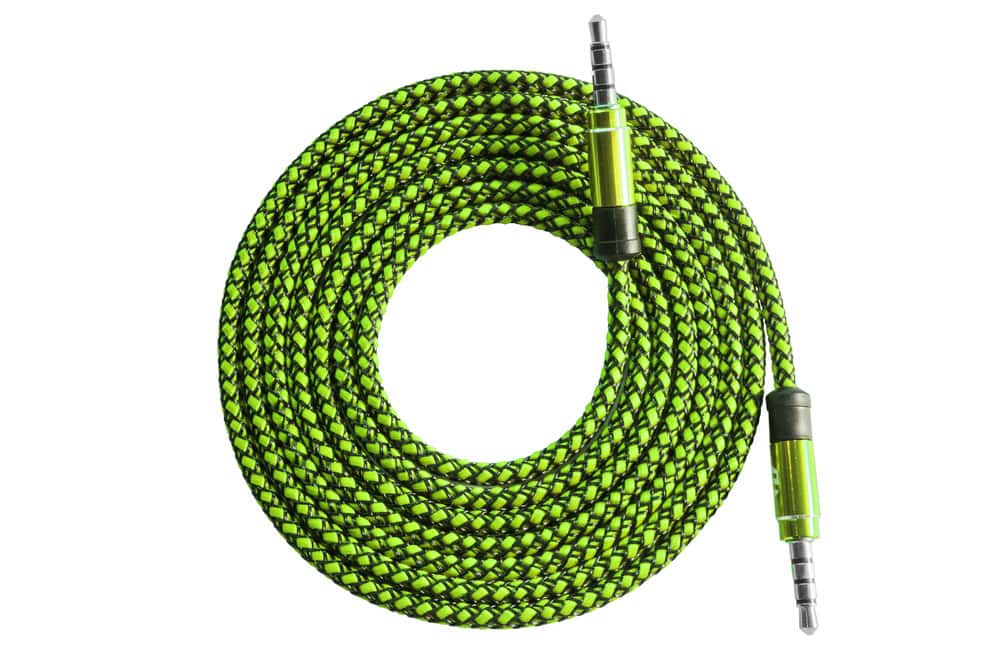
- Aux cable (3.5mm male to male)
- Wiring harness or connector kit
- Zip ties for cable management
- Fuse tap or inline fuse (for power connection)
Safety Gear And Preparation Items
- Gloves to protect your hands
- Flashlight or headlamp
- Clean cloth to handle parts
- Owner’s manual for your car and stereo
Credit: autowiringpro.com
Choosing The Right Aux Input Adapter
Choosing the right aux input adapter is crucial for a smooth and enjoyable audio experience in your car. Not all adapters fit every car stereo, so you need to consider compatibility, sound quality, and ease of installation. Picking the wrong one can lead to poor sound or extra hassle during setup.
Understanding Your Car Stereo’s Compatibility
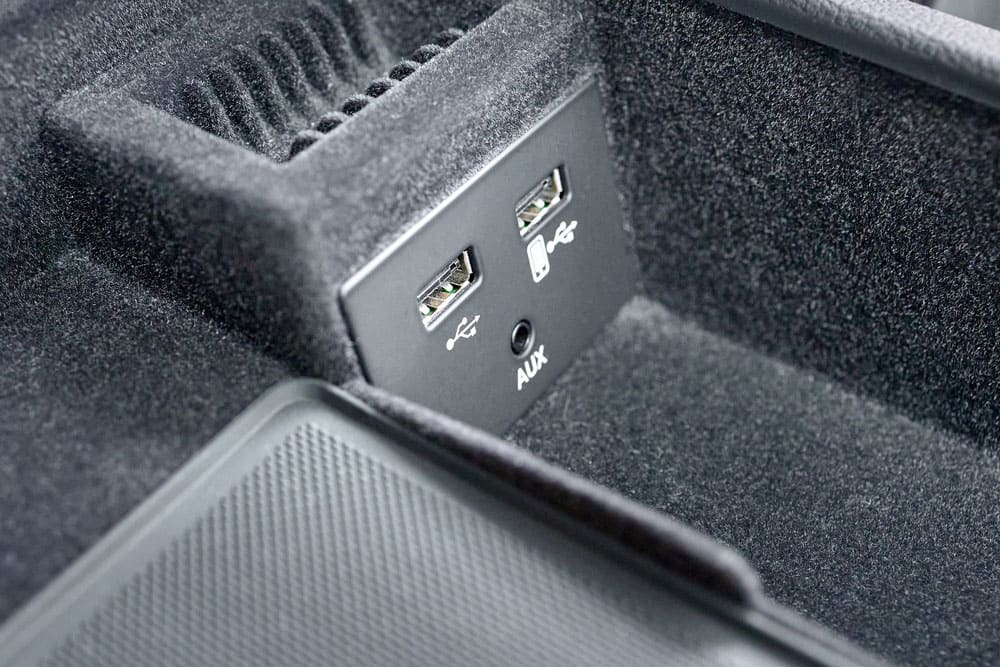
Check what type of aux input your car stereo supports before buying an adapter. Some stereos have a standard 3.5mm jack, while others might require a special cable or connector. If your car uses a proprietary port, a generic adapter won’t work.
Look at your stereo’s manual or search online for your model’s specifications. This saves you time and avoids buying an adapter that won’t fit. Have you ever bought a gadget only to find it doesn’t connect properly? Avoid that frustration by verifying compatibility first.
Types Of Aux Input Adapters
Aux adapters come in various forms:
- 3.5mm Jack Adapters:The most common and easy to use, perfect if your stereo has a headphone-style input.
- FM Transmitter Adapters:Useful if your stereo lacks an aux port, but sound quality can vary.
- USB or Bluetooth Adapters:These can act as aux inputs and add wireless convenience.
Think about how you want to connect your device and what fits your car’s setup best.
Sound Quality And Durability Considerations
Not every adapter delivers the same audio performance. Some cheap models introduce static or lower volume levels. Look for adapters with good customer reviews highlighting clear sound.
Durability matters too if you plan to plug and unplug often. An adapter with a sturdy build and reinforced cables will save you from frequent replacements. What good is a perfect sound if the adapter breaks after a few uses?
Ease Of Installation And Additional Features
Choose an adapter that’s easy to install without needing extra tools or technical skills. Some models are plug-and-play, while others require splicing wires or removing panels.
Extras like volume control, LED indicators, or remote control can improve your experience. But keep in mind that more features might mean a higher price and more complex installation. What features matter most to you during your drive?
Preparing Your Car Stereo
Preparing your car stereo is a key step before installing an aux input. This process ensures the installation goes smoothly. It helps avoid damage to your stereo and wiring. Taking time to prepare saves effort later.
Start by gathering the necessary tools and materials. You will need basic tools like screwdrivers and wire strippers. Also, have the aux input kit ready. This kit usually includes the aux jack and wiring harness.
Next, disconnect the car battery. This step prevents electrical shorts and protects you from shocks. Always work with the battery disconnected when handling car electronics.
Remove the stereo from the dashboard carefully. Use the correct tools to avoid breaking clips or damaging the dash. Keep all screws and parts in one place for easy reassembly.
Checking Your Car Stereo Model
Identify your stereo’s make and model number. This information helps find the right aux input adapter. Look for labels on the back or inside the stereo casing.
Inspecting The Wiring Harness
Examine the stereo wiring harness closely. Check for any loose or damaged wires. Make sure the wiring matches your aux input kit’s instructions.
Cleaning The Stereo Components
Clean the stereo components before installation. Remove dust and dirt with a soft cloth. Clean connections improve the quality of the audio signal.
Testing The Stereo Functionality
Test the stereo to ensure it works well before installation. Turn it on and check sound and controls. Fix any issues before proceeding to aux input installation.

Credit: idoneitmyself.com
Locating The Stereo Wiring Harness
Locating the stereo wiring harness is the first step to install an aux input in your car stereo. The wiring harness connects your car’s stereo to the vehicle’s electrical system. Finding it helps you add new audio inputs safely and correctly.
The wiring harness is usually behind the stereo unit inside the dashboard. You might need to remove the stereo to access it. This harness has many wires bundled together with different colors.
Each wire color has a specific function, such as power, speakers, or ground. Identifying the right wires ensures a secure connection for the aux input. Use a wiring diagram for your car model to match the wires easily.
Tools Needed To Access The Wiring Harness
- Screwdrivers (Phillips and flathead)
- Panel removal tool
- Flashlight
- Multimeter (optional for testing wires)
Removing The Stereo To Reveal The Wiring Harness
Start by disconnecting your car battery to avoid electrical shorts. Carefully remove the trim around the stereo with the panel removal tool. Unscrew the mounting screws holding the stereo in place.
Slowly pull the stereo out of the dashboard. Behind it, you will find the wiring harness connected to the stereo’s back.
Identifying The Correct Wires For Aux Input
Look for wires labeled as audio input, AUX, or similar in the wiring diagram. Common wire colors for audio are red and white or red and black for left and right channels. The ground wire is usually black or brown.
Use a multimeter to verify wire functions if unsure. Mark the wires to avoid confusion during installation.
Connecting The Aux Input Adapter
Connecting the aux input adapter is a key step to add audio input to your car stereo. This process involves linking the adapter wires to the car’s existing wiring harness. Careful connection ensures clear sound and prevents damage to your stereo system.
Take your time to match each wire correctly. Check the adapter’s manual for color codes and wiring diagrams. Proper connection avoids signal loss and interference in sound quality.
Wiring The Adapter To The Harness
Start by locating the car stereo wiring harness behind the dashboard. Identify the wires for power, ground, and audio signals.
- Strip a small part of the wire insulation.
- Connect the adapter wires to the matching wires in the harness.
- Twist the wires tightly together to ensure good contact.
- Use wire connectors or solder the wires for a secure link.
- Match colors: red to red, black to black, and so on.
Double-check each connection before proceeding. Loose or wrong wiring can cause issues.
Securing The Connections
Once wiring is complete, securing the connections is crucial. This prevents wires from loosening due to vibrations or movement.
- Wrap each connection with electrical tape.
- Use heat shrink tubing for a more durable seal.
- Bundle wires neatly to avoid tangling.
- Fasten wires with zip ties to keep them in place.
- Ensure no wires touch metal parts to avoid shorts.
Properly secured connections keep your aux input working well for a long time.
Testing The Aux Input Connection
Testing the aux input connection is important after installation. It confirms the connection works properly and sound quality is clear. This step helps find any issues early. A few simple checks ensure your car stereo plays audio from your device.
Preparing Your Device And Car Stereo
Connect a phone or music player to the aux cable. Use a good quality audio file or app. Turn on the car stereo and set it to aux mode. Make sure volume levels are moderate on both devices. This setup prevents sudden loud sounds.
Checking For Audio Playback
Play music from the connected device. Listen carefully through the car speakers. Sound should be clear without static or buzzing. If there is no sound, check cable connections again. Sometimes unplugging and reconnecting the cable helps.
- Ensure the aux cable is fully inserted.
- Try a different aux cable to rule out damage.
- Check the device’s volume and mute settings.
- Test the car stereo aux input with another device.
These steps help identify the source of the problem quickly.
Adjusting Audio Settings For Best Quality
Use your car stereo’s equalizer to improve sound. Adjust bass, treble, and balance to your preference. Avoid extreme settings that cause distortion. Proper settings give a better listening experience.
Reassembling The Stereo And Dashboard
Reassembling the stereo and dashboard is the final step in installing an aux input. This process requires care and patience to avoid damaging any parts. Take your time to ensure everything fits back perfectly.
Start by carefully placing the stereo back into its slot. Make sure all wires are connected securely and nothing is pinched. Loose connections can cause poor sound or no sound at all.
Once the stereo is in place, secure it using the screws or clips removed earlier. Do not overtighten screws to avoid cracking the plastic frame. Confirm the stereo sits flush with the dashboard surface.
Aligning The Dashboard Panels Correctly
Check each panel’s alignment before pressing it back onto the dashboard. Panels should fit snugly without forcing them. Misaligned panels can create gaps or cause rattling sounds while driving.
Gently press panels into their original positions. Listen for clicks indicating clips have locked in place. Use even pressure across the panel to avoid breaking clips or cracking plastic.
Securing Screws And Fasteners
Use the original screws and fasteners to secure the dashboard. Keep screws organized to avoid mixing them up. Tighten screws evenly but avoid over-tightening.
Check that all screws are tight and panels do not move. This will prevent vibrations and noise when driving. Use a screwdriver that fits each screw properly to avoid stripping.
Testing The Aux Input And Stereo Functionality
Turn on the car stereo to test the aux input. Connect your device and play audio to confirm sound quality. Adjust volume and settings to ensure proper function.
Check for any static, noise, or connection issues. If problems arise, recheck wire connections and panel alignment. Testing now saves time before finalizing the assembly.
Troubleshooting Common Issues
Troubleshooting common issues during aux input installation helps ensure smooth audio playback. Many problems arise from simple connection errors or device settings. Identifying these issues quickly saves time and frustration.
Check each connection carefully and confirm that cables fit tightly. Testing the aux cable with another device can isolate the problem. Adjusting the car stereo settings might also fix sound issues.
No Sound From Aux Input
Verify the aux cable is fully plugged into both the car and device. Make sure the car stereo is set to aux mode or input source. Increase the volume on both the car stereo and connected device. Try a different aux cable to rule out cable damage. Restart the device to refresh its audio output.
Static Or Interference
Inspect the aux cable for damage or loose connections. Avoid running the aux cable near power cords or other electronics. Use a shielded aux cable to reduce noise interference. Lower the volume on connected devices and the car stereo to minimize static. Test the connection in different locations to check for external interference.
Adapter Not Recognized
Confirm the adapter matches the car stereo’s aux input type. Clean the adapter and aux port to remove dirt or debris. Restart the car stereo and connected device to reset connections. Check if the adapter needs drivers or firmware updates. Try using the adapter with another device to verify its function.
Tips For Maintaining Your Aux Input
Maintaining your aux input keeps your car stereo working well. Clean connections and careful use prevent damage. Simple care steps extend the life of the aux port. Follow these tips to enjoy clear sound every time.
Keep The Aux Port Clean
Dust and dirt block the aux port. Use a soft brush or compressed air to remove debris. Avoid liquids that may cause corrosion. Regular cleaning ensures a strong connection.
Use Quality Aux Cables
Cheap cables break easily and reduce sound quality. Choose cables with good shielding and strong connectors. Store cables without bending or twisting them. Good cables protect the aux input and improve audio.
Avoid Force When Plugging In
Push the aux plug gently into the port. Forcing it can bend or break the internal pins. Align the plug correctly before inserting. Careful handling prevents damage and connection issues.
Protect The Aux Port From Moisture
Water and humidity cause rust and shorts inside the aux input. Keep drinks away and avoid wet hands when using the port. Use a cover if your car has one. Protecting from moisture keeps the port safe.
Disconnect Cables When Not In Use
Leaving cables plugged in can strain the aux port. It may loosen or damage the connection over time. Unplug cables after use to reduce wear. This simple habit extends the port’s life.
Frequently Asked Questions
What Tools Are Needed To Install Aux Input In Car Stereo?
You need a screwdriver, wire stripper, soldering iron, and electrical tape. Also, have the aux input kit ready for installation. These tools help you connect the aux cable safely and securely to the stereo system.
Can I Install Aux Input Without Professional Help?
Yes, you can install aux input yourself with basic knowledge. Follow step-by-step guides and use proper tools. Ensure the car is off and disconnect the battery before starting to avoid damage or injury.
How Long Does It Take To Install An Aux Input?
Installing an aux input usually takes 30 to 60 minutes. The time depends on your car model and wiring complexity. Taking your time ensures correct connections and prevents damage to your stereo system.
Will Installing Aux Input Affect My Car Stereo Warranty?
Installing an aux input yourself may void the stereo warranty. Check your car stereo’s warranty terms before proceeding. Professional installation is recommended to keep warranty intact and ensure proper setup.
Conclusion
Adding an aux input to your car stereo is simple. This upgrade enhances your music experience. Follow the steps carefully for a successful installation. Gather your tools before starting. Read the car manual for guidance. Double-check connections to avoid errors.
Enjoy clear, quality sound with your favorite tunes. The aux input makes every drive more enjoyable. Safe travels and happy listening!

