
Are you struggling to play your favorite music through your Pioneer car stereo? Connecting an aux cable might seem simple, but a small mistake can stop the sound from coming through.
Imagine the frustration of wanting to enjoy your playlist on the road, only to face silence. In this guide, you’ll learn exactly how to connect your aux cable to your Pioneer car stereo quickly and easily. By the end, you’ll be ready to enjoy clear, powerful sound from your phone or MP3 player every time you drive.
Keep reading to get the step-by-step help you need!

Credit: www.amazon.ca
Check Your Car Stereo Compatibility
Before you grab that aux cable and start plugging it into your Pioneer car stereo, it’s crucial to check if your stereo is actually compatible. Not all Pioneer models support aux input directly, and understanding this can save you from frustration and unnecessary purchases.
Knowing your stereo’s compatibility also helps you figure out if you need extra adapters or if there’s a specific port to use. This step ensures you get the best sound quality without damaging your equipment.
Identifying Your Pioneer Stereo Model
Look at the front panel or the manual to find the exact model number of your Pioneer stereo. This number is key to finding detailed specs online or in your manual.
Once you have the model number, visit the Pioneer website or trusted forums to confirm if your stereo has an aux input. Sometimes, the aux port is hidden behind a flap or integrated into a USB port.
Checking The Available Input Ports
Not all stereos have a dedicated aux input. Some models use a 3.5mm jack, while others might require RCA cables or a USB connection for audio input.
Inspect your stereo’s back and front panels carefully. If you only see USB or CD slots, your stereo may not support a direct aux connection without extra hardware.
Understanding Alternative Connection Options
If your Pioneer stereo doesn’t have an aux port, don’t give up. Bluetooth adapters or FM transmitters can serve as practical alternatives to connect your device wirelessly.
Think about your audio source and how you want to use it. Would a Bluetooth adapter work better for your daily commute, or is a wired connection more reliable for you?
Verifying Firmware And Software Compatibility
Some Pioneer stereos require firmware updates to enable aux input or improve connectivity options. Check the support section on Pioneer’s website for updates related to your model.
Installing the latest firmware can unlock hidden features or fix bugs that affect audio input quality.
Gather Necessary Equipment
Gathering the right equipment is the first step to connect an aux cable to your Pioneer car stereo. Without the proper tools and accessories, the process can become frustrating. Prepare everything before starting to save time and avoid interruptions.
Having the correct items ensures a smooth connection. This section covers all essential gear you need for a successful setup.
Auxiliary Cable
Choose a standard 3.5mm aux cable. It should be long enough to reach from your device to the stereo. Check both ends for damage or loose connections.
Pioneer Car Stereo With Aux Input
Confirm your Pioneer stereo has an aux input jack. This is usually on the front panel. If missing, an adapter or different connection method may be necessary.
Compatible Audio Device
Use a smartphone, MP3 player, or any device with a headphone jack. Ensure the device volume is adjustable for better sound control.
Car Manual Or Stereo Guide
Keep the car or stereo manual handy. It helps locate the aux port and provides specific connection instructions for your model.
Locate The Aux Input On Pioneer Stereo
Finding the Aux input on your Pioneer car stereo is the first step to playing your favorite tunes through the car speakers. Without locating this port, connecting an Aux cable becomes frustrating and confusing. Understanding exactly where to look can save you time and avoid unnecessary hassle.
Check The Front Panel For A Dedicated Aux Port
Most Pioneer stereos have a clearly marked Aux input on the front panel. Look for a small round hole labeled “AUX” or an icon that looks like headphones or a plug. This port usually fits a standard 3.5mm Aux cable.
If you don’t see it immediately, try inspecting the corners or near the volume knob. Sometimes the input is subtly placed to maintain the sleek design of the stereo.
Look Behind The Front Panel Or Flip-down Cover
Some Pioneer models hide the Aux input behind a flip-down cover or a detachable faceplate. Gently open or pull down any panel on the front of your stereo to check inside. This design keeps the front clean while still giving you access when needed.
Have you ever missed an input just because it was hidden? This is a common trick manufacturers use to protect ports from dust and damage.
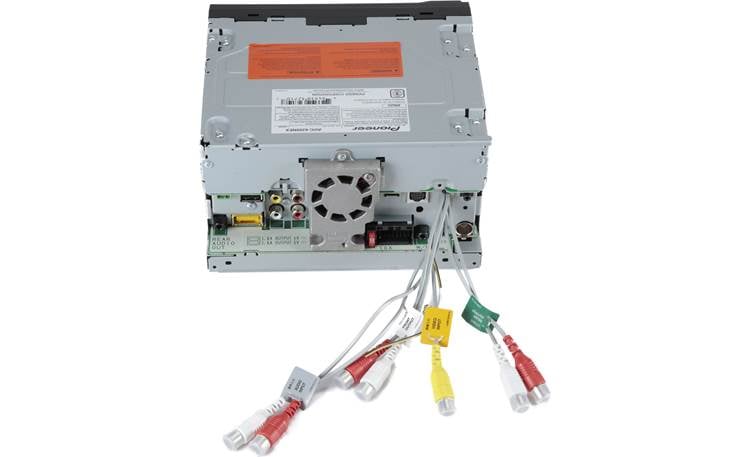
Inspect The Rear Of The Stereo Unit
If you can’t find an Aux input on the front, it might be located at the back of the stereo unit. This is less common but still possible, especially in older or more complex Pioneer systems. In such cases, you may need to access the wiring panel behind your dashboard.
Before pulling your stereo out, check your car’s manual or Pioneer’s documentation for the exact Aux input location. It could save you from unnecessary dismantling.
Consult The User Manual Or Pioneer’s Online Resources
When in doubt, the user manual is your best friend. It provides detailed diagrams showing where the Aux input is located on your specific model. You can also visit Pioneer’s official website for downloadable manuals and guides.
Knowing your stereo model number helps you find precise information quickly. It’s worth taking a minute to look this up before hunting around your dashboard.
Prepare The Aux Cable
Preparing the aux cable is a key step before connecting it to your Pioneer car stereo. It ensures a clear and stable audio connection. Take time to check your cable and its condition. A well-prepared aux cable will provide better sound quality and avoid connection issues.
Start by inspecting the cable for any damage or frays. A damaged cable can cause poor sound or no sound at all. Make sure the cable connectors are clean and free from dust. Dirt on the connectors can block the signal and reduce audio quality.
Choose The Right Aux Cable Length
Select a cable length that fits your car setup. Too short can limit movement. Too long can cause tangles and clutter. Measure the distance between your phone or device and the stereo. Pick a cable slightly longer than this distance for ease.
Check Connector Types
Most Pioneer car stereos use a 3.5mm aux input. Confirm your cable ends match this size. Some devices may need adapters if their plugs differ. Ensure both ends fit snugly to avoid loose connections that interrupt sound.
Test The Cable Before Use
Before plugging in the cable to the stereo, test it with your device. Play some music and listen for sound clarity. Move the cable gently to check for crackling or cutouts. A good cable will maintain steady sound without noise.
Keep The Cable Organized
Untangle and straighten the cable before use. Avoid sharp bends or knots as they damage the wire inside. Use cable ties or clips to keep the cable neat inside your car. A tidy cable lasts longer and looks better.
Connect Aux Cable To Stereo
Connecting an aux cable to your Pioneer car stereo is a straightforward way to enjoy your favorite playlists on the road. It lets you bypass Bluetooth issues and stream music directly with reliable sound quality. Let’s look at how you can easily make this connection and start listening without hassle.
First, find the aux input port on your stereo. It is usually a small, round jack labeled “AUX” or “Audio In.” This port is often located on the front panel or sometimes on the side of the stereo unit.
If you can’t spot it immediately, check your stereo’s user manual or look for a small headphone-like symbol near the ports. Knowing exactly where this input is saves you time and frustration.
Plug The Aux Cable Into Your Device And Stereo
Take the aux cable and insert one end into your phone, tablet, or music player’s headphone jack. Then, plug the other end firmly into the stereo’s aux input port.
Make sure both ends are securely connected. Loose connections can cause static noise or interrupted sound, which can ruin your listening experience.
Switch The Stereo To Aux Mode
After connecting the cable, switch your Pioneer stereo to the aux input mode. You can do this by pressing the “Source” or “Mode” button repeatedly until “Aux” or “AUX” appears on the display.
Not seeing the aux mode? Sometimes the stereo needs a moment to recognize the connection. Try unplugging and plugging the cable back in if it doesn’t respond.
Adjust Volume And Play Your Music
Start playing music on your device and adjust the volume both on your device and the car stereo for the best sound quality.
Be cautious not to set the volume too high on either end to avoid distortion. A balanced volume ensures clear and enjoyable audio while you drive.
Connect Aux Cable To Audio Device
Connecting an aux cable to your audio device is simple and quick. This connection lets you play music from phones, tablets, or MP3 players through your Pioneer car stereo. A proper connection ensures clear sound and better control over your music.
Before connecting, check the aux cable and audio device for compatibility. Most devices have a standard 3.5mm headphone jack that fits the aux cable easily. Knowing the device type helps in choosing the right cable and ensuring a good connection.
Locate The Headphone Or Audio Output Jack
Find the headphone or audio output jack on your device. It usually looks like a small round hole. This is where you plug in the aux cable. Some devices may have a different port, so check carefully.
Plug The Aux Cable Into The Audio Device
Insert one end of the aux cable firmly into the audio output jack. Make sure it goes in all the way. A loose connection can cause poor sound or interruptions.
Set The Audio Device Volume
Adjust the volume on your audio device before playing music. Start with a medium level to avoid sudden loud sounds. You can increase or decrease the volume later through the car stereo.
Play a song or audio file on your device. Check if the sound comes through the car stereo speakers. Adjust the volume and settings for the best audio quality.
Set Stereo To Aux Mode
Setting your Pioneer car stereo to Aux mode is a crucial step to ensure your music plays through the aux cable without any issues. Without switching to the correct input, your stereo won’t recognize the aux connection, leaving you wondering why there’s no sound. Let’s break down how to get your stereo ready for that seamless audio experience.
Locate The Source Or Mode Button
Most Pioneer stereos have a button labeled “Source” or “Mode.” This button cycles through different input options like radio, CD, Bluetooth, and Aux. Press this button repeatedly until you see “Aux” or “AUX” displayed on the screen.
Use The Touchscreen Or Menu
If your Pioneer stereo has a touchscreen, tap the screen to access the input options. Navigate to the audio source menu and select “Aux” from the list. This method is often quicker and more intuitive than pressing physical buttons.
Confirm The Aux Input Is Active
After selecting Aux mode, play audio from your connected device to make sure the stereo is receiving the signal. You should see the track info or hear the sound immediately. If nothing happens, double-check your aux cable connection and try selecting Aux mode again.
Test The Connection
Testing the connection after plugging in your aux cable to a Pioneer car stereo is essential. This step confirms whether your setup works properly and ensures you get the best sound experience. Skipping this can leave you wondering if the problem lies with the cable, the stereo, or the device.
Check The Audio Source And Volume
Start by selecting the aux input mode on your Pioneer stereo. Make sure your phone or music player is playing audio and that its volume is turned up. Sometimes, the issue is as simple as a muted device or a low volume level.
Listen For Clear Sound Output
After playing a song or audio clip, listen carefully. The sound should be clear without any crackling, static, or interruptions. If you notice distortion, try using a different aux cable or test the current one on another device to pinpoint the problem.
Test Controls And Adjust Settings
Use your car stereo’s volume and equalizer settings to adjust the sound. Notice if the controls respond smoothly and if the sound quality changes accordingly. If controls don’t affect the audio, your connection might not be properly established.
- Ensure the aux cable is fully inserted into both the stereo and your device.
- Try a different aux cable to rule out a faulty wire.
- Restart your music device or car stereo to refresh the connection.
- Check for any software updates on your car stereo or device that might improve compatibility.
Have you ever connected an aux cable and found no sound, only to realize the device was still on silent mode? Small details like this can save you from unnecessary frustration. How do you make sure your connection is perfect before hitting the road?
Troubleshoot Common Issues
Troubleshooting common issues can save time and frustration when connecting an aux cable to your Pioneer car stereo. Problems like no sound, loose connections, or compatibility can stop audio playback. Understanding these issues helps fix them quickly and enjoy your music without interruptions.
No Sound Output
Check if the aux cable is fully plugged into both the car stereo and the device. Ensure the volume is not muted or set too low on both devices. Confirm that the car stereo is set to the correct aux input mode. Test the aux cable with another device to see if it works. Try restarting your device to reset audio settings.
Loose Connection
A loose connection can cause crackling or no sound at all. Inspect the aux cable for any bends or damage. Make sure the cable’s jack fits snugly into the car stereo and the device. Clean the aux port gently with a soft brush if dust or dirt is present. Replace the cable if it feels loose or worn out.
Compatibility Problems
Some devices may not work well with certain Pioneer stereo models. Check if your device supports standard aux output. Look for any required adapters if your device uses different audio ports. Update the car stereo’s firmware to improve device compatibility. Consult the stereo’s manual for supported devices and formats.

Credit: www.xtorm.eu
Tips For Better Sound Quality
Connecting an aux cable to your Pioneer car stereo is simple. To enjoy clear and crisp sound, follow some easy tips. These small steps improve your music experience. They reduce noise and boost audio quality. Listen to your favorite songs like never before.
Choose A High-quality Aux Cable
Use an aux cable made with good materials. Look for cables with thick shielding to block interference. Gold-plated connectors help reduce signal loss. Avoid cheap cables with loose or worn plugs. A better cable means better sound.
Check The Aux Port And Cable Connection
Make sure the aux port on your stereo is clean. Dust or dirt can cause static or poor sound. Insert the cable firmly into the port. Loose connections cause crackling and dropouts. Secure the connection for steady audio.
Adjust The Car Stereo Settings
Open your Pioneer stereo’s sound settings. Adjust the bass, treble, and balance to suit your taste. Turn off any sound effects that distort music. Set the volume to a comfortable level. Proper settings bring out the best sound.
Keep Your Device Volume High
Set your phone or music player volume close to maximum. Low device volume can cause poor sound quality. Avoid boosting car stereo volume too much. High input volume and moderate stereo volume produce clear sound.
Use A Signal Booster Or Preamp
Add a signal booster or preamp if sound is weak. These devices enhance the audio signal from your device. They reduce noise and improve clarity. Consider this if your music sounds low or fuzzy.

Credit: www.reddit.com
Frequently Asked Questions
How Do I Find The Aux Port In My Pioneer Stereo?
Locate the aux port on your Pioneer stereo by checking the front panel or near the rear connectors. It is usually labeled as “AUX” or “Auxiliary. ” Consult your stereo’s manual for specific location details, as it may vary by model.
Can I Connect An Aux Cable To Any Pioneer Stereo?
Most modern Pioneer car stereos have an aux input. However, it’s important to check your stereo’s specifications. Older models may not have this feature. Refer to your stereo manual or Pioneer’s website for compatibility details.
What Type Of Aux Cable Is Needed For Pioneer Stereos?
A standard 3. 5mm aux cable is typically used for Pioneer stereos. Ensure the cable is of good quality for optimal sound. It’s advisable to check your stereo’s manual for any specific cable recommendations.
Why Is My Aux Input Not Working?
If your aux input isn’t working, check the cable connection first. Ensure the cable is fully inserted into the port. Verify that the stereo’s input source is set to “AUX. ” Lastly, test the cable with another device to ensure it’s functioning properly.
Conclusion
Connecting an aux cable to your Pioneer car stereo is simple. Just follow the steps carefully. This lets you play music from your phone or device easily. No special tools or skills are needed. Enjoy clear sound and better control over your music.
Now, your drive can be more fun and relaxing. Try it yourself and hear the difference today.

