How to Connect Car Stereo to Battery: Easy Step-by-Step Guide
Are you looking to power up your car stereo directly from your battery but don’t know where to start? Connecting your car stereo to the battery might sound tricky, but with the right steps, you can do it safely and quickly.
Imagine enjoying your favorite tunes without interruptions or worrying about weak signals. In this guide, you’ll discover simple, clear instructions that anyone can follow—no complicated jargon, no guesswork. Stick with me, and by the end, you’ll have your stereo wired perfectly, ready to blast your music loud and clear.
Let’s get started!
Credit: batteryguy.com
Required Tools And Materials
Connecting a car stereo to the battery needs some basic tools and materials. Having the right items ensures a safe and successful setup. Preparation saves time and avoids errors during the process.
Gather everything before starting. This list covers what you need for the job.
Essential Tools
- Screwdrivers (flathead and Phillips)
- Wire strippers and cutters
- Multimeter for voltage testing
- Crimping tool for secure wire connections
- Socket wrench set for battery terminals
- Electrical tape
- Heat shrink tubing
- Panel removal tool
Required Materials
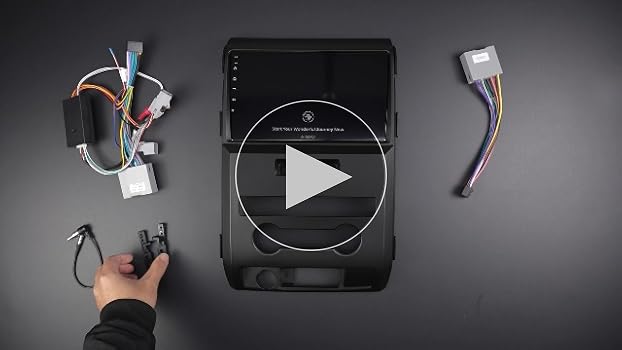
- Car stereo wiring harness
- Power wire (usually 12-gauge)
- Ground wire
- Fuse holder with appropriate fuse
- Ring terminals for battery connection
- Wire connectors or butt connectors
- Cable ties for organizing wires
Safety Equipment
- Protective gloves
- Safety glasses
Safety Precautions
Connecting a car stereo directly to the battery requires careful attention to safety. Ignoring safety can cause damage, injury, or fire. Taking proper precautions protects you and your vehicle. Follow these guidelines to keep the process safe and smooth.
Disconnect The Negative Battery Terminal
Always start by disconnecting the negative terminal. This stops electrical flow and reduces shock risk. Use a wrench to loosen the terminal clamp carefully. Never skip this step before working on the car’s electrical system.
Use Proper Fuse Protection
Install a fuse on the power wire near the battery. This protects against short circuits and electrical fires. Choose a fuse with the right amperage rating for your stereo. A blown fuse signals a problem before damage occurs.
Wear Safety Gear
Wear insulated gloves and safety glasses. These protect your hands and eyes from sparks and sharp edges. Keep metal jewelry off your hands to avoid accidental shorts. Safety gear minimizes injury risks during installation.
Check For Proper Wire Insulation
Use wires with good insulation to prevent shorts. Inspect wires for cuts or damage before use. Replace any worn or frayed wires. Proper insulation keeps the electrical current where it belongs.
Avoid Contact With Moving Parts
Keep wires away from belts, fans, and other moving parts. Use cable ties to secure wires in place. Moving parts can cut or damage wires, causing shorts or failures. Secure wiring ensures long-term safety.
Locate The Car Battery
Locating your car battery is the first key step before connecting a car stereo to it. Knowing exactly where the battery sits helps you work safely and efficiently, avoiding unnecessary frustration. Sometimes, the battery isn’t where you expect it, so a little extra attention here can save you time and effort.
Check Under The Hood
Most car batteries are located under the hood. Open your car’s hood and look towards the front corners near the windshield or fender area. You’re looking for a rectangular box with two thick cables attached—one red (positive) and one black (negative).
Keep in mind that some newer car models hide the battery under protective covers or trays. If you see a plastic box, open it carefully; the battery is likely inside. Have you ever struggled to find your battery because it was hidden? This is why checking your car manual can be a real time-saver.
Look In The Trunk Or Under Seats
If you don’t find the battery under the hood, check the trunk. Some vehicles place the battery near the rear, often on one side behind a panel or under the floor mat. Don’t forget to check under the back seat as well, especially in European or luxury cars.
This setup can surprise you if you’re used to traditional placements. Knowing these alternative locations prevents you from wasting time searching in the wrong places. Have you ever opened your trunk expecting a spare tire but found the battery instead?
Use The Car Manual Or Online Resources
Your car’s owner manual is a reliable resource for finding the battery location. It usually includes diagrams showing exactly where to look. If you don’t have a manual handy, searching online for your car’s make and model can quickly point you in the right direction.
Relying on these resources can save you from guesswork and potential damage. Have you checked online forums or videos when you got stuck with car repairs? They often provide clear pictures and step-by-step guidance.
Identify The Stereo Power Wires
Identifying the stereo power wires is the first step to connect your car stereo to the battery safely. Power wires carry the electricity needed for your stereo to function. Knowing which wires provide constant power, switched power, and ground helps avoid damage and ensures proper operation.
Different car stereos use various color codes for power wires. Checking the manual or wiring diagram is helpful. You can also use a multimeter to test wires and confirm their function.
Locate The Constant Power Wire
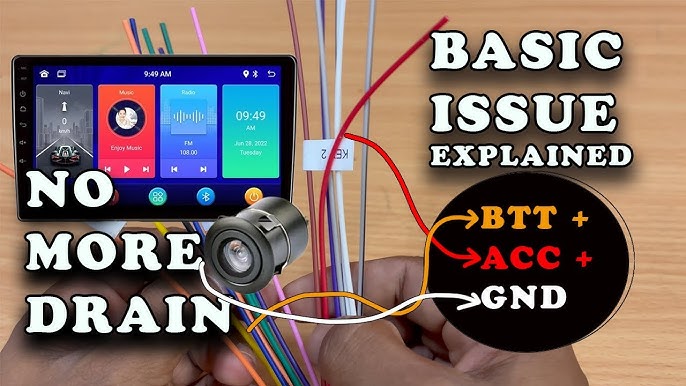
The constant power wire supplies power even when the car is off. It keeps memory settings like radio presets intact. Usually, this wire is red or yellow in many stereos. Use a multimeter to check for 12 volts with the ignition off.
Find The Switched Power Wire
The switched power wire provides power only when the ignition is on. It controls when the stereo turns on and off. This wire is often red or blue. Test it by turning the car key to the accessory position and checking for voltage.
Identify The Ground Wire
The ground wire completes the electrical circuit. It is essential for safety and sound quality. The ground wire is usually black or brown. Connect it securely to a metal part of the car’s chassis.
Check Speaker And Accessory Wires
Speaker wires carry audio signals from the stereo. Accessory wires may connect to things like antenna or illumination. These wires have different colors depending on the stereo brand. Label them carefully to avoid confusion during installation.
Disconnect The Car Battery
Disconnecting the car battery is a crucial step before connecting a car stereo to the battery. This ensures safety and prevents electrical shorts. Always handle the battery with care to avoid sparks or shocks.
Start by turning off the car and removing the keys from the ignition. This stops any power flow and reduces the risk of electric shock.
Open the hood and find the car battery. It usually sits in a corner of the engine bay. The battery has two terminals: positive (+) and negative (–).
Identify The Battery Terminals
The positive terminal is marked with a plus sign and often has a red cover. The negative terminal has a minus sign and is usually black or unmarked.
Use Proper Tools For Safety
Get a wrench or socket set to loosen the battery terminals. Make sure the tools fit well to avoid slipping and injury.
Disconnect The Negative Terminal First
Loosen the nut on the negative terminal. Remove the cable and move it away from the battery. This stops the flow of electricity safely.
Disconnect The Positive Terminal Next
Loosen the nut on the positive terminal. Remove this cable carefully. Keep both cables apart to prevent accidental contact.
Secure The Battery Cables
Place the disconnected cables where they cannot touch the battery terminals. This prevents short circuits while working on the stereo.
Connect The Positive Wire
Connecting the positive wire from your car stereo to the battery is a crucial step that requires attention to detail and safety. This wire carries the power from the battery to your stereo system, so a solid and secure connection is key to preventing electrical issues or damage to your equipment. Let’s look at how you can safely and effectively connect this wire to ensure your stereo works flawlessly.
Using A Fuse Holder
Adding a fuse holder to the positive wire is essential for protecting your stereo and vehicle from electrical shorts or power surges. The fuse acts as a safety barrier that will break the circuit if the current gets too high, preventing potential fires or damage.
Choose a fuse holder that fits your wire gauge and stereo’s power requirements. Place the fuse holder as close to the battery terminal as possible—this helps protect the entire length of the wire. Remember, the fuse should always be rated slightly above your stereo’s maximum current draw to avoid unnecessary blowing.
Have you checked the fuse rating on your stereo before connecting? Using the wrong size can either leave your system unprotected or cause frequent interruptions.
Securing The Connection
After installing the fuse holder, it’s important to secure the positive wire connection firmly to the battery terminal. Loose connections can cause intermittent power loss or electrical arcing, which is dangerous.
- Use a ring terminal to attach the positive wire to the battery post. Crimp it tightly for a solid fit.
- Clean the battery terminal with a wire brush to remove corrosion before connecting.
- Tighten the terminal clamp securely, but avoid over-tightening to prevent damage.
Once connected, wrap the exposed metal parts with electrical tape or heat shrink tubing to prevent accidental shorts. This extra step can save you from troubleshooting unexpected issues later.
Connect The Ground Wire
Connecting the ground wire is essential when wiring a car stereo to the battery. The ground wire completes the electrical circuit and prevents electrical noise. A proper ground connection ensures the stereo works safely and clearly.
Choosing A Ground Point
Pick a metal spot close to the stereo’s location. The spot should be free from paint and rust. Bare metal allows better contact for the ground wire. Common ground points include the car’s chassis or a factory ground bolt. Avoid plastic or painted surfaces for grounding.
Ensuring A Solid Ground
Clean the chosen ground point using sandpaper or a wire brush. Remove any dirt, rust, or paint. Attach the ground wire securely with a ring terminal. Use a tight screw or bolt to hold the terminal in place. A loose or weak ground can cause buzzing or stereo failure.
Credit: www.diymobileaudio.com
Reconnect The Car Battery
Reconnect the car battery carefully after installing or repairing your car stereo to ensure everything powers up correctly. This step is crucial because improper reconnection can cause electrical issues or even damage your stereo system. Taking your time and following safety tips can save you a lot of hassle later.
Prepare Your Tools And Workspace
Before touching the battery terminals, make sure you have the right tools ready, such as a wrench or socket set. Clear the area around the battery to avoid accidental shorts or dropping tools. A clean, dry workspace helps you focus and keeps the battery connections safe from dirt and moisture.
Connect The Positive Terminal First
Always attach the positive terminal (marked with a + or red cover) before the negative one. This reduces the risk of sparks and electrical shorts. Secure the terminal tightly but avoid over-tightening, which can damage the battery post or terminal clamp.
Attach The Negative Terminal Last
After the positive terminal is secure, connect the negative terminal (marked with a – or black cover). This completes the circuit and powers up your car’s electrical system. Double-check both terminals for a snug fit to prevent any loose connections that might cause starting problems.
Test Your Stereo And Electrical System
Once the battery is connected, turn on your car and test the stereo to confirm it powers up correctly. Check other electrical components like lights and dashboard indicators to ensure everything works. If something feels off, don’t ignore it—revisit your connections before driving.
Handle Battery Safety With Care
Remember to wear gloves and eye protection when reconnecting the battery to shield yourself from acid and sparks. Never touch both terminals simultaneously with metal tools or jewelry. Keeping safety top of mind protects you and your vehicle during this sensitive step.
Test The Stereo System
Testing the stereo system after connecting it to the battery is crucial. It ensures everything works correctly and safely. This step helps find any wiring issues or faults early. Testing also confirms the stereo delivers clear sound without distortion. Follow simple checks to verify the system’s performance before finalizing the installation.
Check Power And Ground Connections
Turn on the car’s ignition to power the stereo. Observe if the unit lights up and responds. Listen for any unusual sounds like buzzing or static. Ensure the ground wire is securely connected to a metal part of the car. A loose ground can cause noise and malfunction.
Test Audio Output
Play music or radio to check sound quality. Adjust the volume slowly to avoid damage. Listen to all speakers to confirm each one works. Check for clear bass, midrange, and treble tones. Distorted or no sound indicates wiring or speaker problems.
Inspect Fuse And Voltage
Locate the fuse connected to the stereo circuit. Check if the fuse is intact and not blown. Use a multimeter to measure voltage at the stereo terminals. Voltage should match the car battery’s output, usually 12 volts. Low or no voltage means a wiring fault or bad connection.
Verify Remote Turn-on Wire
Ensure the remote turn-on wire activates the stereo amplifier or subwoofer. This wire sends a small voltage signal to power external devices. Test with a multimeter or listen for amplifier power-up sounds. If it fails, check the wire connection and car settings.
Confirm All Controls Work
Operate volume, balance, fade, and tone controls. Each control should respond smoothly without delay. Test preset buttons and source switching (radio, CD, aux). Confirm Bluetooth or USB functions if available. Proper control response means the wiring and stereo unit are fine.
Troubleshooting Common Issues
Troubleshooting common issues is key to a smooth car stereo connection. Problems can stop the stereo from working or cause poor sound quality. Understanding these issues helps fix them quickly.
Checking each part of the connection can save time and avoid damage. Some problems are simple and need basic tools to solve. Others may require a closer look at wiring or the battery itself.
Checking The Power Connection
Make sure the stereo’s power wire is firmly attached to the battery. Loose or corroded connections cause power loss. Clean the terminals and tighten all screws. Use a multimeter to confirm power flow.
Inspecting The Ground Wire
The ground wire must connect securely to the car’s metal frame. A bad ground causes buzzing or no sound. Check for rust or paint that blocks the connection. Replace or tighten the ground wire as needed.
Examining The Fuse
A blown fuse stops the stereo from turning on. Locate the fuse box and check the stereo fuse. Replace it with the same type and rating. Use a fuse tester or visually inspect for breaks.
Testing The Battery Voltage
Low battery voltage causes the stereo to cut out or not start. Use a voltmeter to measure the battery’s charge. A healthy battery reads around 12.6 volts when the car is off. Recharge or replace the battery if voltage is low.
Checking The Wiring Harness
Wiring harnesses connect the stereo to the car’s electrical system. Damaged or mismatched wires cause poor audio or no power. Inspect wires for cuts, burns, or loose plugs. Match wire colors to the stereo’s manual for correct installation.
Addressing Interference And Noise
Interference causes static or humming sounds in the stereo. Keep audio cables away from power wires and antennas. Use shielded cables and secure all connections. Adding a noise filter can reduce unwanted sounds.

Credit: www.reddit.com
Frequently Asked Questions
How Do I Connect Car Stereo To Battery?
To connect a car stereo to a battery, first ensure the battery is disconnected. Connect the stereo’s red wire to the battery’s positive terminal and the black wire to the negative terminal. Secure the connections and test the stereo. Always follow the manufacturer’s instructions for specific wiring details.
What Tools Are Needed For Connecting A Car Stereo?
You will need wire strippers, electrical tape, and a screwdriver. A multimeter can help verify connections. Having a wiring harness adapter simplifies the process. Ensure you have the stereo’s manual for guidance. These tools ensure a safe and effective installation.
Can Connecting A Stereo Drain My Car Battery?
Yes, a stereo can drain your battery if improperly connected. Ensure proper installation and turn off the stereo when the car is off. Consider installing a switch or relay to prevent battery drainage. Regularly check the battery’s health to avoid issues.
Is It Safe To Install A Car Stereo Myself?
Yes, if you follow instructions carefully, it’s safe. Ensure you disconnect the battery before starting. Use proper tools and follow the stereo’s manual. If unsure, consult a professional. Safety is crucial, so don’t rush the process.
Conclusion
Connecting a car stereo to the battery is simple with the right steps. Always check the battery’s voltage before starting. Use proper wires and secure all connections tightly. Avoid loose or exposed wires to prevent short circuits. Test the stereo after connecting to ensure it works well.
Following these tips helps keep your stereo safe and sound. Enjoy clear sound and easy setup without trouble. Stay safe and take your time during installation. This way, your car stereo will deliver great music every drive.