
Is your Pioneer car stereo acting up and leaving you frustrated? You rely on your stereo for music, directions, and calls, so when it stops working, it can throw off your whole drive.
But don’t worry—you don’t have to be a tech expert to fix it. You’ll discover simple, step-by-step tips to get your Pioneer stereo back to perfect sound. Keep reading, and you’ll be enjoying your favorite tunes again in no time.

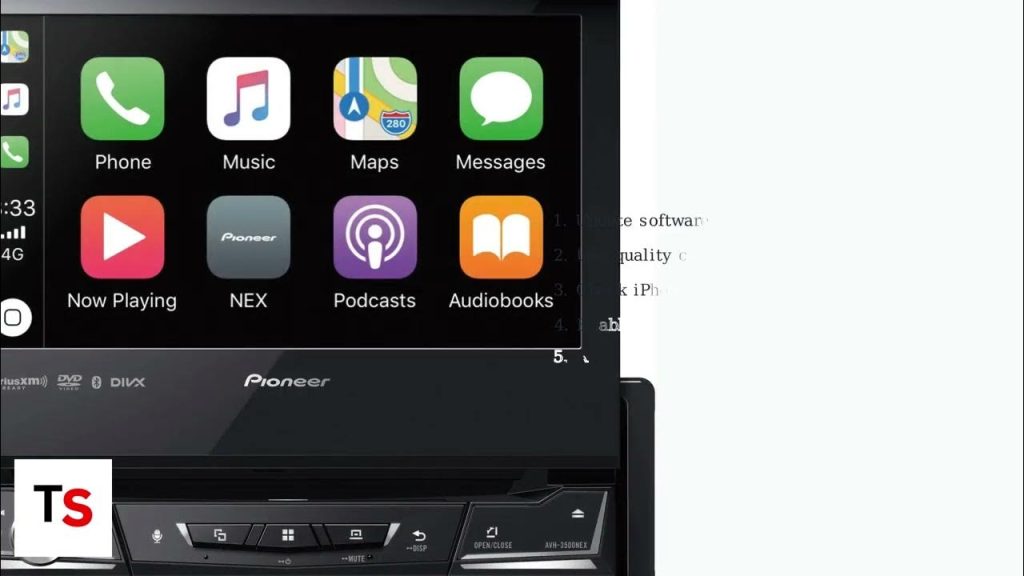
Credit: m.youtube.com
Common Pioneer Stereo Issues
Pioneer car stereos can face several common problems that stop them from working properly. These issues may affect the power, sound, media playback, or connectivity. Understanding these problems helps find the right solution fast. This section covers typical Pioneer stereo troubles and how to spot them.
No Power Or Display
One frequent issue is the stereo not turning on or showing any display. This can happen due to a blown fuse or loose wiring. Sometimes the car battery might be low or dead. Check the power connections and fuses first. Resetting the stereo by disconnecting the car battery for a few minutes can also help.
Sound Problems
Sound issues include no sound, distorted audio, or uneven volume. These can result from speaker wiring faults or faulty speakers. The stereo settings might be wrong or muted. Inspect speaker connections and test with different audio sources. Adjusting the balance and fade settings often fixes uneven sound problems.
Cd And Media Playback Errors
Many users report problems playing CDs or media files. The disc might be dirty or scratched. The CD player lens can be dirty or damaged. Digital media errors often come from incompatible file formats or corrupted files. Cleaning the disc and lens or updating the stereo’s firmware can restore playback.
Connectivity Troubles
Bluetooth or USB connections sometimes fail or disconnect. This can happen due to pairing issues or faulty cables. Outdated software can cause compatibility problems. Restarting the stereo and devices or re-pairing Bluetooth usually solves the problem. Use original cables for USB connections and check for software updates regularly.
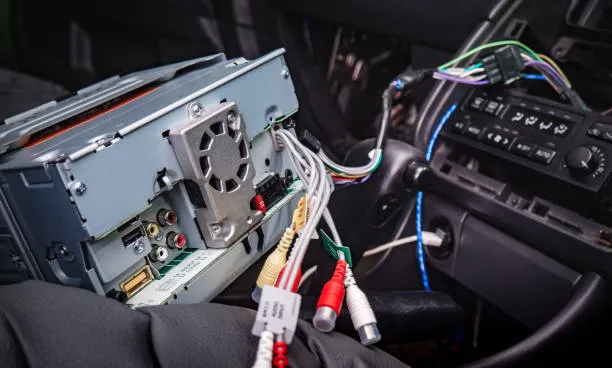
Credit: mobilemechanicshouston.com
Tools And Materials Needed
Fixing a Pioneer car stereo requires the right tools and materials. Using proper equipment makes the job easier and safer. Prepare everything before starting your repair to avoid delays and frustration.
Basic Tools
- Screwdrivers (Phillips and flathead) for removing screws
- Panel removal tool to avoid damaging dashboard parts
- Wire strippers and cutters for handling cables
- Multimeter to check electrical connections and voltage
- Socket wrench set for bolts and nuts
Replacement Parts
- Compatible Pioneer stereo unit or specific replacement components
- Wiring harness adapter to connect stereo to car wiring
- Mounting brackets or screws if original ones are damaged
- Fuses suitable for your car and stereo system
- Electrical tape or heat shrink tubing for insulation
Safety Equipment
- Insulated gloves to protect against electric shock
- Safety glasses to shield eyes from debris
- Protective clothing to avoid scratches and cuts
- Fire extinguisher nearby in case of electrical fires
- Disconnect car battery before starting any electrical work
Diagnosing The Problem
Diagnosing the problem is the first step in fixing a Pioneer car stereo. Understanding what causes the issue helps you find the right solution quickly. Start by checking the power supply to ensure the stereo has electricity. Then, inspect all wiring and connections for any loose or damaged parts. Testing the fuse is important to see if it is blown. Finally, try resetting the stereo to clear any errors or glitches.
Checking Power Supply
Make sure the car’s battery is charged and working. Turn on the ignition to let power flow to the stereo. Use a multimeter to check voltage at the stereo’s power wire. It should read around 12 volts. If there is no power, check the car’s battery and ignition switch. Without power, the stereo will not turn on or function.
Inspecting Wiring And Connections
Look behind the stereo unit for all wires and plugs. Loose or disconnected wires cause problems. Check for any damaged or frayed wires that could short circuit. Make sure connectors are firmly plugged in. Wiggle wires gently to test connection strength. Secure or replace any faulty wiring before testing the stereo again.
Testing The Fuse
Locate the fuse box in your car, often under the dashboard. Find the fuse labeled for the car stereo. Remove the fuse and check if the metal strip inside is broken. A broken strip means the fuse is blown and needs replacement. Use a fuse with the same amperage rating. Reinstall the fuse and test the stereo’s function again.
Resetting The Stereo
Some issues clear up with a simple reset. Locate the reset button on the stereo, usually a small hole. Use a pointed object like a paperclip to press the button gently. Hold it for a few seconds to reset the system. This can fix software errors or frozen screens. After resetting, check if the stereo works correctly.
Fixing Power And Display Issues
Power and display issues are common problems that can make your Pioneer car stereo frustrating to use. These issues often stem from simple faults like blown fuses, loose wiring, or display malfunctions that can be fixed with some basic troubleshooting. You don’t always need an expert—sometimes, a little hands-on effort is all it takes to bring your stereo back to life.
Replacing Fuses
Fuses protect your car stereo from power surges. If your stereo won’t turn on, a blown fuse could be the culprit. Check the fuse box in your car and look for any fuses related to the stereo system.
Use a fuse puller or tweezers to remove the fuse carefully. Inspect it closely—if the metal wire inside the fuse is broken or burnt, replace it with one of the same rating. Have you checked your fuses before blaming the stereo itself?
Repairing Wiring
Loose or damaged wiring can disrupt power and cause your stereo to malfunction. Start by examining the wiring harness connected to the stereo unit. Look for any frayed wires, loose connectors, or corrosion.
If you find damaged wires, strip the insulation gently and twist the wires back together, then secure them with electrical tape or heat shrink tubing. Ensuring solid connections can often restore your stereo’s power. Have you ever traced wires only to find a hidden loose connection?
Fixing Display Malfunctions
Display problems like flickering, blank screens, or distorted images can ruin your listening experience. Try resetting your stereo by disconnecting the car battery for a few minutes and reconnecting it—this can clear minor software glitches.
If the problem persists, check the display ribbon cable inside the stereo unit. Sometimes, this cable becomes loose or dirty. Carefully reseating or cleaning the connector with isopropyl alcohol might fix the issue. What if a simple cable adjustment could save you a costly repair?
Solving Sound Problems
Sound problems in your Pioneer car stereo can turn a great drive into a frustrating experience. Poor audio quality, distortion, or no sound at all are common issues that you can often fix yourself. Addressing these problems starts with understanding the root cause and applying the right solution.
Adjusting Audio Settings
Sometimes, the issue isn’t hardware but how your audio settings are configured. Check the balance and fade controls to ensure sound is evenly distributed between speakers. Also, review the equalizer settings; overly boosted bass or treble can cause distortion or muffled sound.
Try resetting the audio settings to factory defaults if you’re unsure what changes were made. This simple step can often clear up sound inconsistencies. Have you ever found your music sounding flat only to discover a tiny dial was off?
Replacing Faulty Speakers
If certain speakers produce no sound or crackle, they might be damaged or worn out. Speakers can fail due to age, exposure to moisture, or physical damage. Testing each speaker individually helps pinpoint the faulty one.
Replacing a speaker is straightforward if you have the right tools. Make sure you buy a speaker compatible with your Pioneer stereo system for the best sound. Remember, new speakers can dramatically improve your audio experience.
Fixing Distorted Sound
Distortion often signals interference or a problem with wiring or connections. Inspect the speaker wires for loose connections or frayed insulation. Tighten any loose connectors and replace damaged wires to restore clean sound.
Another cause of distortion can be overdriving the amplifier. Lower the volume or adjust the gain settings on your stereo to prevent this. Do you notice distortion only at high volumes? That’s a sign your system needs adjusting.
Repairing Media Playback Errors
Media playback errors can disrupt your driving experience. Fixing these issues often restores clear sound and smooth operation. Some errors come from dirty parts, outdated software, or connection problems. Simple checks and fixes usually solve most playback problems. Focus on cleaning, updating, and connection troubleshooting to improve performance.
Cleaning The Cd Mechanism
Dust and dirt can block the CD mechanism. This causes skipping or failure to read discs. Use a soft, dry cloth to clean discs before playing. A CD lens cleaner helps remove dust inside the player. Insert the cleaner disc and follow its instructions carefully. Avoid using liquids or sharp objects inside the player. Regular cleaning keeps the mechanism working well and extends its life.
Updating Firmware
Firmware controls the stereo’s features and performance. Old firmware can cause playback errors or bugs. Visit the Pioneer official website to check for updates. Download the latest firmware to a USB drive. Insert the USB into the stereo and follow the update steps. Updating firmware can improve compatibility and fix known issues. Keep your stereo’s software current for best results.
Handling Usb And Bluetooth Issues
USB and Bluetooth connections often cause playback problems. Check the USB cable and port for damage or dirt. Use a different USB device to test the connection. For Bluetooth, remove the device from the stereo’s paired list. Re-pair the device to refresh the connection. Make sure the device supports the stereo’s Bluetooth version. Restarting both devices can also clear temporary glitches. Clear, stable connections improve media playback quality.
Preventive Maintenance Tips
Keeping your Pioneer car stereo in top shape isn’t just about fixing it when something goes wrong. Preventive maintenance can save you time, money, and frustration. Small, regular efforts can extend the life of your stereo and keep the sound quality crisp and clear.
Regular Cleaning
Dust and dirt can easily build up on your stereo’s buttons, screen, and ports. Use a soft, dry cloth to wipe the surface gently every few weeks. Avoid harsh chemicals that might damage the finish or seep inside and cause electrical issues.
Don’t forget to clean the CD slot or USB port carefully. A can of compressed air can blow out dust without damaging delicate components. This simple habit helped me avoid a sticky button problem that once made my stereo unresponsive.
Proper Usage Practices
How you use your stereo matters. Avoid turning the volume up to the maximum for long periods, as this strains the speakers and internal circuits. Also, don’t force cables or plugs into ports; it can cause loose connections or damage pins.
Consider turning off the stereo before starting your car to prevent power surges. Have you noticed how quickly a device can wear out when it’s pushed too hard? Your stereo is no different, so treating it gently will keep it working better for longer.
Periodic System Checks
Set a reminder every few months to check your stereo system thoroughly. Test all functions like radio tuning, Bluetooth connectivity, and sound balance. Look for any signs of distortion or unusual noises that might indicate a problem.
Regularly inspect wiring for wear or loose connections, especially if you hear crackling or intermittent sound. Catching these issues early can prevent costly repairs or total failure. How often do you really check your car’s electronic systems beyond the basics?

Credit: www.reddit.com
Frequently Asked Questions
Why Is My Pioneer Car Stereo Not Turning On?
If your Pioneer car stereo won’t turn on, check the fuse first. Ensure all wiring connections are secure. Sometimes, a reset can resolve the issue. If these steps don’t work, consider consulting a professional to avoid further damage.
How Do I Reset My Pioneer Car Stereo?
To reset your Pioneer car stereo, locate the reset button. It’s usually a small, pinhole-sized button. Use a pointed object to press it. Hold for a few seconds. This process can solve many minor issues by restoring default settings.
Why Is There No Sound From My Pioneer Stereo?
If there’s no sound, first check the volume and mute settings. Ensure speaker connections are secure. Inspect for any loose wires. If the problem persists, test with another audio source or consult a professional for further diagnosis.
How Can I Fix Distorted Sound?
For distorted sound, start by lowering the volume level. Check if the speakers are damaged or misaligned. Verify that your audio settings are properly configured. If the problem continues, inspect the wiring or consult a professional for assistance.
Conclusion
Fixing your Pioneer car stereo is easier than it seems. Start with simple steps like checking connections and power. Small problems often have quick solutions. Take your time and follow instructions carefully. This saves money and frustration. Remember, patience helps you find the right fix.
Enjoy clear sound and music again soon. Keep your stereo working well with regular care. You can handle it!

