Are you ready to upgrade your car’s sound system but don’t know where to start? Installing a Pioneer car stereo yourself can save you time and money, and it’s easier than you think.
Imagine enjoying crystal-clear music and all your favorite features without waiting for a professional. In this guide, you’ll get simple, step-by-step instructions that anyone can follow. By the end, you’ll have your new stereo up and running, transforming your driving experience.
Keep reading—you’re just moments away from better sound and total control behind the wheel.
Gather Necessary Tools
Before you dive into installing your new Pioneer car stereo, it’s important to gather all the necessary tools. Having everything ready not only saves time but also prevents frustration during the process. Missing just one tool can turn a straightforward job into a tricky challenge.
Tools Required For Installation
You’ll need a few basic tools to get started. Most installations require a set of screwdrivers—both Phillips and flathead. A panel removal tool will help you safely pry off dashboard panels without causing damage.
Other essential items include:
- Wire stripper and crimper – for connecting wires securely
- Electrical tape or heat shrink tubing – to insulate wire connections
- Socket wrench set – to remove mounting bolts
- Multimeter – to check electrical connections and avoid mistakes
Have you ever tried to install electronics without the right tools? It can be frustrating and even risky for your car’s electrical system.
Safety Precautions
Safety should be your top priority before starting the installation. Always disconnect your car battery to prevent electrical shocks or shorts. This simple step protects both you and your vehicle’s electronics.
Use gloves to avoid cuts from sharp metal edges inside the dashboard. Work in a well-lit area so you don’t miss any crucial connections. And don’t rush—careful attention reduces the chance of mistakes that could damage your new stereo or your car.
Prepare Your Vehicle
Getting your vehicle ready is a crucial part of installing a Pioneer car stereo. Skipping these preparation steps can lead to electrical issues or damage to your car’s interior. Taking the time to properly prepare ensures a smooth and safe installation process.
Disconnect The Battery
Before touching any wires or the existing stereo, disconnect your car’s battery. This simple safety step prevents electrical shorts or shocks while you work. Locate the negative terminal and use a wrench to loosen the bolt, then remove the cable.
Have you ever experienced a sudden spark or a blown fuse during a car upgrade? Disconnecting the battery helps you avoid that frustration and costly repairs. Plus, it protects your vehicle’s sensitive electronic systems from damage.
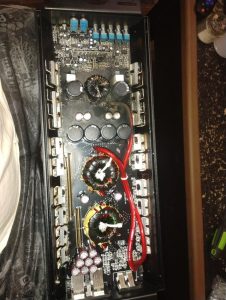
Remove Existing Stereo
Take time to carefully remove the current stereo unit. Most stereos are secured with screws or clips, so gather the right tools like screwdrivers or trim removal tools. Gently pry off the dashboard trim surrounding the stereo to access the mounting hardware.
Don’t rush this step; forcing parts can break plastic clips or damage your dashboard. If you hit resistance, double-check for hidden screws or bolts. Keeping track of all screws and parts ensures you can put everything back together neatly after installation.
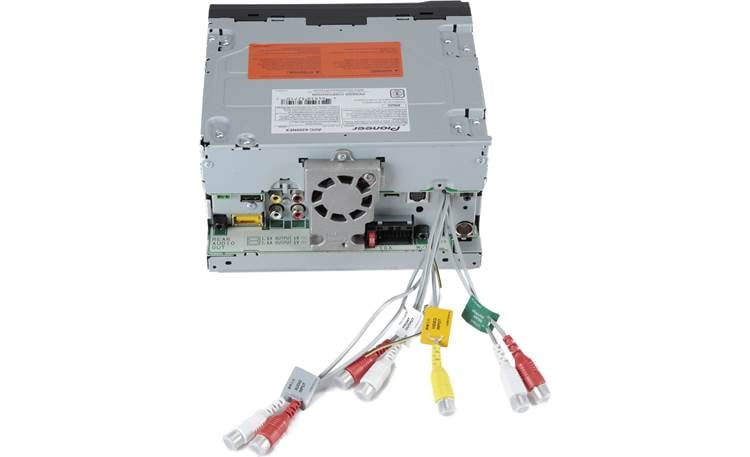
Wire The Pioneer Stereo
Wiring the Pioneer stereo is a key step to ensure it works smoothly. Correct wiring connects the stereo to your car’s power and speakers. This process requires care and attention to detail. Follow clear steps to avoid any issues.
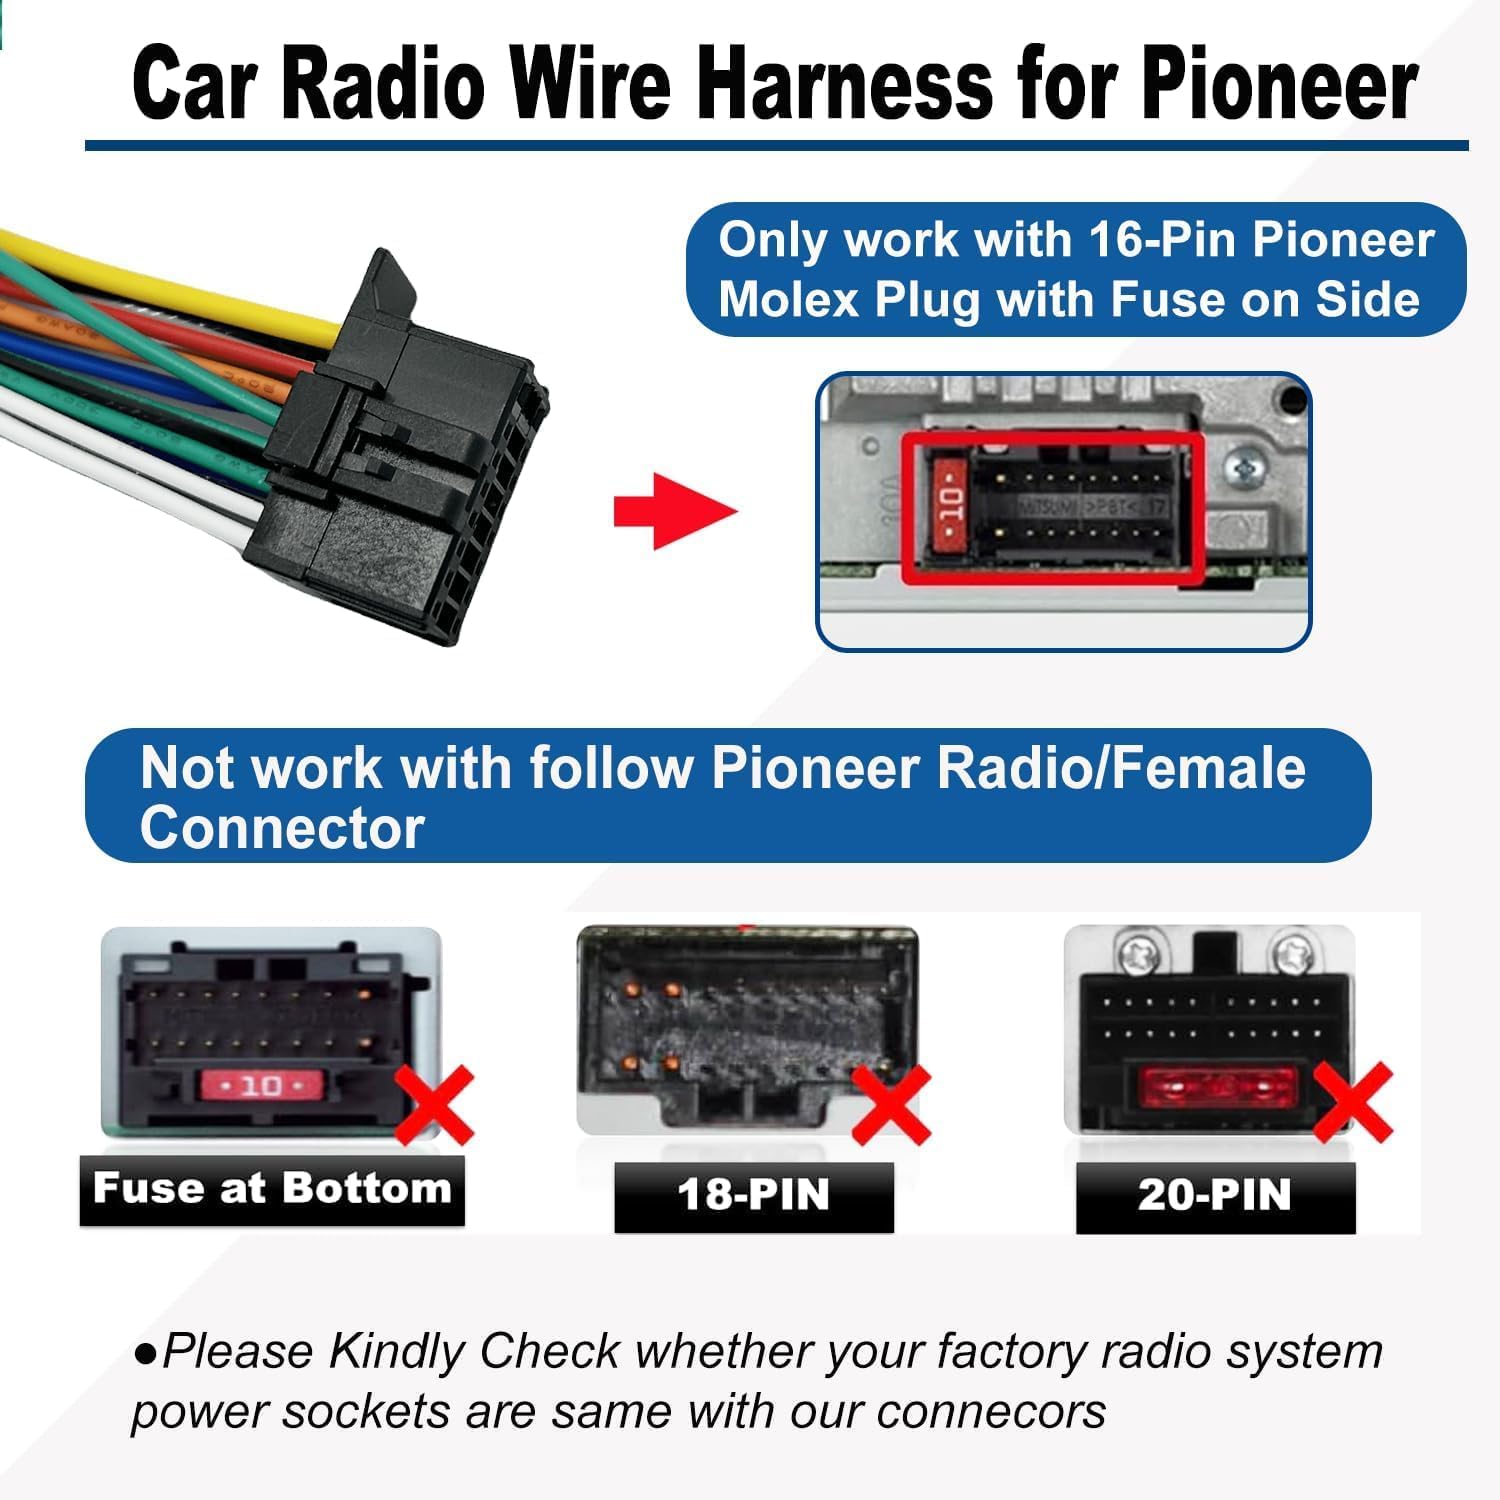
Identify Wiring Harness
Start by locating the wiring harness. It is a bundle of wires with different colors. Each color has a specific function, like power, ground, or speaker connection. Check the manual for the color code chart. Match the car’s wiring harness to the stereo’s harness.
Connect Wires Correctly
Match wires by color and function. Typical wire colors include:
- Red for ignition power
- Yellow for constant power
- Black for ground
- White, gray, green, and purple for speaker wires
Use wire connectors or solder to join wires. Avoid loose connections. Secure each wire to prevent shorts or disconnections.
Secure Connections
After connecting wires, cover them with electrical tape or heat shrink tubing. This protects against moisture and vibration. Bundle wires neatly with zip ties. Double-check each connection for firmness. Proper securing keeps the stereo functioning without interruption.
Credit: www.amazon.com
Mount The Stereo
Mounting the stereo is a key part of installing your Pioneer car stereo. This step secures the unit and ensures it fits well inside your dashboard. Proper mounting prevents vibrations and keeps the stereo stable while driving.
Install Mounting Bracket
Start by attaching the mounting bracket to the dashboard opening. The bracket holds the stereo firmly in place. Align the bracket with the dashboard slots. Use screws or clips that come with the bracket. Tighten the screws evenly to avoid tilting. Make sure the bracket is flush and secure.
Fit The Stereo Unit
Slide the stereo unit into the mounting bracket carefully. Push it straight in to avoid damaging wires. You will hear a click or feel it lock in place. Check if the stereo is level and stable. Secure it with screws if your model requires it. Avoid forcing the unit to prevent damage.
Test The System
Testing your Pioneer car stereo after installation is crucial to ensure everything works perfectly. This final step confirms that all connections are secure and the system functions as expected. Skipping this part might leave you with unexpected issues on the road.
Reconnect The Battery
Before testing, reconnect your car battery’s negative terminal securely. Loose connections here can cause power interruptions or damage the stereo system.
Double-check the terminal for corrosion or dirt. Cleaning it ensures a solid connection and stable power supply.
Have you ever powered up your device only to find it dead? A simple battery reconnection often solves that problem.
Power On And Check Functions
Turn on your car stereo and watch for the startup display. If the screen lights up, that’s a good sign your wiring is correct.
Test essential features like volume control, radio tuning, Bluetooth connectivity, and USB playback. Make sure each function responds smoothly without glitches.
- Check the sound output on all speakers.
- Try switching between AM/FM stations.
- Pair your phone via Bluetooth and test call quality.
What happens if a feature doesn’t work? Troubleshoot by revisiting wire connections or consulting the Pioneer manual. Your goal is a flawless audio experience before hitting the road.
Credit: www.crutchfield.ca
Finalize Installation
Finalizing the installation of your Pioneer car stereo ensures it works smoothly and looks neat. This step involves putting back all parts removed during installation and setting up the stereo for the best sound experience. Taking time here helps avoid issues and improves your car’s audio system.
Reassemble Dashboard
Start by carefully placing all dashboard panels back into position. Check that all clips and screws fit securely without forcing any part. Make sure wiring is tucked away neatly to avoid pinching or damage. Use a soft cloth to wipe any fingerprints or dust on panels. Test buttons and vents to confirm everything moves freely before fully tightening screws.
Adjust Settings
Turn on your Pioneer stereo and access the main menu. Set the language, time, and date to your preference. Adjust sound settings such as bass, treble, and balance for clear audio. Use the equalizer presets or customize to match your music style. Connect Bluetooth or other devices and test audio playback. Save your settings to prevent losing them after turning off the car.
Credit: www.feoa.net
Frequently Asked Questions
How Do I Prepare My Car For Pioneer Stereo Installation?
Start by disconnecting the car battery to avoid electric shock. Remove the old stereo carefully using proper tools. Gather all necessary Pioneer stereo components and wiring harnesses before beginning the installation.
What Tools Are Needed To Install A Pioneer Car Stereo?
You need a screwdriver set, wire strippers, electrical tape, and a wiring harness adapter. A dash removal tool can help prevent damage. Having a multimeter is useful for checking wiring connections.
How Do I Connect Wiring For A Pioneer Stereo Correctly?
Match each wire from the car harness to the stereo wires by color. Use a wiring diagram specific to your car model. Secure connections with crimp connectors or soldering for a reliable fit.
Can I Install A Pioneer Stereo Without Professional Help?
Yes, with basic tools and careful attention to instructions, you can install it yourself. Follow the manual step-by-step, and take safety precautions. If unsure, consulting a professional is always a safe choice.
Conclusion
Installing a Pioneer car stereo is simple with the right steps. Follow the guide, and enjoy better sound in your car. Always keep your tools ready and organized. Double-check connections to avoid issues later. Patience is key for a smooth installation process.
Remember to secure all parts firmly. Your new stereo promises enhanced music experiences. Now, hit the road and enjoy your tunes. Consider seeking help if you face any difficulties. Enjoy the upgrade and drive safely with your new sound system.