How to Wire 2 Amplifiers in a Car: Step-by-Step Guide
If you want to boost your car’s sound system, wiring two amplifiers can make a huge difference. But it might seem tricky if you’re not sure where to start.
Don’t worry—this guide will walk you through every step clearly and simply. By the end, you’ll know exactly how to set up your amps for powerful, clear sound that transforms your driving experience. Ready to take your car audio to the next level?
Let’s dive in.
Choosing The Right Amplifiers
Choosing the right amplifiers is key to building a strong car audio system. The amplifiers must work well with your speakers and power needs. Picking the right type ensures clear sound and avoids damage to your equipment. Understanding the basics helps you make smart choices.
Matching Amplifiers To Speakers
Amplifiers and speakers must match in impedance and power range. Check the speaker’s ohm rating and choose an amplifier that supports it. An amplifier with too much power can damage speakers. Too little power causes weak sound and distortion. Aim for an amplifier that provides clean power within the speaker’s limits.
Power Requirements
Know the power your speakers need for the best sound. RMS power rating shows the continuous power an amplifier can deliver. Match the amplifier’s RMS output to the speaker’s RMS rating. Avoid peak power ratings; they only show short bursts. Proper power prevents clipping and keeps sound quality high.
Class Types And Efficiency
Amplifiers come in different classes: A, B, AB, and D are common. Class A gives pure sound but uses a lot of power. Class B is more efficient but may cause distortion. Class AB balances sound quality and efficiency. Class D is very efficient and works well for subs. Choose a class that fits your sound needs and car’s power system.
Gathering Necessary Tools And Materials
Before you dive into wiring two amplifiers in your car, having the right tools and materials ready is crucial. It saves time, prevents frustration, and ensures a safer installation. Skipping this step often leads to unnecessary trips to the store or, worse, damage to your car’s electrical system.
Wiring Kits And Cables
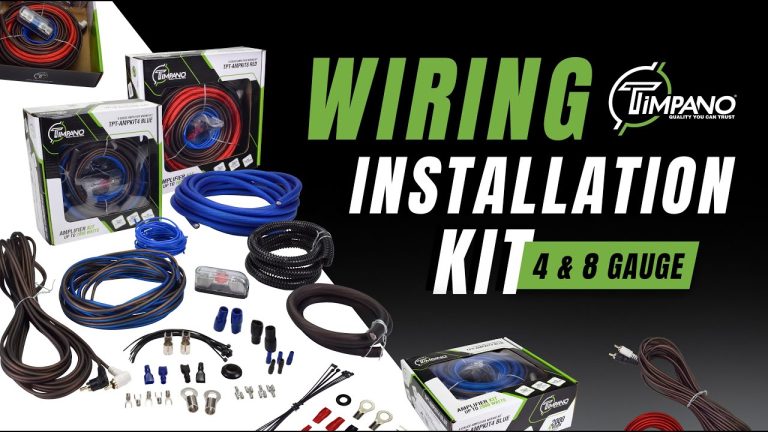
Start with a quality wiring kit designed for car audio amplifiers. These kits usually include power cables, ground cables, and remote turn-on wires. Choose cables with the right gauge—thicker cables (lower gauge numbers) handle more power and reduce voltage drops.
Don’t forget speaker wires for connecting your amps to the subwoofers or speakers. Using cables with good insulation helps avoid interference and ensures a clean sound. Have extra length on hand; it’s better to have a bit more than to struggle with short cables.
Connectors And Fuses
Connectors keep your wiring secure and reliable. Pick ring terminals for power and ground connections to your car’s battery and chassis. Quick-disconnect plugs or spade terminals work well for speaker and remote wires, making future adjustments easier.
Fuses protect your system from electrical shorts and power surges. Use an inline fuse holder near the battery with the fuse rating matching your amplifier’s requirements. This simple addition can save you from costly repairs or even a fire hazard.
Basic Tools Checklist
- Wire strippers:Essential for cleanly removing insulation without damaging the wire.
- Crimping tool:Helps secure connectors tightly on wires.
- Screwdrivers:Both Phillips and flathead for panel removal and securing terminals.
- Multimeter:Useful for checking voltage, continuity, and grounding points.
- Electrical tape or heat shrink tubing:For insulating and protecting wire connections.
- Zip ties:Keep wires organized and prevent rattling.
Gathering these tools before you start can make the process smoother and reduce errors. Have you ever started a project only to realize you’re missing a crucial tool halfway through? Avoid that headache by preparing your toolkit in advance.
Preparing The Vehicle
Before you start wiring two amplifiers in your car, setting up the vehicle properly is essential. This preparation ensures safety and smooth installation. Taking time to organize your workspace and plan your wiring will save you headaches later.
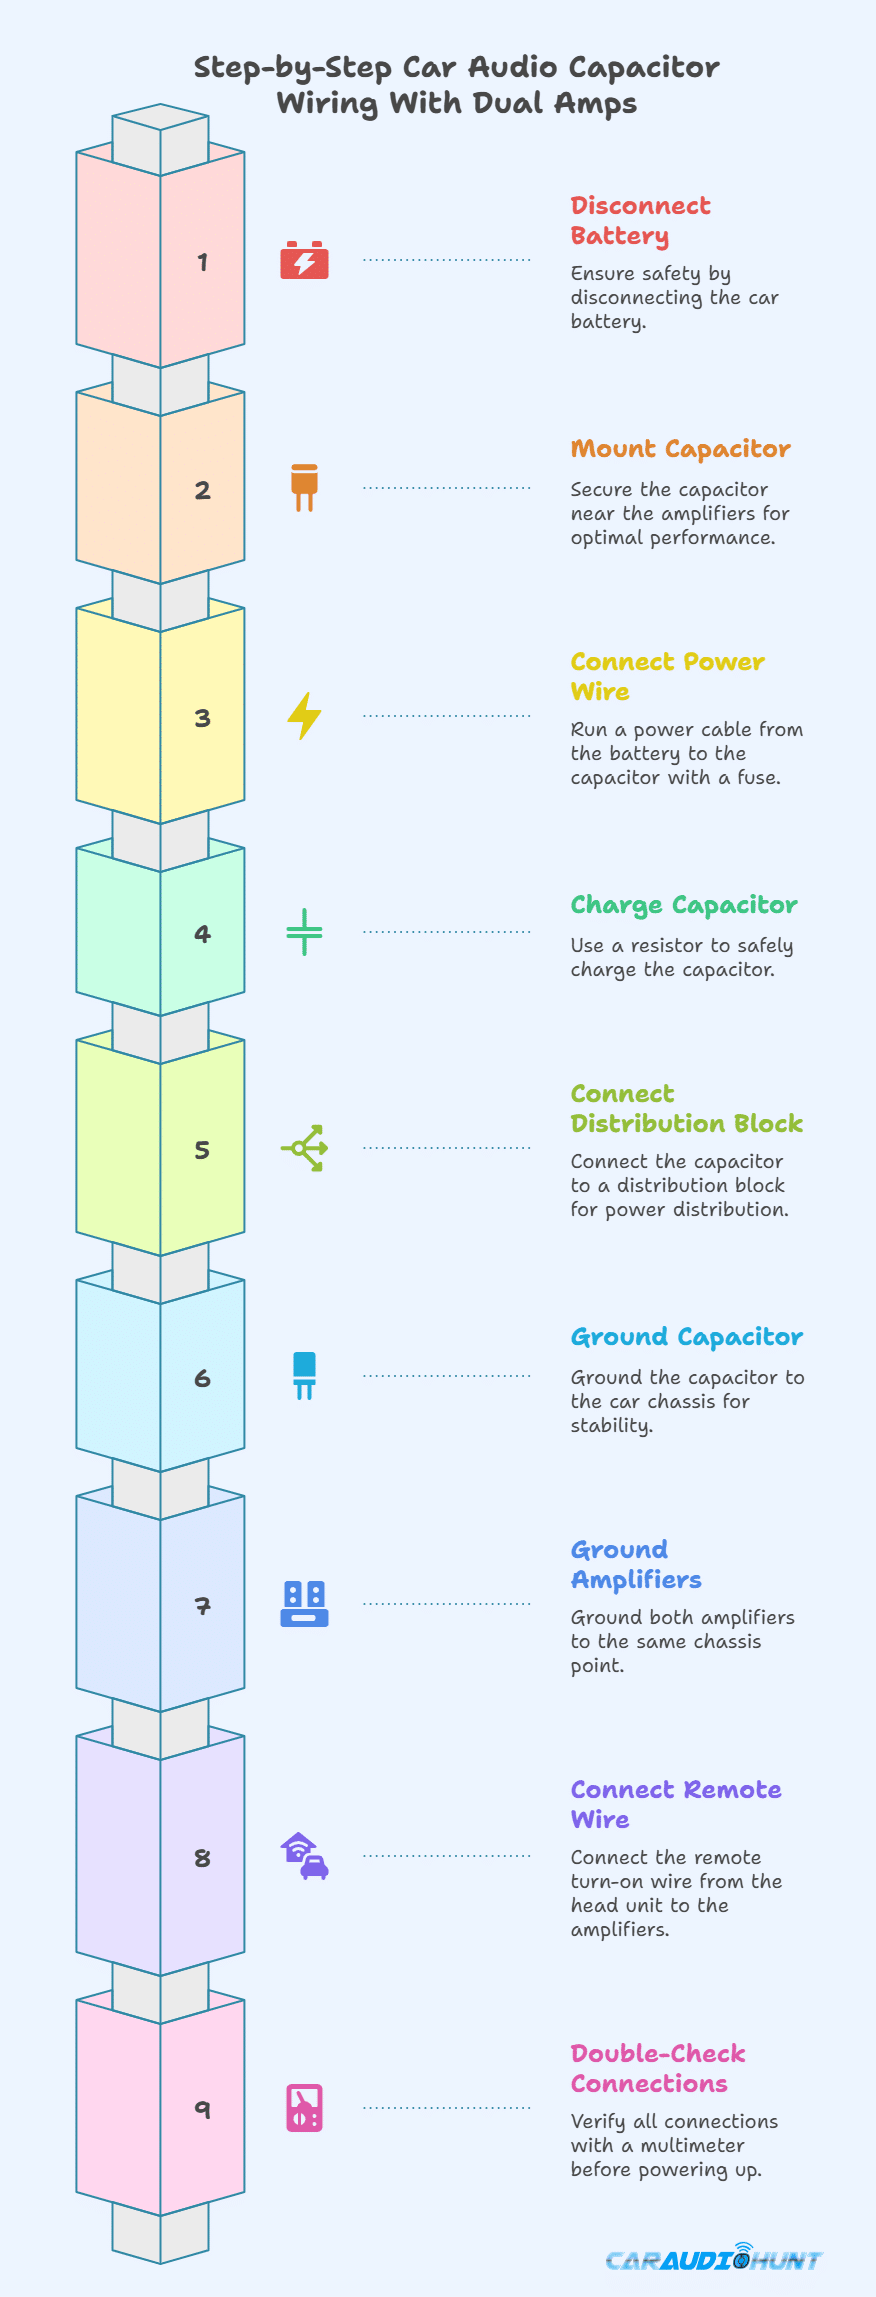
Disconnecting The Battery
Always disconnect the negative terminal of your car battery first. This step prevents accidental short circuits and protects both you and your vehicle’s electrical system.
I once skipped this step and ended up blowing a fuse, which cost me extra time and money. Trust me, a simple wrench and a few minutes here can avoid big problems later.
Planning The Wiring Route
Carefully plan where your wires will run before starting to install. Look for existing wiring harnesses or gaps between panels to hide cables and protect them from heat or sharp edges.
Think about how you’ll route the power, ground, and signal wires separately to minimize interference. Have you checked if there are factory grommets you can use? These make running wires through bulkheads much cleaner and safer.
Clearing Space For Amplifiers
Find a spot for each amplifier that allows good airflow and easy access for wiring. Under seats, in the trunk, or behind panels are common choices, but make sure the location won’t trap heat.
Make room by removing unnecessary items and securing loose parts. You don’t want your new amps to rattle or overheat because of tight spaces.
Running Power And Ground Wires
Running power and ground wires is key to wiring two amplifiers in a car. These wires supply electricity and complete the circuit for the amplifiers. Proper wiring prevents voltage drops and electrical noise. It also protects the car’s electrical system from damage. Careful attention to wire gauge, routing, and grounding ensures reliable amplifier performance.
Selecting Proper Gauge Wire
Choosing the right wire gauge depends on the amplifiers’ total current draw. Thicker wires carry more current safely. Using wires too thin causes heat build-up and voltage loss. Check each amplifier’s manual for recommended wire size. When wiring two amplifiers, add their current needs together. Use a wire gauge chart to pick the correct size. Common sizes include 8, 4, and 0 gauge. Always choose a gauge that meets or exceeds the total current requirement.
Routing Power Wire From Battery
Run the power wire directly from the battery’s positive terminal. Use a fuse holder within 18 inches of the battery. This fuse protects the wire and vehicle in case of a short circuit. Route the wire through the car’s firewall using a grommet. Avoid sharp edges that can cut the wire insulation. Secure the wire with zip ties to keep it from moving. Keep the power wire away from signal cables to reduce noise. Use a wire loom or conduit for extra protection.
Establishing A Solid Ground Connection
Ground wires complete the electrical circuit to the car chassis. Use the same gauge wire as the power wire for grounding. Find a clean, unpainted metal surface near the amplifiers. Sand the area to remove paint and rust. Attach the ground wire with a ring terminal and bolt. Tighten the bolt firmly to ensure good contact. Avoid grounding to plastic or painted surfaces. Poor grounding causes amplifier noise and weak performance. Use multiple ground points if needed for stable current flow.
Connecting The Amplifiers
Connecting two amplifiers in your car requires careful attention to detail to ensure both units work efficiently without causing electrical issues. The wiring process involves powering the amps correctly, enabling them to turn on with your car, and ensuring a clean audio signal passes through. Let’s break down these critical connections to help you get the best sound from your setup.
Wiring The Power And Ground Terminals
Start by running a quality power wire from your car’s battery to each amplifier. Use a fuse close to the battery to protect your system from sudden power surges.
Grounding is just as important. Connect the ground terminal of each amplifier to a clean, bare metal point on your car’s chassis. A poor ground can cause unwanted noise or even damage your amps.
Make sure the power and ground wires are of the same gauge to avoid imbalances. Have you ever experienced a faint buzzing sound in your car audio? That’s often caused by improper grounding.
Linking Remote Turn-on Wire
The remote turn-on wire signals your amplifiers to power on when you start your car stereo. Usually, this wire runs from the head unit’s remote turn-on lead to each amp.
If your head unit only has one remote output, you can use a distribution block or splice the wire carefully to feed both amps. Keep these wires away from power cables to prevent interference.
Have you checked if your amps turn off with the stereo? If not, the remote wire might be miswired or missing.
Connecting Rca Cables
RCA cables carry the audio signal from your head unit to the amplifiers. Use high-quality, shielded RCA cables to reduce noise and maintain sound clarity.
Connect the RCA outputs from your head unit to the inputs on each amplifier. If your head unit has only one set of RCA outputs, consider using a line output converter or RCA splitter designed for audio applications.
Remember, the shortest cable runs are best to minimize signal loss. Are your cables routed away from power wires? If not, it might cause humming or static in your speakers.
Credit: www.diymobileaudio.com
Speaker And Subwoofer Wiring
Wiring your speakers and subwoofers correctly is crucial to get the best sound from your car’s amplifiers. Mistakes here can lead to poor audio quality or even damage to your equipment. Understanding how to connect each component will help you build a setup that sounds powerful and clear.
Wiring Speakers To Amplifiers
Connecting speakers to amplifiers requires attention to the speaker’s impedance and the amplifier’s output capabilities. Each speaker has a recommended ohm rating, usually 4 or 8 ohms, which must match or be compatible with the amplifier’s specifications.
Use quality speaker wire and keep the runs as short as possible to reduce signal loss. Make sure to connect the positive (+) terminal on the amplifier to the positive terminal on the speaker, and the same for the negative (-) terminals. Reversing polarity can cause phase issues and weak bass response.
Parallel Vs Series Connections
Choosing between parallel and series wiring affects the total impedance load on your amplifier. Wiring speakers in parallel decreases total impedance, while series wiring increases it.
- Parallel wiring:Connect all positive terminals together and all negative terminals together. This is common for wiring multiple speakers to one amplifier channel.
- Series wiring:Connect the positive terminal of one speaker to the negative terminal of the next, creating a chain. This is useful to increase impedance and protect your amp from overload.
Ask yourself: Do your amplifiers handle low impedance loads? If not, series wiring might save your gear. But if you want maximum power and your amp supports it, parallel wiring could be your best choice.
Bridging Amplifiers
Bridging combines two amplifier channels to drive a single speaker with more power. This is especially useful for powering a subwoofer that demands high wattage.
Before you bridge, check your amplifier’s manual for specific instructions and minimum impedance requirements. Bridging typically requires connecting the speaker to the positive terminal of one channel and the negative terminal of the other channel.
Keep in mind that bridging increases power output but also heat generation, so ensure your amplifier’s cooling system is up to the task. Have you tested your setup at low volume first? This can prevent damage and confirm everything is wired correctly before pushing your system hard.
Securing And Testing The Setup
Securing and testing your car’s amplifier setup is vital for safety and sound quality. Proper wire management prevents shorts and damage. Testing ensures everything works before final use. This phase protects your investment and your vehicle.
Tying And Protecting Wires
Gather all amplifier wires into neat bundles. Use zip ties to secure them firmly. Avoid tight bends or kinks that can break wires. Cover exposed connections with electrical tape or heat shrink tubing. Protect wires from sharp edges using split loom tubing. This prevents wear and accidental shorts during driving.
Reconnecting The Battery
Before reconnecting, double-check all connections. Ensure ground wires are solid and power cables are secure. Reattach the negative battery terminal carefully. Tighten the terminal to avoid loose contact. Keep tools and metal objects away from the battery. This reduces risk of sparks and damage.
Performing Initial Power-on Tests
Turn on your car’s ignition without starting the engine. Listen for any unusual sounds like buzzing or clicking. Check if both amplifiers power up correctly. Use a multimeter to verify voltage at amplifier terminals. Play audio at low volume to test sound output. Observe for distortion or cutting out. Stop immediately if you detect any problems.
Credit: www.diymobileaudio.com
Adjusting Amplifier Settings
Adjusting amplifier settings is key to getting the best sound from two amplifiers in your car. Proper tuning ensures clear, balanced audio without damage. It helps each amplifier work well with your speakers and subwoofers. Take time to adjust settings carefully for an enjoyable listening experience.
Setting Gain And Crossovers
Set the gain to match the output of your car stereo. This controls the amplifier’s input sensitivity. Too high gain causes distortion; too low results in weak sound.
Use crossovers to direct the right frequencies to each speaker. High-pass filters send only high frequencies to smaller speakers. Low-pass filters send low frequencies to subwoofers. This prevents sound overlap and improves clarity.
Balancing Sound Levels
Balance the volume between the two amplifiers for smooth sound. Listen carefully and adjust levels until the output feels even. Avoid one amplifier overpowering the other. This keeps your music clear and well-blended throughout the car.
Avoiding Distortion
Distortion damages sound quality and speaker life. Lower gain if you hear crackling or buzzing sounds. Check wiring and connections for any faults. Use a sound meter or app to monitor levels and avoid pushing the system too hard.
Troubleshooting Common Issues
Troubleshooting common issues helps keep your car amplifiers running smoothly. Small problems can stop your sound system from working well. Identifying and fixing these issues quickly saves time and frustration. Below are some common problems and easy ways to solve them.
No Power Or Sound
Check the power connections first. Loose or disconnected wires often cause no power. Make sure the fuse is not blown. Confirm the remote turn-on wire is connected properly. Test the amplifier’s power and ground cables with a multimeter. Also, check the head unit settings to ensure the amp is receiving a signal.
Ground Loop Noise
Ground loop noise sounds like a constant hum or buzz. It happens when amplifiers share different ground points. Use a single grounding location for all amps. Keep ground wires short and thick. Adding a ground loop isolator can also reduce noise. Shield audio cables away from power cables to prevent interference.
Overheating Amplifiers
Amplifiers get hot from heavy use or poor ventilation. Make sure amps have enough space to breathe. Clean dust and debris from cooling fans and vents. Check that wiring matches amplifier specifications to avoid overload. Consider installing a cooling fan or heat sink for better airflow. Overheating can cause your amps to shut down unexpectedly.
Credit: www.crutchfield.ca
Frequently Asked Questions
How Do I Connect Two Amplifiers In My Car?
To connect two amplifiers, use a high-quality RCA splitter or line output converter. Connect the head unit to both amps carefully. Ensure proper grounding and power wiring for each amplifier to avoid noise and interference.
Can I Use One Battery For Two Amplifiers?
Yes, one battery can power two amplifiers. Use a high-capacity battery and proper gauge wiring. Install a distribution block for cleaner power management and prevent voltage drops or electrical issues.
What Wiring Gauge Is Best For Two Amplifiers?
Use 4-gauge wiring for most dual amplifier setups. If amplifiers draw high current, consider 0 or 2-gauge wires. Proper gauge prevents power loss and keeps your audio system stable and safe.
How Do I Avoid Noise When Wiring Two Amplifiers?
Keep power and signal wires separated to reduce interference. Use shielded RCA cables and secure all connections tightly. Proper grounding and avoiding cable crossing help maintain clean sound quality.
Conclusion
Wiring two amplifiers in your car can boost your audio experience. Follow the steps carefully to ensure safety and efficiency. Always double-check connections to prevent issues. Use quality cables for better sound. Remember, practice makes perfect. Keep learning and improving your skills.
Consult a professional if unsure about any step. Enjoy the enhanced sound quality in your car. The right setup brings music to life. Your car audio system can be truly amazing. Stay patient and focused during the process. Happy wiring!