How to Wire Car Stereo to Amplifier: Easy Step-by-Step Guide
Wiring your car stereo to an amplifier might sound tricky, but it doesn’t have to be. If you want clearer sound, stronger bass, and a better music experience every time you drive, this guide is for you.
You’ll learn simple steps to connect your stereo and amplifier the right way, avoiding common mistakes that could damage your equipment. Keep reading, and by the end, you’ll have the confidence to upgrade your car’s sound system like a pro.
Gather Necessary Tools
Gathering the right tools is the first step to wiring your car stereo to an amplifier. Having everything ready makes the process smoother and safer. It also helps avoid mistakes that could damage your equipment or your car’s electrical system.
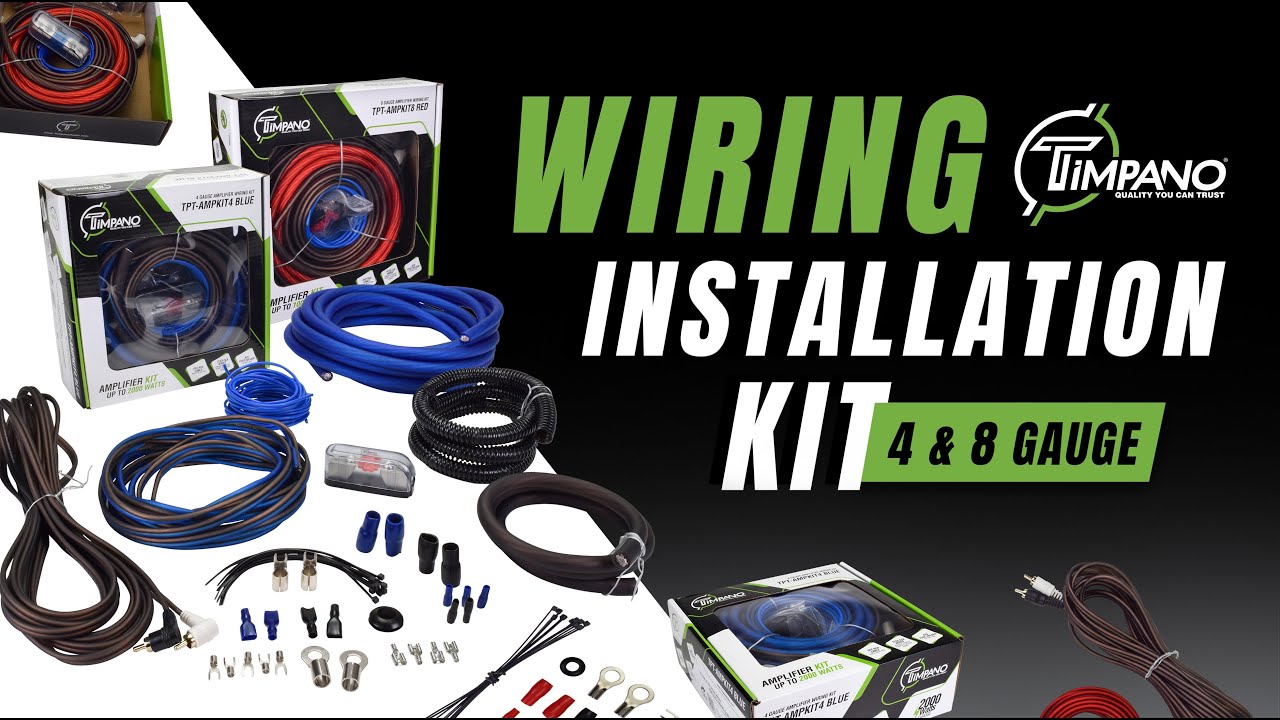
Below is a detailed list of the wires and tools needed for a proper and efficient installation.
Required Wire Types
- Power Wire:Carries power from the battery to the amplifier. Usually 8 or 4 gauge.
- Ground Wire:Connects the amplifier to the car’s chassis. Same gauge as power wire.
- Remote Turn-On Wire:Signals the amplifier to turn on with the stereo. Thin wire, often 18 gauge.
- RCA Cables:Transmit audio signals from the stereo to the amplifier.
- Speaker Wire:Connects the amplifier to the subwoofer or speakers. 16 or 14 gauge is common.
Essential Tools List
- Wire strippers to remove insulation cleanly.
- Crimping tool for secure wire connections.
- Multimeter to test voltage and continuity.
- Electrical tape for insulation and protection.
- Screwdrivers for mounting and terminal screws.
- Heat shrink tubing for durable wire joints.
- Cable ties to keep wires organized and safe.
Credit: www.diymobileaudio.com
Prepare The Wiring
Preparing the wiring is a key part of connecting a car stereo to an amplifier. Proper preparation ensures a secure and clear audio signal. It also helps avoid any damage to your equipment. Take your time to get the wires ready before making any connections.
Strip And Cut Wires
Start by cutting the wires to the needed length. Avoid leaving extra wire that can cause clutter. Use a wire stripper to remove about half an inch of insulation from each wire end. This exposes the metal core for a good connection. Be careful not to nick or damage the wire strands. Clean cuts and proper stripping improve signal flow and safety.
Identify Wire Functions
Each wire has a specific role in the wiring setup. Identify the power wire, ground wire, remote turn-on wire, and speaker wires. Use the car stereo manual or amplifier guide to match wire colors and functions. Label the wires if needed. Correct identification prevents wrong connections that can cause short circuits or poor sound quality.
Connect The Rca Cables
Connecting the RCA cables is a crucial step in wiring your car stereo to an amplifier. These cables carry the audio signal from the head unit to the amplifier, so ensuring a proper connection affects the sound quality and system performance.
Let’s break down how to connect these cables correctly, starting with locating the right ports and then securing the connections to avoid any interruptions or noise.
Locate Output Ports
First, find the RCA output ports on your car stereo. These are usually labeled as “Pre-Out,” “Line Out,” or simply “RCA Out.”
They typically appear as a pair of round, color-coded jacks—red for right audio and white or black for left audio.
On the amplifier side, look for RCA input ports, which will match the colors and style of the stereo’s outputs.
If your stereo doesn’t have RCA outputs, you might need a line output converter to connect to the amplifier.
Secure Rca Connections
Once you’ve identified the ports, plug the RCA cables firmly into both the stereo and amplifier. A loose connection can cause static or signal loss, ruining your listening experience.
Try to keep the cables away from power wires to prevent unwanted interference.
Using cable ties or clips can help keep your wiring neat and prevent accidental unplugging during driving.
Have you ever noticed a buzzing noise after installing a new system? This often happens due to poor RCA connections or interference—tightening and organizing your cables can fix that quickly.
Wire The Power Connections
Wiring the power connections is a crucial part of linking your car stereo to an amplifier. Without a solid power setup, your amplifier won’t function properly, and you could risk damaging your equipment. Let’s break down the key power wires you need to connect to get your system running smoothly.
Connect The Ground Wire
The ground wire is your amplifier’s safety net. It completes the electrical circuit by connecting the amp to your car’s chassis, preventing electrical shocks or interference.
Look for a clean, unpainted metal surface close to your amplifier to attach the ground wire. If the connection isn’t solid, you might hear annoying buzzing or experience power drops.
Keep the ground wire as short as possible—ideally under 18 inches—to avoid signal loss. Have you checked your car’s grounding points lately? A quick inspection can save a lot of headaches.
Attach The Remote Turn-on Wire
This wire tells your amplifier when to power up. It’s usually a thin blue wire running from your car stereo’s remote turn-on lead.
Connect it securely to the amplifier’s remote terminal. Without this connection, the amp won’t turn on automatically when you start your stereo, which can be frustrating.
Double-check that the wire is not loose or broken. A faulty remote wire can cause your amp to stay on all the time, draining your battery.
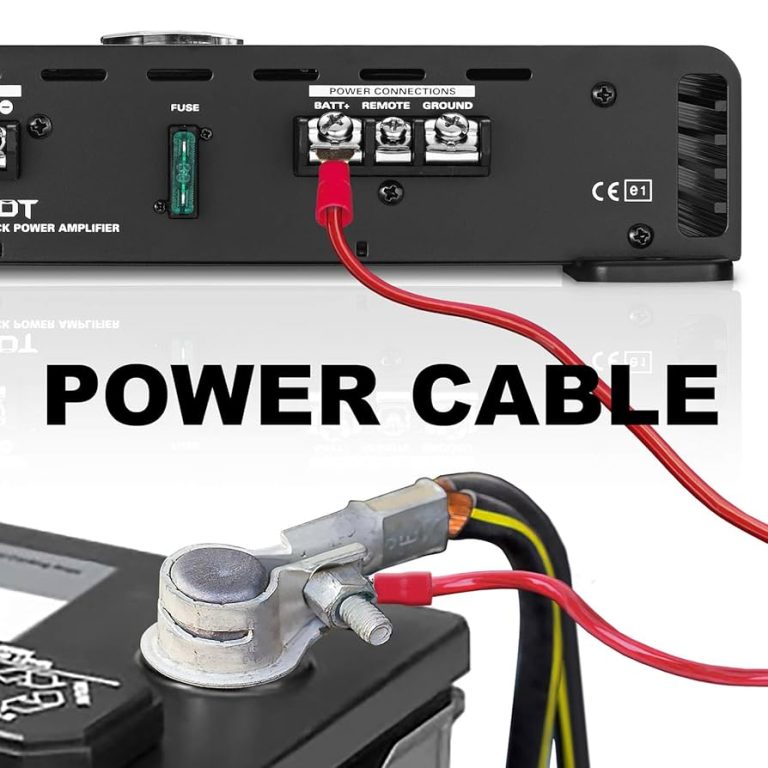
Hook Up The 12v Power Wire
The 12V power wire supplies the amplifier with the energy it needs to pump out sound. This wire should be thick enough to handle the current—usually 8 or 4 gauge depending on your amp’s power.
Run the power wire directly from your car’s battery, and don’t forget to add an inline fuse within 18 inches of the battery terminal. This fuse protects your system from electrical surges.
Make sure the connection at the battery is tight and corrosion-free. Have you ever noticed your sound cutting out during a drive? Loose or corroded power wires might be the culprit.
Connect Speaker Wires
Connecting speaker wires correctly is crucial for getting the best sound from your car stereo and amplifier setup. If the wires aren’t connected properly, you might experience poor sound quality or even damage to your equipment. Paying close attention to how you connect these wires can save you time and frustration later on.
Match Wire Polarity
Always make sure to match the positive and negative wires between your amplifier and speakers. Usually, the wires are color-coded—red or a stripe for positive, and black or plain for negative. Mixing these up can cause your speakers to be out of phase, resulting in weak or distorted sound.
Think about how you feel when music sounds off or hollow. This often happens because the polarity is reversed. Double-checking polarity can prevent this issue and improve your audio experience dramatically.
Secure Speaker Connections
Loose connections cause crackling, interruptions, or no sound at all. Use quality connectors like crimp terminals or solder the wires for a strong, lasting bond. If you’re using bare wires, twist them tightly and make sure they fit snugly into the amplifier’s speaker terminals.
After connecting, gently tug each wire to confirm it’s secure. Have you ever had to stop your music because a wire came loose? Taking a moment to secure your connections properly will keep your sound smooth and uninterrupted.
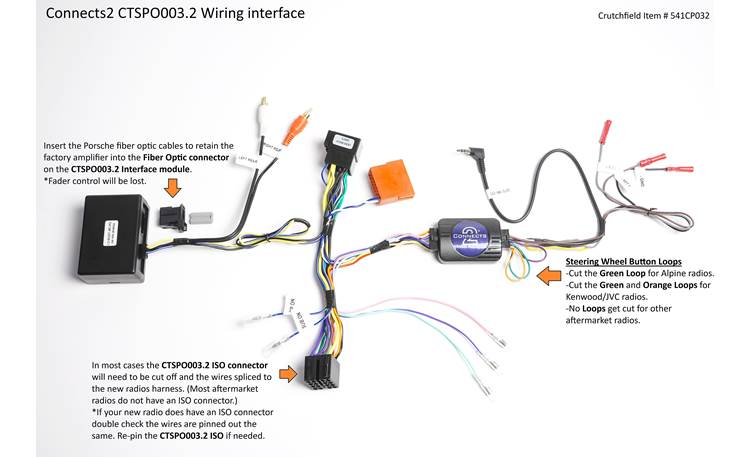
Credit: www.crutchfield.ca
Test The System
Testing the system ensures your car stereo and amplifier work perfectly together. It helps find any wiring mistakes or settings that need tweaking. Proper testing protects your equipment and improves sound quality. Follow these simple steps to test your setup effectively.
Power On And Check
Turn on your car stereo and amplifier. Listen for any unusual noises like buzzing or static. Check if the amplifier’s power light is on. Ensure all speakers, especially the subwoofer, produce sound. If no sound comes out, double-check your wiring connections. Watch for any overheating or strange smells. These signs show if the system is working safely.
Adjust Amplifier Settings
Start with the gain control at the lowest level. Slowly increase the gain until the sound is clear and loud enough. Adjust the bass boost to enhance low frequencies without distortion. Set the crossover frequency to match your subwoofer’s range. Make small changes and listen carefully. Proper settings prevent damage and improve sound quality.
Troubleshoot Common Issues
Troubleshooting common issues helps ensure your car stereo and amplifier work perfectly. Problems like no sound or distorted noise can spoil your listening experience. Fixing these issues often requires simple checks and adjustments. Understanding the causes can save time and avoid damage to your equipment.
No Sound Problems
Check if the amplifier and stereo power wires are securely connected. Loose or disconnected wires cause no sound output. Verify the ground wire is properly attached to a clean metal surface. A bad ground connection interrupts the audio signal flow.
Ensure the fuse on the amplifier is not blown. Replace it if needed. Confirm the stereo’s volume and mute settings are correct. Sometimes the source unit is set to a very low volume or mute mode.
Inspect the RCA cables for damage or loose connections. Faulty cables prevent sound transmission. Swap RCA cables with known good ones to test if cables cause the issue.
Distortion And Noise Fixes
Distorted sound often comes from poor wiring or weak connections. Tighten all wire connections to stop distortion. Check speaker wires for shorts or frays that cause noise.
Use quality shielded RCA cables to reduce interference. Keep power and audio cables separated to avoid noise pickup. Ground loops cause humming or buzzing sounds. Use a ground loop isolator to fix this problem.
Adjust the amplifier gain control properly. High gain settings cause distortion and damage speakers. Set gain to match your stereo’s output level for clear sound.

Credit: www.youtube.com
Frequently Asked Questions
How Do I Connect A Car Stereo To An Amplifier?
To connect a car stereo to an amplifier, use RCA cables from the stereo’s output to the amp’s input. Then, connect the amplifier to the car battery for power and ground. Finally, run speaker wires from the amp to the speakers for sound output.
What Tools Are Needed To Wire A Car Stereo Amplifier?
You need wire strippers, crimping tools, screwdrivers, electrical tape, and a multimeter. RCA cables and appropriate gauge power and ground wires are also essential. These tools help ensure a safe, secure, and professional connection between your car stereo and amplifier.
Can I Wire An Amplifier Without Rca Output Cables?
If your stereo lacks RCA outputs, use a line output converter. This device converts speaker-level signals to RCA-level signals. It allows you to connect the amplifier properly without damaging your stereo or amplifier system.
How Do I Safely Power A Car Amplifier?
Connect the amplifier directly to the car battery using a fuse within 18 inches of the battery. Use a power wire of the correct gauge and ensure a solid ground connection to the chassis. This prevents electrical issues and protects your equipment.
Conclusion
Wiring a car stereo to an amplifier isn’t tough. With patience, it becomes simple. Follow the steps carefully. Use the right tools for safety. Connect cables securely. Ensure every wire is tight. Double-check each connection. Enjoy your enhanced audio experience.
Your car music will sound better. Feel the difference in sound quality. Now, you’re ready to enjoy your drive. Music adds fun to every journey. Let your favorite songs play loud. Drive safely with great tunes.