
Are you looking to upgrade your car’s sound system with powerful 6×9 speakers but unsure how to connect them to your car stereo? You’re not alone.
Many car owners want that rich, clear sound but get stuck when it comes to wiring and setup. The good news is, connecting 6×9 speakers isn’t as complicated as it seems. In this guide, you’ll discover simple, step-by-step instructions that anyone can follow—even if you’re not a tech expert.
By the end, you’ll know exactly how to get your new speakers hooked up and ready to deliver amazing sound on every drive. Keep reading to transform your car audio experience today!
Credit: www.diymobileaudio.com
Choosing The Right 6×9 Speakers
Choosing the right 6×9 speakers is key for great car audio. The right speakers fit your car and sound needs. Knowing speaker types and power ratings helps pick the best match. This choice affects sound clarity, bass, and volume in your car. Let’s explore important points to consider before buying.
Speaker Types And Features
6×9 speakers come in several types. Coaxial speakers combine tweeters and woofers in one unit. They are easy to install and offer balanced sound. Component speakers separate the tweeter and woofer. They deliver better sound quality but need more installation work. Look for features like waterproofing for durability. Some have foam or rubber surrounds that resist wear. Also check the speaker’s sensitivity. Higher sensitivity means louder sound at lower power.
Power Handling And Compatibility
Power handling shows how much power a speaker can take. It includes RMS and peak power ratings. RMS is the continuous power the speaker can handle. Peak power is the maximum it can handle briefly. Match the speaker’s RMS rating to your stereo’s output. Too little power can cause distortion. Too much power may damage the speaker. Also check the speaker’s impedance, usually 4 or 8 ohms. It must be compatible with your car stereo system for best performance.
Gathering Necessary Tools
Before connecting 6×9 speakers to a car stereo, gather all necessary tools. Having the right tools makes installation easier and safer. It saves time and prevents damage to your car or speakers.
Basic Tools Needed
- Screwdrivers (flathead and Phillips) to remove panels and screws
- Wire strippers to remove insulation from speaker wires
- Crimping tool or pliers for securing wire connectors
- Electrical tape to insulate wire joints
- Multimeter to check voltage and continuity
- Panel removal tool to avoid damaging car interior
Additional Accessories
- Speaker wire (if existing wire is too short or damaged)
- Wire connectors or butt connectors for secure connections
- Heat shrink tubing for protecting exposed wires
- Mounting brackets or screws if new hardware is needed
- Sound deadening material to reduce vibration and improve sound
Preparing Your Car Stereo
Preparing your car stereo is a crucial step before connecting new 6×9 speakers. This preparation ensures a smooth installation and protects your vehicle’s electrical system. Taking the time to get this right can save you from unexpected problems later.
Disconnecting The Battery
Start by disconnecting your car battery to avoid any electrical shorts or shocks. Use a wrench to loosen the negative terminal first, then remove it completely. This simple safety measure protects both you and your car’s electronics while you work on the stereo system.
Have you ever experienced a sudden spark while handling car wiring? Disconnecting the battery eliminates that risk. It also helps reset the stereo system, so any previous glitches won’t interfere with your new speakers.
Removing The Old Speakers
Next, carefully remove the old speakers to make space for your new 6×9 units. Begin by taking off the door panel or speaker grille, which might require a screwdriver or panel removal tool. Keep track of all screws and clips so you can reuse them later if needed.
Once the panel is off, unplug the speaker wires gently to avoid damaging the connectors. Inspect the wiring for any wear or corrosion—clean connections ensure better sound quality and a more secure fit. Have you noticed how often poor connections cause crackling sounds? Fixing this now prevents frustration down the road.
Wiring The 6×9 Speakers
Wiring 6×9 speakers in your car stereo system requires careful attention. Proper wiring ensures clear sound and prevents damage to your equipment. Follow simple steps to identify and connect wires safely. Understanding wire polarity and connection points helps avoid common mistakes.
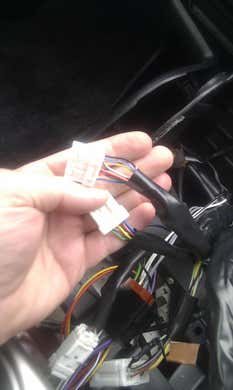
Identifying Positive And Negative Wires
Each speaker wire has two parts: positive and negative. Usually, the positive wire has a stripe or a different color. The negative wire is often plain or black. Check the wire labels or use a multimeter to confirm polarity.
Mark the wires clearly before connecting. This prevents reversing the wires, which can cause sound issues. Keep the positive wire connected to the positive terminal on the speaker and stereo.
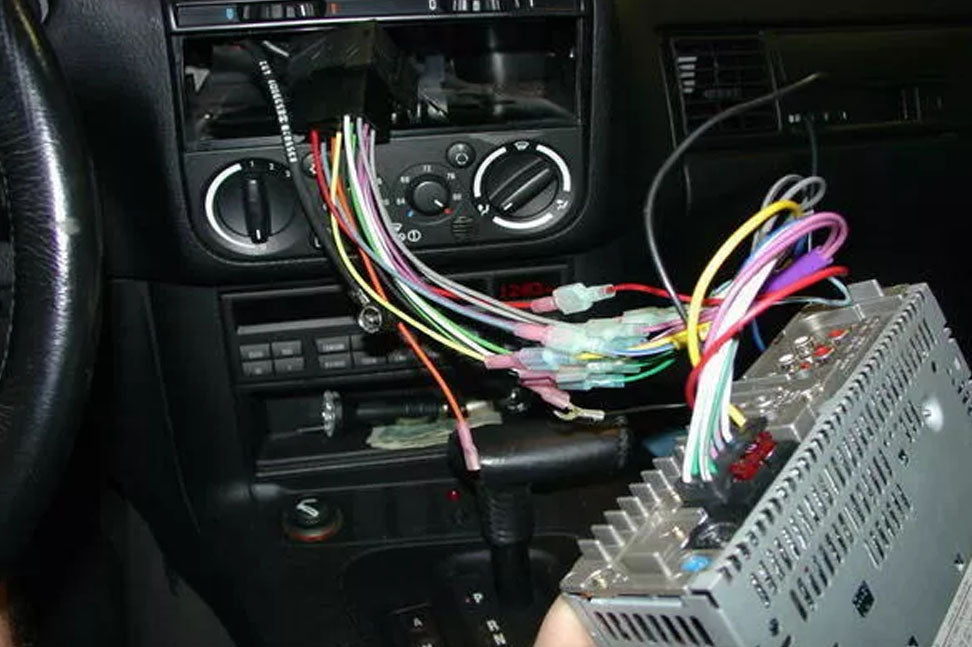
Connecting Speaker Wires To Stereo
Locate the speaker output terminals on your car stereo. These terminals are marked with plus (+) and minus (−) signs. Match the positive wire to the plus terminal and the negative wire to the minus terminal.
Strip about half an inch of insulation from each wire end. Twist the wire strands tightly to avoid loose connections. Insert the wires firmly into the stereo terminals and tighten the screws or clips.
Secure the wires along the car’s interior to prevent them from moving or getting damaged. Test the speakers by playing audio to check for clear sound. Adjust connections if the sound is weak or distorted.
Mounting The 6×9 Speakers
Mounting the 6×9 speakers is a key step for clear, powerful sound in your car. Proper mounting ensures the speakers stay secure and deliver the best audio performance. This section explains how to position and secure your speakers correctly for a lasting setup.
Positioning The Speakers
Choose a flat, stable surface for mounting the 6×9 speakers. Common locations include the rear deck or door panels. Ensure the speakers face toward the listener for optimal sound. Avoid areas with too much vibration or moisture. Check for enough clearance to avoid damage when closing doors or trunk.
Measure the mounting area to confirm the 6×9 speakers fit well. Mark the spots for drilling holes carefully. Align the speaker holes with your marks before making any cuts. Positioning affects sound quality and speaker longevity, so take your time.
Securing The Speakers In Place
Use screws that fit the speaker mounting holes. Do not overtighten screws to avoid damaging the speaker frame. A firm hold prevents rattling and vibrations during driving. If your car uses clips or brackets, make sure they lock the speaker tightly.
Check the speaker’s stability by gently shaking it after installation. Fill any gaps with foam or rubber to reduce vibrations. Proper sealing also helps improve sound quality by preventing air leaks. Double-check all connections before reassembling panels or covers.
Testing The Speakers
Testing your 6×9 speakers after connecting them to your car stereo is essential. It ensures everything is wired correctly and the sound quality meets your expectations. Taking the time to carefully test can save you from future headaches and fine-tune your audio setup for the best experience.
Powering On The Stereo
Start by turning on your car stereo. Make sure the ignition is in the accessory or on position so the system has power. Listen closely for any signs of sound or unexpected noises like static or distortion.
Does the stereo power up smoothly? If it doesn’t, double-check your wiring connections and fuses. A quick fix here can prevent damage to your speakers or stereo system.
Adjusting Sound Settings
Once your stereo is on, adjust the sound settings to test the speakers properly. Start with the volume low and gradually increase it to avoid sudden loud bursts that could harm the speakers.
Experiment with bass, treble, and balance controls. Try playing different types of music with varying bass and treble levels to see how the speakers respond. Do the lows feel punchy and clear? Are the highs crisp without harshness?
Pay attention to any rattling or buzzing sounds that might indicate loose parts or poor installation. If something sounds off, don’t ignore it—fix it before enjoying your ride.
Troubleshooting Common Issues
Connecting 6×9 speakers to your car stereo can sometimes lead to unexpected problems. Troubleshooting these common issues quickly helps you enjoy clear, powerful sound without frustration. Let’s look at two frequent problems and how to fix them efficiently.
No Sound Or Distorted Audio
If your speakers produce no sound or the audio is distorted, start by checking the speaker wires. Damaged or improperly connected wires often cause these issues.
Try these steps:
- Ensure the speaker wires match the stereo output terminals correctly.
- Look for any breaks, cuts, or frays in the wiring.
- Check your car stereo settings to confirm the balance and fade are properly adjusted.
I once overlooked a loose wire, thinking the speaker was faulty. Fixing that connection restored crystal-clear sound instantly. Sometimes, the simplest checks save you from unnecessary expenses.
Loose Connections
Loose connections can cause intermittent sound or no sound at all. Even a slight wiggle can disrupt the signal from your stereo to the speakers.
To secure your connections:
- Firmly attach speaker wires to the terminals or connectors.
- Use a multimeter to test for continuity if you suspect a bad connection.
- Inspect connectors for corrosion or dirt, which can block the signal.
Have you ever noticed that shaking a wire restores sound temporarily? That’s a clear sign of a loose connection. Tightening these connections ensures consistent audio performance without interruptions.

Credit: naavagreen.com
Credit: eliteautogear.com
Frequently Asked Questions
How Do I Connect 6×9 Speakers To My Car Stereo?
To connect 6×9 speakers, first disconnect the battery. Remove the old speakers and connect the new speaker wires to the car stereo. Secure the speakers in their mounts and reconnect the battery. Test the sound to ensure proper connection.
What Tools Are Needed For Speaker Installation?
You’ll need a screwdriver, wire strippers, and possibly a drill for installation. These tools help in removing panels, stripping wires, and securing the speakers. Having these handy ensures a smooth installation process without unnecessary interruptions.
Can I Install Speakers Without An Amplifier?
Yes, you can install 6×9 speakers without an amplifier. Most car stereos provide enough power for decent sound. However, an amplifier enhances audio quality. It’s optional, but for audiophiles, an amplifier can make a noticeable difference.
How Can I Improve Sound Quality?
Ensure proper speaker placement and use quality speaker wires. Avoid cheap connectors as they can degrade sound quality. Additionally, use sound-dampening materials to reduce vibrations and improve overall audio clarity.
Conclusion
Connecting 6×9 speakers to your car stereo is simple and rewarding. Follow the steps carefully for clear, powerful sound. Use the right tools and check all connections twice. Test the speakers before finishing to avoid issues later. Enjoy better music on every drive.
Good sound makes any trip more fun and relaxing. Keep your setup safe and neat for long-lasting use. Now, your car audio can sound just how you want.

