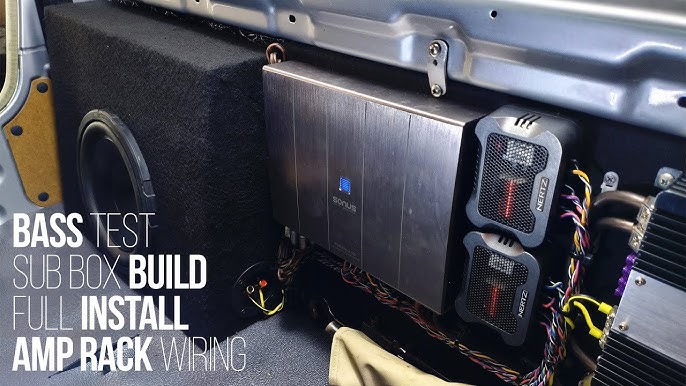
Are you ready to take your car’s sound system to the next level? Installing a car audio amplifier and subwoofer can transform your driving experience with richer, deeper bass and clearer sound.
But if you’re worried about complicated wiring or expensive installers, don’t be. This guide will walk you through every step in a simple, straightforward way. By the end, you’ll know exactly how to set up your amplifier and subwoofer like a pro, saving money and getting the powerful sound you want.
Keep reading, and let’s make your car audio system truly unforgettable.
Choosing The Right Amplifier And Subwoofer
Choosing the right amplifier and subwoofer is crucial to getting the best sound quality and performance from your car audio system. The right match ensures your setup runs efficiently without damaging any components. It also shapes how deep and clear your bass will feel inside your vehicle.
Matching Amplifier Power To Subwoofer
Power matching is key to a smooth setup. Your amplifier’s RMS (continuous power output) should closely align with your subwoofer’s RMS rating. Too little power makes your bass weak and distorted, while too much power risks blowing the subwoofer.
Check the subwoofer’s specifications and pick an amplifier that delivers power within 80% to 100% of those numbers. This balance keeps the sound clean and protects your gear. Have you ever heard a distorted bass that just ruins the whole track? That’s often due to poor power matching.
Types Of Amplifiers
There are mainly three types of amplifiers to consider: Class A/B, Class D, and mono-block. Each has its strengths depending on your needs and budget.
- Class A/B:Offers excellent sound quality but uses more power and generates heat.
- Class D:Highly efficient and compact, ideal for subwoofers and limited space.
- Mono-block:Designed specifically for subwoofers, providing dedicated power with minimal distortion.
Think about your car’s space and your sound preferences before deciding. Have you considered how much power efficiency matters to you during long drives?
Selecting Subwoofer Size And Enclosure
The size of your subwoofer directly affects the bass response. Larger subwoofers (12 to 15 inches) deliver deeper, louder bass, while smaller ones (8 to 10 inches) offer tighter, punchier sound.
Enclosure type also shapes the sound:
- Sealed enclosures:Provide accurate and tight bass, great for music that needs precision.
- Ported enclosures:Boost loudness and bass extension, perfect for bass-heavy genres.
- Bandpass enclosures:Combine both effects but are more complex and less versatile.
Choosing the right size and enclosure depends on your music style and space in your car. What kind of bass experience do you want to create?
Gathering Necessary Tools And Materials
Before you dive into installing your car audio amplifier and subwoofer, gathering the right tools and materials is crucial. Having everything prepared saves time and prevents frustrating interruptions. It also ensures your installation is safe and effective, giving you the best sound experience.
Essential Installation Tools
You’ll need a set of basic tools to handle wiring and mounting tasks. A good quality wire stripper and crimper will make connecting cables easier and more secure. Screwdrivers, both flathead and Phillips, are necessary for removing panels and securing components.
Other handy tools include a multimeter to check electrical connections and a drill with bits for mounting the amplifier and subwoofer securely. Don’t forget electrical tape and zip ties to organize and protect your wiring neatly. Have a panel removal tool ready to avoid damaging your car’s interior.
Required Wiring And Accessories
Choosing the right wiring is key to powering your amplifier and subwoofer efficiently. Use a power cable thick enough to handle the amplifier’s current—usually 4 or 8 gauge depending on your amp’s power rating. A matching ground cable is equally important to avoid electrical noise and ensure safety.
You’ll also need a fuse holder and an inline fuse placed close to the battery to protect your system from power surges. RCA cables connect your head unit to the amplifier, so choose high-quality ones to reduce signal loss. Don’t overlook speaker wires; pick a gauge that suits the distance and power requirements.
Have you thought about how you’ll route these wires through your vehicle? Planning this ahead prevents damage and keeps your installation clean. Gathering these tools and materials upfront lets you focus on the actual installation without unnecessary delays.
Preparing The Vehicle
Before you dive into installing your car audio amplifier and subwoofer, getting your vehicle ready is crucial. Proper preparation not only ensures safety but also makes the installation smoother and more efficient. Taking time to prepare your vehicle can save you headaches later and improve the overall sound quality.
Disconnecting The Battery
Safety should always come first. Disconnecting your car battery prevents electrical shorts and protects you from accidental shocks.
Start by locating the battery, usually under the hood. Use a wrench to loosen the negative terminal first, then remove the cable completely. This simple step cuts off power and keeps your vehicle’s electronics safe during installation.
Have you ever experienced that annoying warning light flashing after a quick install? Disconnecting the battery helps avoid those issues and resets the system cleanly.
Finding A Suitable Mounting Location
Choosing the right spot for your amplifier and subwoofer is key to maximizing sound quality and protecting your equipment.
Look for a flat, stable area inside your vehicle that allows easy access to wiring. Common places include the trunk, under a seat, or behind panels. Ensure there’s enough ventilation to prevent overheating.
Think about how much space you’ll need—not just for the devices but also for running cables without tension or sharp bends. Have you checked if your chosen spot interferes with any vehicle components or cargo space?
Taking time to plan the mounting location helps avoid rerouting wires later and keeps your installation neat and professional.
Wiring The Amplifier
Wiring the amplifier is a crucial step to ensure your car audio system works perfectly. Proper wiring delivers power and signals to the amplifier and subwoofer. It also keeps your system safe and stable. Follow clear steps to connect all wires correctly for the best sound experience.
Running Power Wire From Battery
Use a thick power wire rated for your amplifier’s current. Disconnect the car battery before starting. Find a spot to pass the wire through the firewall. Use a grommet to protect the wire from sharp edges. Connect the power wire to the positive terminal of the battery. Add an inline fuse within 18 inches of the battery connection.
Connecting Ground Wire
Choose a clean metal surface near the amplifier for grounding. Sand off paint or rust to get bare metal. Use a short, thick wire for grounding. Attach the ground wire securely to the chassis. A poor ground causes noise and poor performance. Tighten all connections firmly to avoid loose contacts.
Installing The Remote Turn-on Wire
Locate the remote turn-on lead from the head unit. This wire signals the amplifier to power on and off. Connect it to the amplifier’s remote turn-on terminal. Use a small gauge wire for this connection. Secure the wire to avoid interference. Check the connection by turning the head unit on and off.
Routing Rca And Speaker Wires
Keep RCA cables away from power wires to prevent noise. Run RCA cables along the opposite side of the car if possible. Use wire ties to secure cables neatly. Connect RCA cables to the amplifier’s input jacks. Match speaker wires from the amplifier to the subwoofer terminals. Check polarity; positive to positive, negative to negative.
Mounting The Amplifier And Subwoofer
Mounting the amplifier and subwoofer correctly ensures great sound and safety. Proper placement prevents damage and improves audio performance. Take time to secure each component firmly and in the right spot.
Securing The Amplifier
Choose a flat, stable surface for the amplifier. Common spots include under seats or in the trunk. Use mounting brackets or screws to fix it tightly. Avoid loose wiring and allow air to flow around it. This prevents overheating and keeps the amplifier working well.
Installing The Subwoofer In Enclosure
Always place the subwoofer inside a proper enclosure. The box controls the sound quality and protects the speaker. Use screws to fix the subwoofer inside the enclosure. Check for any gaps or loose parts that can cause noise. A sealed or ported box works best for deep bass.
Positioning The Subwoofer In Vehicle
Pick a spot in the vehicle that fits the subwoofer box securely. The trunk is a popular choice because it offers space and good sound reflection. Keep the subwoofer away from loose items that could hit it. Face the speaker toward the cabin for better bass feel. Make sure wiring is neat and out of the way to avoid damage.
Connecting The Subwoofer To The Amplifier
Connecting the subwoofer to the amplifier is a key step in your car audio installation. Proper connection ensures clear, powerful bass and protects your equipment. This process involves wiring the subwoofer terminals correctly and testing the connections for safety and performance.
Wiring Subwoofer Terminals
Identify the positive (+) and negative (–) terminals on both the subwoofer and amplifier. Use quality speaker wire to connect these terminals. Match the positive terminal on the amplifier to the positive on the subwoofer. Do the same with the negative terminals.
Strip about half an inch of insulation from the wire ends. Twist the wire strands to prevent fraying. Insert the wires firmly into the terminals and tighten the screws or clamps. Check that no stray wires touch each other or the amplifier’s metal parts.
Testing The Connections
Turn on the car’s audio system at a low volume. Listen for clear bass sounds without distortion or buzzing. If you hear noise, turn off the system and check the wiring again.
Use a multimeter to verify the resistance and continuity of the wires. This tool helps find loose or broken connections. Tighten or replace any faulty wires before increasing the volume.
Adjusting Amplifier Settings
Adjusting the amplifier settings is key to great sound quality in your car. It helps balance the power output and tone. Proper settings prevent distortion and protect your speakers. Tuning the amplifier ensures clear, deep bass and overall better audio.
Setting Gain And Crossover
Gain controls the amplifier’s input level. Set it too high and sound will distort. Too low means weak sound. Start with gain low, then increase slowly while playing music.
The crossover directs frequencies to the right speaker. Use a low-pass filter for the subwoofer. This stops high sounds from reaching it. Set crossover frequency between 80Hz and 120Hz for smooth bass. Adjust by ear for the best mix.
Fine-tuning Bass Levels
Bass level adjusts how loud the subwoofer plays. Start with it at mid-level. Listen to different songs with strong bass. Increase or decrease bass until it sounds natural and clear.
Too much bass can overpower other sounds. Too little makes music feel flat. Balance is important for a good listening experience. Use the bass boost sparingly to avoid distortion.

Credit: www.youtube.com
Final Testing And Troubleshooting
After installing your car audio amplifier and subwoofer, testing and troubleshooting are crucial. This step ensures your setup works correctly and sounds great. It helps find any issues early before they cause bigger problems. Carefully checking each part will keep your system safe and reliable.
Checking For Sound Quality
Start by playing music with a wide range of sounds. Listen carefully to bass, mids, and highs. The bass should be deep and clear without distortion. Mids and highs must sound balanced and not harsh. Adjust the gain and crossover settings on the amplifier as needed.
Check volume levels at different settings. The sound should stay clean and powerful even at high volume. Make sure the subwoofer moves smoothly without rattling or buzzing. Test sound from all speakers to confirm proper channel output.
Fixing Common Installation Issues
Look for loose or disconnected wires first. Secure any loose connections with proper terminals or connectors. Check the power and ground wires for solid contact and no corrosion. Inspect the fuse to ensure it is the correct rating and not blown.
Eliminate any unwanted noise like humming or buzzing. This noise often comes from bad grounding or interference. Re-route signal cables away from power cables to reduce noise. Tighten all screws and mounting brackets to stop vibrations.
If the amplifier overheats, check ventilation and reduce gain. Make sure the subwoofer matches the amplifier’s power output. Use a multimeter to test voltages and continuity if problems persist. Following these steps solves most common issues after installation.
Safety Tips And Maintenance
Installing a car audio amplifier and subwoofer can dramatically improve your sound experience, but safety and upkeep play crucial roles in protecting your investment. Ignoring basic precautions might lead to electrical mishaps or damage to your equipment. Let’s focus on how you can keep your setup safe and running smoothly for years to come.
Preventing Electrical Hazards
Electrical hazards are a real risk when working with car audio systems. Always disconnect your car battery before starting the installation to avoid short circuits or electric shocks. Use fuses rated for your amplifier’s power to protect your wiring from overheating.
Check that all connections are tight and insulated properly to prevent sparks or fires. I once skipped double-checking a ground wire and ended up with intermittent audio cuts that were frustrating to trace back. Don’t let a loose wire ruin your sound or your safety.
Keep wires away from moving parts and sharp edges inside your vehicle. You don’t want cables fraying or getting pinched, which can cause shorts or equipment failure. Have you inspected your wiring route carefully before finalizing the install?
Maintaining Audio Equipment
Regular maintenance extends the life of your amplifier and subwoofer and keeps your sound quality crisp. Dust and dirt buildup can cause overheating and degrade components over time. Wipe down surfaces with a dry cloth and use compressed air to clean vents and connectors.
Check your system’s wiring periodically for signs of wear or corrosion. Replacing damaged cables early can save you from costly repairs later. I remember ignoring a corroded ground connection until my subwoofer stopped working during a long drive—simple maintenance could have avoided that.
Test your equipment after maintenance to ensure everything works perfectly. Are you setting a routine to inspect your gear every few months? Small, consistent care can prevent big headaches and keep your car audio booming.

Credit: www.reddit.com

Credit: www.youtube.com
Frequently Asked Questions
How Do I Choose The Right Amplifier For My Car?
Select an amplifier that matches your subwoofer’s power and impedance. Check RMS ratings and ensure compatibility with your car audio system. Proper sizing avoids distortion and protects your equipment.
What Tools Are Needed To Install A Car Amplifier?
You’ll need wire strippers, a screwdriver, a drill, crimp connectors, and a multimeter. These tools help in wiring, mounting, and testing your amplifier installation safely and efficiently.
Where Should I Mount My Car Amplifier?
Mount the amplifier in a dry, ventilated area away from heat sources. Common spots include under seats or in the trunk. Proper placement ensures cooling and prevents damage.
How Do I Connect A Subwoofer To The Amplifier?
Use speaker wires to connect the subwoofer’s terminals to the amplifier’s output. Match positive and negative terminals correctly to avoid phase issues and ensure optimal sound quality.
Conclusion
Installing a car audio amplifier and subwoofer can boost your sound quality. Follow each step carefully for safe setup. Double-check all connections before powering your system. Test the audio to ensure clear and balanced sound. Take your time and enjoy the process.
A good installation makes your music experience much better. Now, your car sounds richer and more powerful. Keep learning and upgrading for even better audio.