How to Connect Amplifier to Car Radio: Easy Step-by-Step Guide
If you want to boost your car’s sound system and enjoy clearer, louder music, connecting an amplifier to your car radio is the key. But if you’re unsure where to start or worried about making mistakes, don’t worry—you’re in the right place.
This guide will walk you through the process step-by-step, using simple language and easy tips. By the end, you’ll have the confidence to upgrade your sound system and transform your driving experience. Ready to get started? Let’s dive in!
Gather Necessary Tools And Materials
Before connecting an amplifier to a car radio, gather all the necessary tools and materials. Having everything ready saves time and avoids frustration during installation. It also ensures a safer and smoother setup process.
Prepare your workspace and check each item carefully. Using the right tools helps prevent damage to your car’s electrical system and audio components. Below is a list of what you will need.
Required Tools
- Screwdrivers (flathead and Phillips)
- Wire stripper and cutter
- Crimping tool
- Multimeter for voltage testing
- Drill with bits (for mounting)
- Socket wrench set
- Electrical tape
- Panel removal tools
- Heat shrink tubing (optional)
Essential Materials
- Amplifier wiring kit (includes power, ground, and remote wires)
- RCA cables for audio signal
- Fuse holder with appropriate fuse
- Ring terminals and connectors
- Zip ties for cable management
- Amplifier mounting hardware
- Battery terminal connectors

Credit: www.youtube.com
Prepare Your Car Radio
Getting your car radio ready is the first key task before connecting an amplifier. This ensures a smooth installation and protects your vehicle’s electrical system. Taking time here can save you from headaches later.
Disconnect The Battery
Before touching any wires or components, disconnect your car battery. This simple step prevents accidental shorts or shocks while working on your radio.
Use a wrench to loosen the negative terminal clamp, then remove it completely. Keep the cable away from the battery terminal to avoid reconnecting by mistake.
Have you ever skipped this step and faced a blown fuse? It’s a costly and frustrating lesson that’s easy to avoid.
Remove The Radio Unit
Next, carefully remove the radio unit from the dashboard. This usually involves taking off trim panels or screws that hold the radio in place.
Check your car’s manual for specific instructions or watch a quick video for your model. Pull the radio gently to avoid damaging wiring or connectors behind it.
Once out, you’ll see the wiring harness that connects to your car radio—this is where the amplifier will eventually connect. Are you ready to handle these connections confidently?
Plan The Wiring Route
Planning the wiring route is key to connecting an amplifier to a car radio. A clear route keeps wires safe and neat. It also helps avoid electrical problems and signal loss. Careful planning saves time and effort during installation. Knowing where wires run protects them from damage and wear. Taking time to plan means better sound quality and lasting connections.
Choosing The Right Path
Select a path that is short and direct. Avoid sharp bends or tight spaces. Look for existing wire channels or gaps under the dashboard. Run wires along the car’s frame or under carpets. Keep wires away from moving parts like pedals or seats. Secure the wires with clips or zip ties to stop movement. A tidy path prevents wires from getting crushed or frayed.
Avoiding Interference
Keep power wires separate from audio cables. Power lines can cause buzzing or noise in the sound system. Avoid running wires near the engine or alternator. These parts produce strong electrical interference. Use shielded cables for audio signals when possible. Cross wires at right angles if paths must intersect. Proper spacing and shielding reduce noise and improve audio clarity.
Connect The Power Wire
Connecting the power wire is vital to make the amplifier work properly. This wire carries electricity from the car battery to the amplifier. It must be installed carefully to avoid damage and ensure safety.
Follow these instructions for a secure and efficient connection.
Locate The Battery Connection
Find the positive terminal of your car battery. It usually has a red cover or a plus (+) sign. Clear any dirt or corrosion around it. Make sure the car is off before working near the battery. This is where you will connect the power wire.
Install The Fuse Holder
Place a fuse holder on the power wire near the battery connection. This protects your amplifier and car from electrical problems. Use a fuse with the right rating for your amplifier. Attach the fuse holder securely and make sure the wire is tight. This step is important for safety and prevents damage.
Attach The Ground Wire
Attaching the ground wire is a key step when connecting an amplifier to a car radio. This wire completes the electrical circuit and prevents unwanted noise or interference. A solid ground connection helps your amplifier work smoothly and safely.
Find A Suitable Ground Point
Look for a clean metal spot near the amplifier. The best places are bare metal parts of the car’s chassis. Remove any paint or rust with sandpaper to expose the metal. Avoid spots near moving parts or the fuel system. The ground point should be close to the amplifier to reduce wire length and signal loss.
Secure The Ground Connection
Use a ring terminal on the ground wire for a strong connection. Tighten the terminal firmly to the ground point with a bolt or screw. Make sure the connection is tight and stable. Check that no wires are loose or touching other metal parts. A good ground prevents electrical problems and helps your sound system perform well.
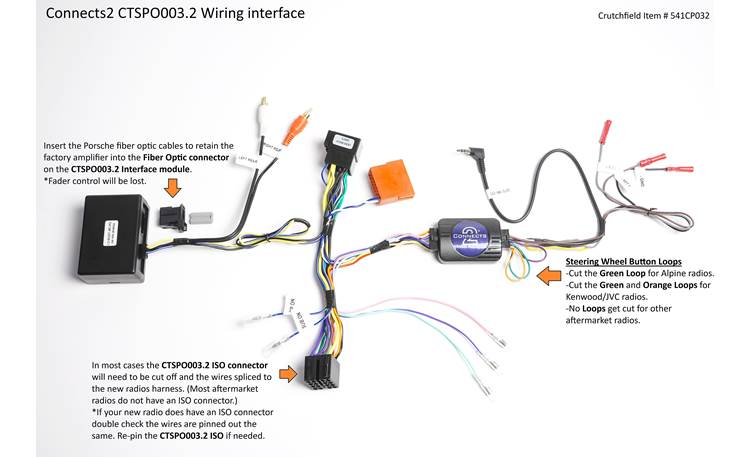
Credit: www.crutchfield.ca
Run The Rca Cables
Running the RCA cables is a crucial step in connecting your amplifier to your car radio. These cables carry the audio signal from the radio to the amplifier, ensuring clear and powerful sound output. Handling them carefully and routing them properly can save you from annoying interference and signal loss later on.
Identify Signal Output
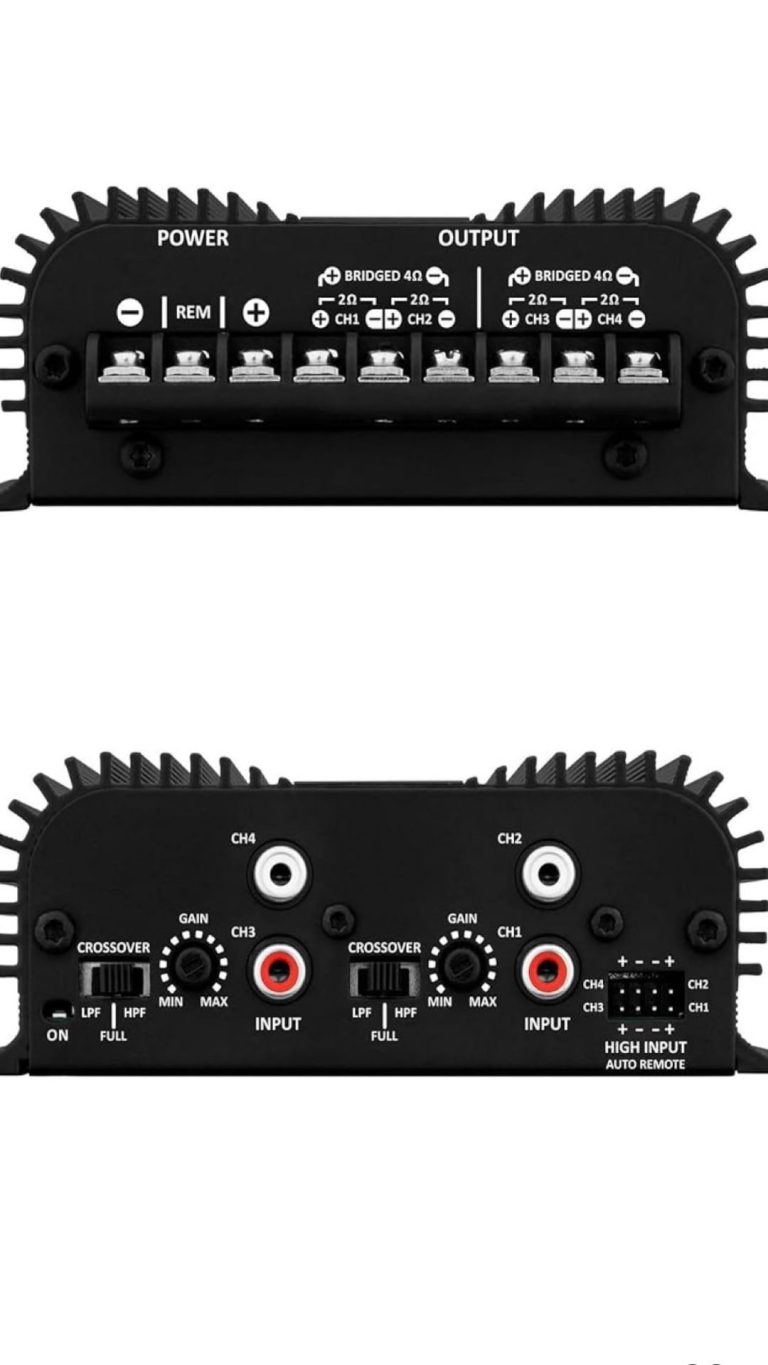
Start by locating the RCA output jacks on your car radio. These are usually labeled as “Front,” “Rear,” or “Subwoofer” outputs. Not all radios have RCA outputs, so check your manual if you’re unsure.
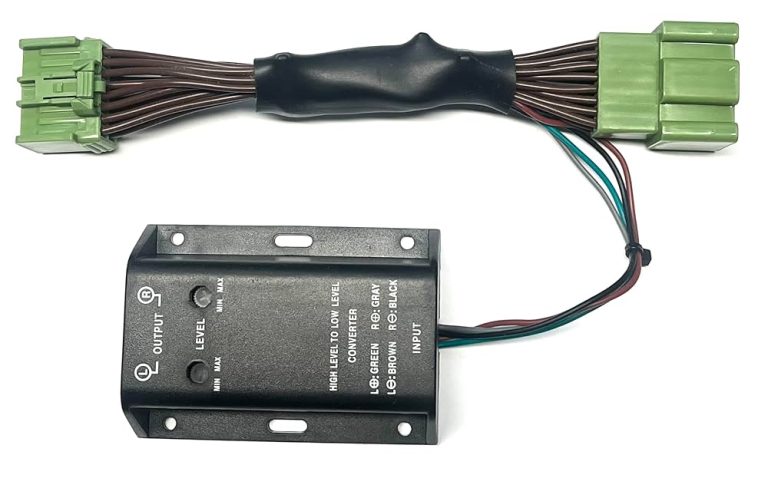
If your radio lacks RCA outputs, you might need an adapter or a line output converter. This small device converts speaker-level signals into RCA signals that your amplifier can use.
Double-check that you match the right RCA output with the amplifier input. Connecting front outputs to subwoofer inputs, for example, can cause sound quality issues.
Route Rca To Amplifier
Once you’ve identified the correct RCA outputs, plan the cable route carefully. Avoid running RCA cables alongside power cables to reduce electrical noise and interference.
Use existing gaps or rubber grommets where cables pass through the firewall or under the dashboard. This prevents cable damage and keeps your installation tidy.
Secure the RCA cables with zip ties or clips to stop them from moving or rattling while driving. A loose cable not only looks messy but can also wear out faster.
Have you checked if your cable length is enough before starting? It’s frustrating to run out of cable mid-installation. Measure twice, cut once—this applies to cables too.
Connect The Remote Turn-on Wire
Connecting the remote turn-on wire is a crucial step when setting up your amplifier with your car radio. This wire tells the amplifier when to power on and off, preventing battery drain and ensuring your sound system works smoothly. Without this connection, your amplifier might stay off or run continuously, causing issues.
Locate Remote Wire On Radio
Start by checking your car radio’s wiring harness. Look for a thin blue wire, often labeled as “remote,” “remote turn-on,” or “antenna” wire. This wire sends a 12V signal when the radio is powered on.
If you don’t see a blue wire, consult your car radio’s manual or search online for the wiring diagram specific to your model. Some radios use a different color, so verifying the exact wire is key to avoid mistakes.
Link To Amplifier
Once you find the remote wire on your radio, connect it to the amplifier’s remote turn-on terminal. This usually involves stripping a small section of insulation on both wires and twisting or crimping them together.
Use a quick splice connector or solder the connection for a secure fit. Then, cover the joint with electrical tape or heat shrink tubing to protect it from moisture and vibration.
Have you checked if your amplifier turns on and off with the radio after this connection? If not, it’s worth testing before finalizing your setup to avoid troubleshooting later.
Hook Up The Speakers To Amplifier
Hooking up the speakers to the amplifier is a key step for clear sound. This connection sends the audio signals from the amplifier to your car speakers. Proper wiring ensures the best sound quality and prevents damage.
Disconnect Existing Speaker Wires
Start by turning off your car and disconnecting the battery. This avoids any electrical shocks or short circuits. Find the current speaker wires connected to your car radio or head unit. Carefully unplug these wires from the speakers. Keep track of which wire goes to which speaker. Labeling them helps avoid confusion later.
Connect Speaker Outputs
Locate the speaker output terminals on your amplifier. These usually have clear positive (+) and negative (-) signs. Match the wires from your speakers to the amplifier terminals. Connect the positive wire to the positive terminal and the negative wire to the negative terminal. Use a screwdriver to tighten the connections firmly. Loose wires can cause poor sound or no sound at all.
Check all connections twice before powering on your system. Proper hookup leads to better sound and a safer setup.
Test The Amplifier Setup
Testing your amplifier setup is a crucial step to ensure everything works smoothly before hitting the road. It helps you catch any wiring issues or sound distortions early. Taking time here saves you from frustrating sound problems later.
Reconnect The Battery
Before powering on your amplifier, reconnect your car battery. This restores the electrical power needed for the system to operate. Make sure the battery terminals are secure and free of corrosion for a stable connection.
It’s easy to overlook this simple step, but without proper battery power, your amp won’t turn on. Have you ever tried testing your audio without reconnecting the battery? It usually results in no sound or inconsistent power.
Power On And Adjust Settings
Turn on your car radio and then the amplifier. Listen carefully for any unusual noises like buzzing or static. These sounds often point to grounding problems or loose connections.
Adjust the amplifier’s gain and bass boost controls slowly. Start low and increase gradually to avoid speaker damage. Pay attention to how the sound changes with each adjustment—do you notice clearer highs or stronger bass?
- Set the gain so the sound is loud but not distorted.
- Use the bass boost sparingly for a balanced output.
- Test different volume levels to ensure consistent clarity.
Have you tried fine-tuning your amp settings while driving? Sometimes the cabin acoustics reveal issues not heard when stationary. Testing your setup in different conditions can make a big difference.
Secure And Organize Wiring
Secure and organize wiring to keep your car’s audio system safe and efficient. Proper wiring prevents shorts and damage. It also improves the system’s look and makes future maintenance easier. Tidy wires help avoid interference and signal loss, enhancing sound quality. Take time to arrange cables neatly and securely.
Use Cable Ties
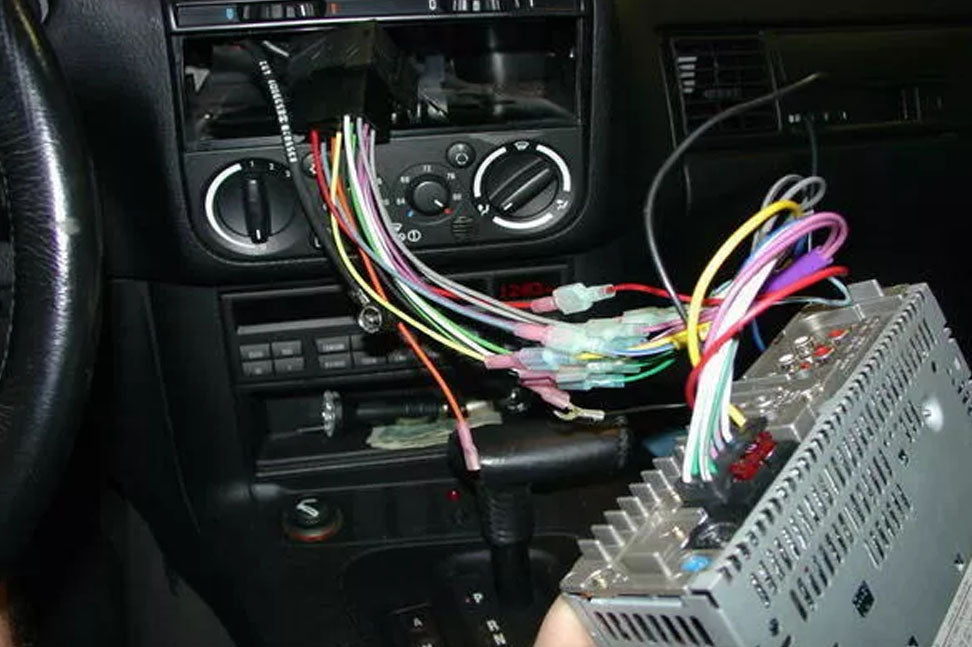
Cable ties keep wires bundled and in place. They prevent cables from moving or tangling during driving. Use small or medium-sized cable ties for the best fit. Avoid over-tightening to protect wire insulation. Group wires by function and route them along existing car paths. This keeps everything clean and easy to follow.
Ensure Safety And Cleanliness
Check all connections for a firm fit before securing wires. Loose wires can cause sparks or shorts. Keep wires away from sharp edges and hot engine parts. Use protective sleeves if needed. Clean the wiring area to remove dust and debris. This reduces fire risk and helps wires last longer. Organized wiring supports a safer and better-performing audio setup.
Credit: eliteautogear.com
Frequently Asked Questions
How Do I Connect An Amplifier To My Car Radio?
To connect an amplifier, first disconnect your car battery. Use RCA cables to connect the radio’s preamp outputs to the amplifier. Connect the amplifier to the car speakers using speaker wires. Finally, reconnect the car battery and ensure all connections are secure.
What Tools Are Needed For Installation?
You’ll need a wire stripper, crimping tool, screwdriver, and multimeter. These tools help ensure safe and effective connections. Having the right tools makes the installation process easier and more efficient.
Can I Install An Amplifier Myself?
Yes, you can install an amplifier yourself with basic tools and instructions. Follow a detailed guide for safety. Ensure all connections are secure to prevent damage to your car’s audio system.
Do I Need Special Cables For Connection?
Yes, you’ll need RCA cables, speaker wires, and a power cable. These cables ensure optimal sound quality and power delivery. Using the right cables prevents signal loss and interference.
Conclusion
Connecting an amplifier to your car radio is easier than it seems. Follow each step with care and take your time. Double-check all wires and connections for safety and sound quality. Your music will sound clearer and louder once done right.
Enjoy the improved audio and the drive. Keep learning and experimenting to get the best sound. Simple tools and patience make a big difference. Now, your car audio setup is ready to impress.