How to Add Amplifier to Car Stereo: Boost Sound Like a Pro
Master Automotive Systems Engineer & Performance Vehicle Specialist at CarSpeedNest Automotive Testing Lab · ASE Certified Master Technician, Mobile Electronics Certified Professional (MECP Master), Certified Dyno Diagnostic Specialist · 14+ years in dyno testing, electronic sensor calibration, automotive wiring harnesses, and precision drivetrain maintenance
Are you ready to take your car’s sound system to the next level? Adding an amplifier to your car stereo can transform your music experience, making every beat clearer and every note more powerful.
But if you’re unsure where to start, don’t worry—you’re in the right place. This guide will walk you through simple steps to install an amplifier, even if you’re not a tech expert. By the end, you’ll know exactly how to boost your sound and enjoy your favorite tunes like never before.
Let’s dive in and get your car stereo sounding amazing!
Choose The Right Amplifier
Choosing the right amplifier is key to improving your car’s sound system. The amplifier boosts the audio signal, making the music louder and clearer. Picking an amplifier that matches your setup ensures better sound quality and protects your equipment.
Types Of Car Amplifiers
There are three main types of car amplifiers:
- Class A/B:Good balance of sound quality and power. Common in many systems.
- Class D:More efficient and smaller. Ideal for subwoofers and bass-heavy setups.
- Class A:High sound quality but less efficient. Rare in car audio due to heat and power use.
Matching Amplifier To Speaker Power
Match the amplifier’s power output to your speakers’ power rating. Check the RMS (continuous power) rating on your speakers. The amplifier should deliver power close to this RMS value. Too much power can damage speakers. Too little power causes distortion.
Consideration Of Amplifier Channels
Amplifiers come with different channel counts:
- Mono (1 channel):Best for powering a subwoofer.
- 2-channel:Good for front or rear speakers.
- 4-channel:Can power four speakers or a combination of speakers and subwoofers.
Choose channels based on your speaker setup. More channels allow more flexibility in connecting speakers.
Gather Necessary Tools And Materials
Before adding an amplifier to your car stereo, gathering the right tools and materials is crucial. Having everything on hand not only makes the installation smoother but also prevents costly mistakes and delays. Think about how frustrating it is to start a project and realize halfway through that you’re missing a vital part.
Wiring Kits And Connectors
Choosing the right wiring kit can make a big difference in how well your amplifier performs. A typical kit includes power cables, ground cables, RCA cables, and a remote turn-on wire. Don’t forget the fuse holder and the right connectors to ensure secure and reliable connections.
Look for kits with thick gauge wires; thinner wires can cause voltage drops and reduce your amplifier’s power. Also, having ring terminals and spade connectors helps you create solid connections without loose ends. How often do you check the quality of your car’s wiring before upgrading components?
Basic Tools For Installation
Some basic tools will be your best friends during the installation process. Make sure you have a wire stripper, crimping tool, and a multimeter to test connections. Screwdrivers (both flathead and Phillips) and a socket wrench set are also essential for removing panels and securing the amplifier in place.
Don’t overlook electrical tape and zip ties—they help organize wires and prevent shorts. If you’ve ever struggled with tangled wires or loose connections, you know how these small tools can save you time and headaches. What’s your go-to tool when working on car electronics?
Safety Equipment
Safety should never be an afterthought. Always use gloves to protect your hands from sharp edges or hot components. Safety glasses are also important to shield your eyes from debris when working inside tight spaces.
Disconnecting your car battery before starting the installation reduces the risk of electrical shock or damage to your vehicle’s electronics. Have you ever experienced a spark or short circuit while working on your car? Taking simple safety steps can prevent those moments from turning into bigger problems.
Prepare The Car Stereo System
Preparing your car stereo system is essential before installing an amplifier. This step ensures safety and avoids damage to the car’s electrical components. Proper preparation makes the installation process smoother and more efficient.
Start by disconnecting the battery to prevent electrical shorts. Next, remove the stereo head unit carefully to access wiring. Finally, inspect the existing wiring to check for any issues or upgrades needed.
Disconnecting The Battery
Always disconnect the car battery first. Locate the negative terminal and use a wrench to loosen the clamp. Remove the cable and keep it away from the battery. This step stops power flow and protects you from electric shocks.
Removing The Stereo Head Unit
Use the right tools to remove the stereo head unit. Start by carefully prying off the trim around the stereo. Unscrew any bolts holding the unit in place. Gently pull the stereo out, exposing the wiring behind it. Take care not to damage any connectors or cables.
Inspecting Existing Wiring
Check all wiring behind the stereo. Look for frayed, loose, or damaged wires. Identify the power, ground, and speaker wires. Confirm wires are securely connected and in good condition. This inspection helps avoid connection problems when adding the amplifier.
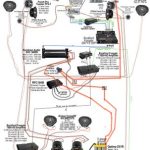
Credit: www.diymobileaudio.com
Install Power And Ground Wires
Installing the power and ground wires is essential for your car amplifier to work safely and efficiently. These wires deliver the electrical current the amplifier needs to boost your sound system. Proper installation prevents shorts and protects your vehicle’s electrical system.
Follow clear steps to route the power cable, secure the ground connection, and install a fuse holder. Each part ensures your amplifier runs smoothly and avoids damage.
Routing The Power Cable
Run the power cable from the car battery to the amplifier location. Use a path away from sharp edges and moving parts. Avoid placing the cable near signal wires to reduce noise interference.
- Choose a spot near the firewall to pass the cable inside the car.
- Use grommets to protect the cable from metal edges.
- Secure the cable with zip ties to prevent movement.
Securing A Proper Ground Connection
Find a clean metal surface close to the amplifier for grounding. Remove paint and rust to ensure good contact. A solid ground helps the amplifier function without electrical noise.
- Sand the metal area until shiny.
- Attach the ground wire with a ring terminal and screw.
- Keep the ground wire as short as possible, under 18 inches.
Installing The Fuse Holder
Place the fuse holder on the power wire near the battery. This protects your car from electrical damage. Choose a fuse rating that matches your amplifier’s power needs.
- Cut the power wire and insert the fuse holder in line.
- Secure the fuse holder with clamps or zip ties.
- Use a fuse close to the battery, within 12 inches.
Connect Signal And Speaker Wires
Connecting the signal and speaker wires is a crucial step when adding an amplifier to your car stereo. This connection ensures that the amplifier receives the audio signal correctly and powers your speakers efficiently. Getting these connections right can make a huge difference in sound quality and system reliability.
Using Rca Cables For Signal Input
RCA cables carry the audio signal from your head unit to the amplifier. Most aftermarket stereos have RCA output jacks labeled as “Pre-Out” or “Line-Out.”
Choose high-quality RCA cables to avoid noise and interference. Connect the cables from your head unit’s output to the amplifier’s input, matching colors if possible. A secure and snug connection prevents signal loss, so double-check the fit before moving on.
Running Speaker Wires To Amplifier
Speaker wires carry the amplified audio signal from the amplifier to your speakers. Use wires with the correct gauge; thicker wires handle more power and reduce signal loss.
Run speaker wires carefully from the amplifier to each speaker location. Avoid sharp bends or pinches that could damage the wire insulation. Labeling each wire helps you avoid confusion during installation and future troubleshooting.
Ensuring Proper Wire Management
Organizing your wires keeps your setup clean and prevents accidental disconnections or shorts. Use zip ties or cable organizers to bundle wires together neatly.
Keep power and signal wires separated to reduce interference. Consider routing wires along existing vehicle wiring paths to protect them from heat and moving parts. How much time do you spend on wire management in your car projects? Proper care here saves headaches later.
Mount The Amplifier Securely
Mounting your amplifier securely is crucial for both performance and safety. A loosely mounted amp can cause vibrations that damage internal components or create unwanted noise in your sound system. Taking time to find the right spot and secure it properly ensures your investment lasts and sounds great every time you hit play.
Choosing The Best Location
Pick a spot that keeps your amplifier close to the battery and stereo to minimize wire length. This reduces power loss and signal interference, improving sound quality. Also, think about accessibility—can you easily reach the amp if adjustments or troubleshooting are needed?
Many people overlook how a cramped or hidden location can lead to overheating or damage. I once mounted an amp under a seat without checking space, and it overheated after just a few hours of use. Don’t make the same mistake—choose a place that balances convenience and protection.
Securing The Amplifier
Use strong brackets or mounting kits designed specifically for your amplifier model. Avoid using just tape or weak adhesives, as they won’t hold up against car vibrations. Screws and bolts provide the best hold, but make sure you don’t drill into any wiring or structural parts of your car.
Check that the amp doesn’t wiggle or shift when you push it lightly. Even small movements can loosen connections over time. If your car has a carpeted trunk or floor, consider using a mounting board to create a stable surface.
Allowing For Ventilation
Amplifiers generate heat, so good airflow is essential to prevent overheating. Leave at least a couple of inches of space around the amp for air to circulate freely. Avoid placing it inside enclosed compartments without ventilation holes.
Have you noticed your amp cutting out on hot days? That’s a clear sign of poor ventilation. Adding a small fan or mounting the amp near existing vents can keep temperatures down and improve performance. Remember, a cool amp is a happy amp.
Adjust Amplifier Settings
Adjusting amplifier settings is key to getting clear sound and powerful output from your car stereo. Proper tuning ensures the amplifier works well with your speakers. It also protects your equipment from damage. Take time to set each control carefully for the best audio experience.
Setting Gain Levels
Gain controls the amplifier’s input signal strength. Set the gain too high, and the sound distorts. Set it too low, and the volume stays weak. Start with the gain at a low level. Slowly increase it while playing music at normal volume. Stop increasing when the sound begins to distort or crackle. This method keeps the audio clean and loud.
Tuning Bass And Treble
Bass and treble adjust the low and high frequencies of your music. Boosting bass adds depth and power to songs. Increasing treble sharpens vocals and instruments. Use small adjustments for both controls. Listen carefully to avoid harsh or muddy sound. Balance bass and treble to match your music taste and car acoustics.
Crossover And Frequency Settings
The crossover directs sound frequencies to the right speakers. It prevents speakers from playing sounds they can’t handle well. Set the low-pass filter for subwoofers to block high frequencies. Use the high-pass filter for smaller speakers to block bass. Adjust the crossover frequency based on speaker type and size. Proper crossover settings improve clarity and speaker life.
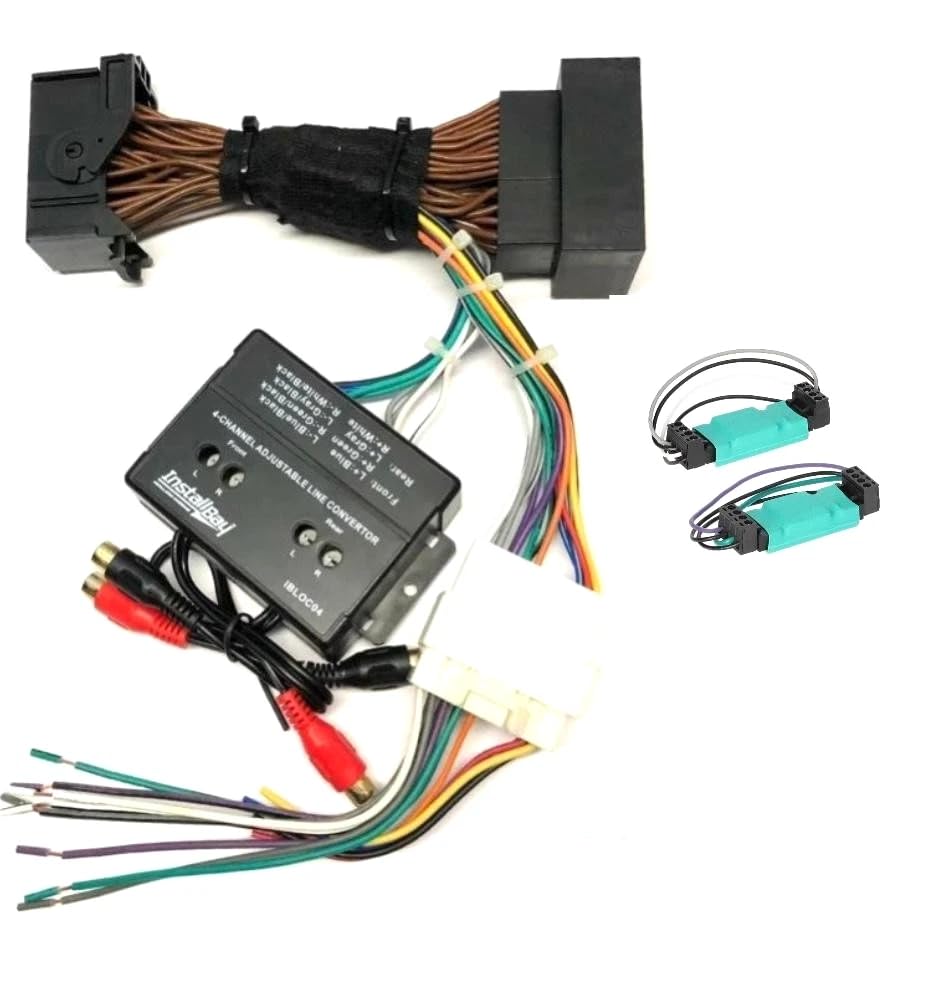
Credit: www.amazon.com
Test The System
After installing your amplifier, testing the system is essential to ensure everything works perfectly. Skipping this step could mean missing hidden issues that affect sound quality or even damage your equipment. Let’s walk through how to carefully check your setup before hitting the road.
Reconnecting The Battery
Start by reconnecting your car’s battery. This restores power to the stereo and amplifier, allowing you to test the entire system. Make sure the battery terminals are clean and tight to avoid any power interruptions or sparks.
Once connected, turn on your car stereo and amplifier. Listen for any unusual noises or warning lights that might indicate electrical problems. If you notice anything off, it’s better to address it before moving forward.
Checking For Distortion
Play a variety of music tracks at different volumes. Pay close attention to any distortion or crackling sounds coming from the speakers. Distortion often signals that the amplifier is overloaded or that speaker wires aren’t connected properly.
Have you ever cranked your stereo only to hear static or buzzing? That’s a clear sign to double-check your settings and wiring. Adjust the gain and bass levels on the amplifier gradually to find a clean, balanced sound.
Verifying All Connections
Inspect every wire and connection once more. Look for loose connectors, frayed wires, or incorrect terminals that could disrupt your audio system. A secure connection ensures consistent performance and prevents shorts.
- Check RCA cables for tight fits and no damage.
- Confirm that speaker wires are connected to the right channels.
- Ensure the ground wire is firmly attached to a clean metal surface.
Have you ever experienced sudden sound loss while driving? That often comes from a loose ground or power wire. Taking a few extra minutes to verify connections can save you from frustrating interruptions later.
Troubleshooting Common Issues
Adding an amplifier to your car stereo can significantly boost your sound experience, but sometimes things don’t go as planned. Troubleshooting common issues quickly can save you time and frustration. Let’s look at some practical solutions to keep your system running smoothly.
Dealing With Noise And Interference
Hearing a constant hum or buzzing noise? This usually comes from a ground loop or interference in your wiring. Check that your amplifier and head unit share a common ground point; different grounding can cause unwanted noise.
Use shielded RCA cables to reduce interference from your car’s electrical system. Keep power and signal cables separated, as running them close together can induce noise. If the noise persists, try using a noise filter or ground loop isolator to clear up the sound.
Fixing Power Problems
If your amplifier won’t turn on or cuts out frequently, power supply issues are likely the cause. Verify that the amplifier’s power wire is properly connected to the battery with a suitable fuse close to the battery terminal.
Check the remote turn-on wire from your head unit to ensure it’s delivering the signal. Loose or corroded connections can cause intermittent power loss. Also, consider the wire gauge; thin cables may not handle the current needed, leading to voltage drops.
Addressing Overheating
Amplifiers generate heat, but excessive heat can damage your equipment or cause it to shut down. Make sure your amp is installed in a well-ventilated area, not buried under seats or in tight spaces.
Cleaning dust from cooling fins and ensuring fans (if present) work properly can prevent overheating. If your amp still overheats, check if it’s being overdriven by speakers with too low impedance or if the gain settings are too high.
Credit: www.diymobileaudio.com
Frequently Asked Questions
How Do I Connect An Amplifier To My Car Stereo?
To connect an amplifier, first disconnect the battery. Run RCA cables from the stereo’s output to the amplifier’s input. Connect the amplifier to the car battery with a power wire and ground it properly. Finally, connect speaker wires from the amplifier to your speakers.
What Tools Are Needed To Install A Car Amplifier?
You need wire cutters, crimp connectors, a screwdriver, a drill, and a multimeter. These tools help cut wires, secure connections, mount the amplifier, and test electrical circuits for safe installation.
Can I Add An Amplifier Without Replacing The Stereo?
Yes, you can add an amplifier without changing your stereo. Use a line output converter if your stereo lacks RCA outputs. This converts speaker wire signals to RCA for the amplifier input.
How Do I Choose The Right Amplifier For My Car?
Select an amplifier that matches your speakers’ power and impedance. Consider the amplifier’s RMS wattage and channel count. Also, ensure it fits your car’s space and budget for the best performance.
Conclusion
Adding an amplifier enhances your car audio experience. It’s worth the effort. Clearer sound and stronger bass transform your drives. First, gather the right tools and parts. Then, carefully follow the steps for installation. Ensure all connections are secure and neat.
Test the system to confirm everything works. This process improves audio quality significantly. Enjoy your new, richer car sound system. Happy driving with your upgraded stereo!

Similar Posts