How to Add an Amplifier to Factory Car Stereo: Easy Step-by-Step Guide
Are you tired of your car’s sound feeling flat and weak? Adding an amplifier to your factory car stereo can transform your listening experience, giving you richer bass and clearer sound.
But if you’re worried it’s too complicated or expensive, don’t be. In this guide, you’ll discover simple steps to boost your car’s audio power without replacing your entire system. By the end, you’ll know exactly how to make your music come alive every time you hit the road.
Ready to turn up the volume on your drive? Keep reading.
Choosing The Right Amplifier
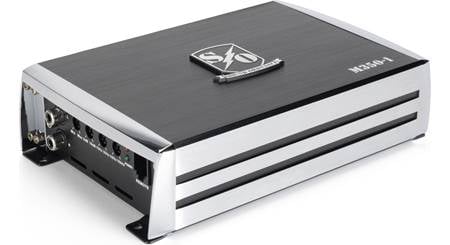
Choosing the right amplifier is a key step for better sound in your car. The amplifier boosts the audio signal from your factory stereo. It powers your speakers and subwoofers, making music louder and clearer. Picking the correct amplifier avoids damage and ensures great sound quality. Focus on types, matching specs, and power needs for best results.
Types Of Amplifiers
Amplifiers come in several types, each serving different needs. The main kinds are:
- Mono Amplifiers:Designed for subwoofers, providing a single powerful channel.
- 2-Channel Amplifiers:Good for driving two speakers or bridging for more power.
- 4-Channel Amplifiers:Ideal for powering front and rear speakers together.
- Multi-Channel Amplifiers:Combine several channels for complex setups.
Choose based on how many speakers or subs you plan to power.
Matching Amplifier To Speaker Specs
Check the speaker’s power handling and impedance before choosing an amp. The amplifier should deliver power within the speaker’s rated range. Too little power causes weak sound. Too much power risks speaker damage.
Match the amplifier’s output impedance with the speaker’s impedance. Common speaker impedance is 4 or 8 ohms. The amplifier should support these values for stable operation.
Power Requirements
Calculate the total power your speakers and subwoofer need. Add some extra wattage for clear sound without distortion. RMS (root mean square) power ratings give a true power level.
Choose an amplifier that can supply continuous RMS power, not just peak power. This ensures clean and reliable performance during long listening sessions.

Credit: www.amazon.com
Gathering Necessary Tools And Materials
Before you start installing an amplifier to your factory car stereo, gathering the right tools and materials is crucial. Having everything ready saves you from frustrating trips to the store mid-project. It also helps ensure a smoother, safer installation process.
Essential Tools
You’ll need a basic set of tools to handle the job efficiently. A good quality wire stripper and crimper are must-haves to prepare and secure wires properly. Also, a multimeter will help you check voltage and continuity, preventing costly mistakes.
Don’t forget screwdrivers with both flathead and Phillips tips—they’re necessary for removing panels and screws. A panel removal tool can protect your car’s interior from scratches. Lastly, a drill with small bits may be required if you need to mount the amplifier securely.
Wiring Kits And Connectors
Choosing the right wiring kit can make or break your amplifier setup. Look for a kit that includes power, ground, and remote turn-on wires, along with RCA cables for signal transfer. The wire gauge should match your amplifier’s power demands to avoid overheating or power loss.
Connectors like butt connectors, ring terminals, and fuse holders are essential to create safe and reliable connections. Investing in heat shrink tubing or electrical tape ensures your splices stay insulated and protected from moisture. Have you checked if your kit includes a fuse? It’s a critical safety feature that many overlook.
Safety Gear
Safety is often underestimated but plays a big role during installation. Wearing gloves protects your hands from sharp edges inside your car’s panels. Safety glasses shield your eyes when drilling or stripping wires.
Also, disconnect your car battery before starting to avoid any electrical shocks or short circuits. A fire extinguisher nearby is a smart precaution when working with electrical components. Have you prepared your workspace to minimize distractions and hazards?
Preparing Your Car Stereo System
Before adding an amplifier to your factory car stereo, getting your system ready is crucial. Proper preparation helps avoid damage and ensures a smooth installation. It also saves you time and frustration during the process.
Accessing The Factory Stereo
You need to remove the stereo unit carefully to access its wiring and connections. Most factory stereos are secured with screws or clips behind the dashboard panel. Use the right tools like a panel remover or screwdriver to avoid damaging the dash.
Take your time pulling out the stereo. Rushing can break delicate plastic parts or wiring. Have a small container ready to keep screws and parts safe.
Identifying Wiring Harnesses
Once the stereo is out, look at the wiring harnesses connected to the back. These bundles of wires control power, speakers, and signals. Identifying each harness correctly is key to connecting your amplifier without errors.
Look for labels or consult your car’s manual for wiring colors and functions. If you find no markings, use a multimeter or test light to verify wires. This step helps avoid confusion and potential short circuits.
Disconnecting The Battery
Always disconnect your car battery before working with electronics. This simple step prevents electrical shorts and protects both you and your vehicle’s system. Start by removing the negative terminal first.
Keep the battery disconnected until your installation is fully complete. It’s a safety habit that prevents sparks and accidental damage during wiring or mounting. Do you have the right wrench ready for this task?
Credit: www.crzforum.com
Running Power And Ground Wires
Running power and ground wires is a crucial step when adding an amplifier to your factory car stereo. These wires deliver the electricity your amplifier needs to perform at its best. Getting this right ensures stable power flow and prevents electrical issues that could damage your audio system or vehicle.
Choosing Power Wire Route
Select a path from the battery to the amplifier that avoids moving parts and heat sources like the engine or exhaust. A clean, direct route reduces the risk of wire damage and power loss.
Think about where you can hide the wires for a neat look. Running wires along the car’s frame or under the carpet often works well. Have you checked for existing wire channels or factory grommets? They can make your job easier and protect the wire.
Securing Ground Connection
A solid ground connection is just as important as power. Find a clean metal spot close to the amplifier to attach your ground wire.
Scrape away any paint or rust to expose bare metal for a tight connection. Loose or poor grounds cause unwanted noise and can make your amplifier cut out unexpectedly.
Using Fuse Holders
Installing a fuse holder on the power wire near the battery protects your vehicle’s electrical system. Choose a fuse rated slightly above your amplifier’s maximum current draw to avoid unnecessary blows.
Mount the fuse holder in an accessible spot so you can replace fuses quickly if needed. Have you considered using a fuse holder with a clear cover? It helps you spot a blown fuse without disassembling everything.
Connecting The Amplifier To The Stereo
Connecting an amplifier to a factory car stereo requires careful attention to the audio signal. The goal is to send clean audio from the stereo to the amplifier. This ensures better sound quality and power for your speakers or subwoofers. Different car stereos offer various output options. Understanding these options helps in choosing the right connection method.
Using Rca Or Speaker-level Inputs
Many aftermarket amplifiers accept RCA inputs. RCA cables carry low-level audio signals. Some factory stereos have RCA outputs. If yours does, connect these directly to the amplifier’s RCA inputs. This is the easiest and cleanest way to connect.
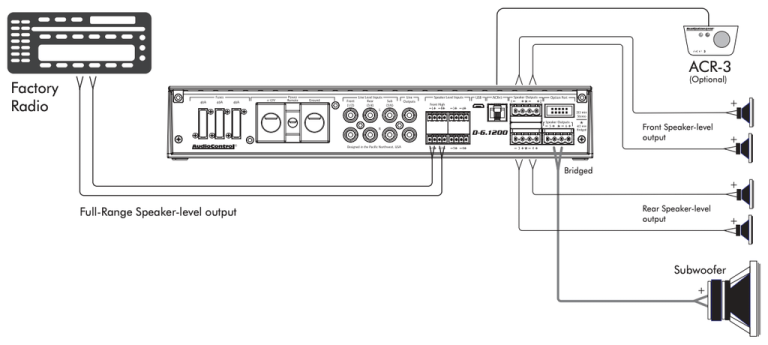
If your stereo lacks RCA outputs, use speaker-level inputs. These inputs accept high-level signals from speaker wires. Connect the amplifier to speaker wires from the stereo. This method allows the amplifier to boost the sound signal properly.
Installing A Line Output Converter
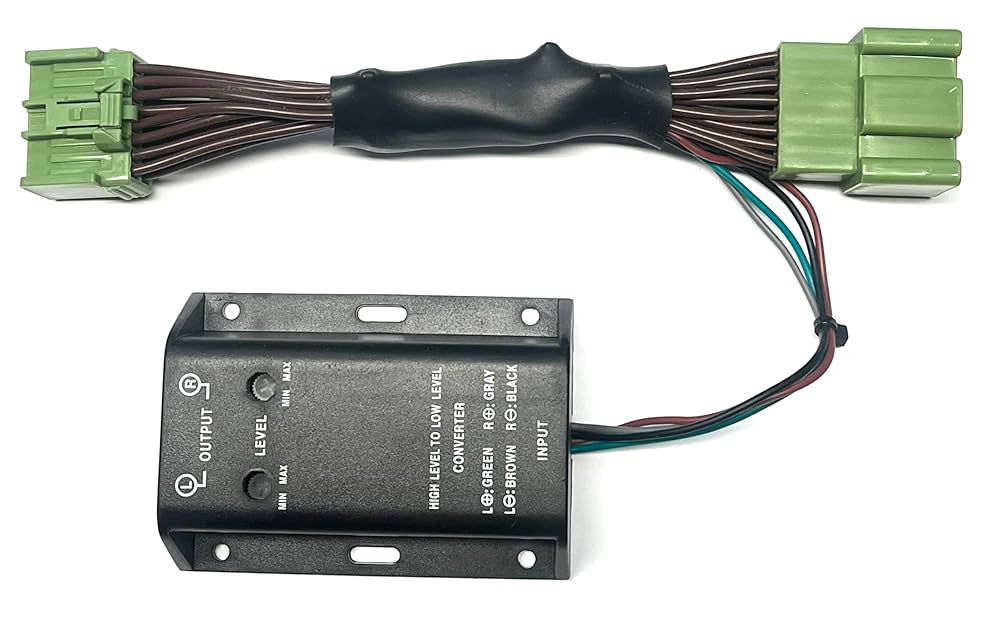
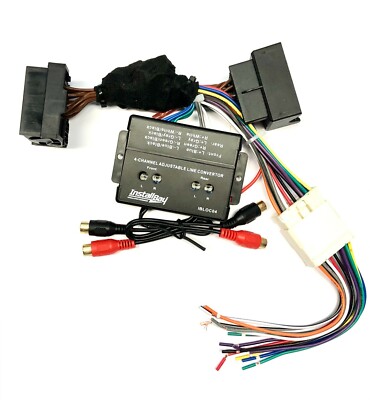
A line output converter (LOC) converts speaker-level signals to RCA-level signals. Use an LOC if your stereo lacks RCA outputs. Connect the LOC to the speaker wires from the stereo. Then, run RCA cables from the LOC to the amplifier.
Choose an LOC with noise reduction to avoid hums or interference. Secure all connections tightly. Proper installation prevents signal loss and distortion.
Routing Signal Cables
Route RCA or speaker wires carefully through the vehicle. Keep signal cables away from power wires. This reduces electrical noise and interference.
- Use wire loom or split tubing for protection.
- Secure cables with zip ties or clamps.
- Avoid sharp edges and moving parts.
Run cables under the carpet or trim panels for a clean look. Proper routing enhances sound quality and safety.
Wiring The Subwoofer And Speakers
Wiring the subwoofer and speakers is a key step in upgrading your car’s audio system. Correct wiring ensures clear sound and protects your equipment. Pay close attention to connections and polarity to avoid damage and poor performance.
Speaker Wire Connections
Use quality speaker wire for all connections. Strip about half an inch of insulation from each wire end. Connect the positive wire from the amplifier to the positive terminal on the speaker. Connect the negative wire to the negative terminal. Avoid loose connections to prevent sound issues.
Run wires neatly to avoid interference. Keep speaker wires away from power cables. Use wire ties to secure wires and prevent rattling. Double-check that wires are connected to the correct terminals before powering on.
Configuring Subwoofer Setup
Choose the right wiring for your subwoofer based on its impedance. Subwoofers can be wired in series or parallel to match the amplifier’s output. Series wiring increases impedance, while parallel lowers it.
Connect the subwoofer’s positive terminal to the amplifier’s positive output. Connect the negative terminal similarly. Use thick speaker wire for the subwoofer to handle the power load. Check the amplifier’s manual for recommended settings.
Ensuring Proper Polarity
Proper polarity keeps sound waves in sync. Incorrect polarity causes phase cancellation and weak bass. Confirm that the positive terminal on the amplifier connects to the positive terminal on the speaker or subwoofer.
Use a polarity tester if unsure. Mark wires with tape or labels for easy identification. Maintaining correct polarity improves sound clarity and bass impact. This step prevents audio distortion and keeps your system balanced.
Testing And Adjusting The Amplifier
Testing and adjusting your amplifier after installation is crucial for achieving the best sound quality from your factory car stereo. This process ensures that the amplifier operates safely and delivers clear, powerful audio without distortion or damage to your speakers. Taking the time to carefully check and tweak settings will help you enjoy every beat as intended.
Initial Power On Checks
Before cranking up the volume, power on your car’s audio system and watch for any warning signs. Listen closely for unwanted noises like buzzing, humming, or static that might indicate wiring issues.
Check the amplifier’s power and ground connections to confirm they are secure. Also, verify that the remote turn-on wire is functioning correctly—if the amp doesn’t turn on with the stereo, you’ll need to recheck this connection.
Adjusting Gain And Filters
Setting the gain properly is key to avoiding distortion and protecting your speakers. Start with the gain knob turned all the way down, then slowly increase it while playing familiar music at a moderate volume until the sound is clear and powerful without distortion.
Use the built-in filters (like low-pass or high-pass) to match the amplifier’s output to your speakers’ capabilities. For example, if you’re powering subwoofers, engage the low-pass filter to block higher frequencies that don’t belong to bass sounds.
Troubleshooting Common Issues
If you hear persistent noise or your amplifier cuts out, check for common problems like loose connections or inadequate power supply. Inspect the ground wire again—an insufficient ground can cause noise and erratic performance.
Another frequent issue is signal clipping, which happens if the gain is set too high. Lower the gain slightly and see if the distortion disappears. Sometimes, adjusting the source unit’s volume or settings can also resolve these problems.
Credit: www.ebay.ca
Finalizing Installation
Finalizing the installation of your amplifier ensures a clean, safe, and durable setup. This stage focuses on securing the amplifier firmly, organizing wires neatly, and restoring your car’s interior. Proper attention here prevents future issues and keeps your system running smoothly.
Securing The Amplifier
Mount the amplifier on a stable surface. Use screws or brackets that come with the amp. Avoid areas that get hot or damp. Keep the amplifier away from moving parts. Check it does not move or vibrate when the car drives.
Organizing And Protecting Wires
Group wires by their function: power, ground, and signal. Use zip ties or Velcro straps to bundle wires neatly. Avoid sharp bends or tight loops. Cover exposed wires with electrical tape or wire loom. Keep wires away from heat sources and sharp edges.
Reassembling Interior Panels
Carefully put back all removed panels and trim pieces. Align clips and screws correctly before securing. Do not force panels; they should fit easily. Double-check that no wires are pinched. Ensure all parts look flush and clean after reassembly.
Frequently Asked Questions
How Do I Connect An Amp To A Factory Stereo?
To connect an amp to a factory stereo, use a line output converter. This device converts speaker-level signals to line-level. First, tap into the factory speaker wires. Then, connect them to the converter. Finally, run RCA cables from the converter to the amplifier.
This setup boosts sound without replacing the stereo.
Can I Add An Amplifier Without Replacing The Stereo?
Yes, you can add an amplifier without replacing the stereo. Use a line output converter to connect the amp. This method enhances your car’s audio system. It allows you to boost sound quality without altering the factory setup. It’s an effective way to improve your car’s audio performance.
What Tools Are Needed To Add An Amplifier?
To add an amplifier, you need a few basic tools. These include wire strippers, a screwdriver, and crimping tools. Additionally, you’ll need RCA cables, a line output converter, and speaker wire. Having these tools ensures a smooth installation process. It allows you to connect the amplifier effectively.
Is It Safe To Install An Amplifier Myself?
Yes, it’s generally safe to install an amplifier yourself. Ensure you follow the instructions carefully. Disconnect the car battery before starting. Use proper tools and take safety precautions. If unsure, consult a professional. Proper installation prevents electrical issues and enhances sound quality.
It ensures a successful and safe upgrade.
Conclusion
Adding an amplifier to your factory car stereo can improve sound quality. It makes music louder and clearer. Follow the steps carefully for a safe installation. Use the right tools and check connections twice. Take your time to avoid mistakes.
Enjoy better audio without buying a new stereo. Small upgrades can make a big difference. Start with simple changes and learn as you go. Your car’s sound system will thank you.