How to Test a Car Amplifier at Home: Easy Steps for Perfect Sound
Are you having trouble with your car’s sound system and wondering if your amplifier is working right? Testing a car amplifier at home might seem tricky, but it’s easier than you think.
Knowing how to check your amplifier yourself can save you time, money, and frustration. In this guide, you’ll learn simple steps to test your car amplifier quickly and accurately. Keep reading, and soon you’ll be confident that your sound system is performing at its best—or know exactly what needs fixing.

Credit: www.youtube.com
Tools Needed For Testing
Testing a car amplifier at home requires some basic tools. These tools help check the amplifier’s performance and spot any issues. Having the right equipment makes testing easier and safer. Some tools are essential, while others improve accuracy and convenience.
Basic Equipment
- Multimeter:Measures voltage, current, and resistance. Essential for checking power and connections.
- Test speaker or dummy load:A speaker or a resistor to simulate one. Prevents damage while testing output.
- Audio source:A phone or MP3 player to play sound signals for testing.
- Speaker wires:Connects the amplifier to the test speaker or dummy load.
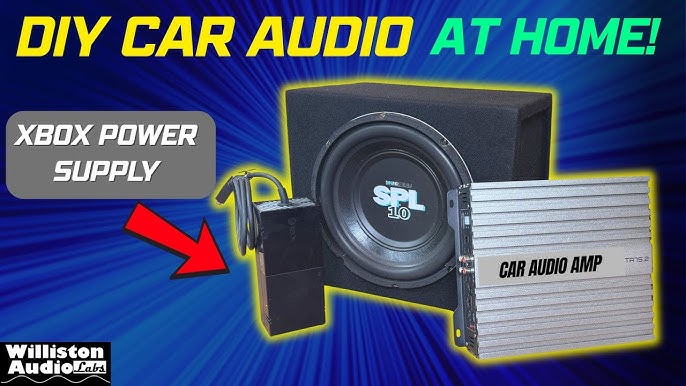
- Power supply or car battery:Provides power to the amplifier during the test.
Optional Accessories
- Oscilloscope:Shows the audio signal waveform for detailed analysis.
- Signal generator:Produces test tones or frequencies for precise testing.
- Amplifier tester box:A device designed specifically to test amplifiers quickly.
- Insulated gloves:Protect hands when working with electrical parts.
- Fuse tester:Checks the condition of fuses inside the amplifier.
Preparing Your Car Amplifier
Preparing your car amplifier properly helps ensure accurate testing results. It involves setting up the amplifier safely and connecting it to power correctly. This preparation protects both you and the equipment.
Safety Precautions
Always disconnect the car battery before starting work. Avoid wearing jewelry or loose clothing near electrical parts. Work in a dry area to prevent electric shock. Use insulated tools to reduce risk. Double-check all connections before powering the amplifier.
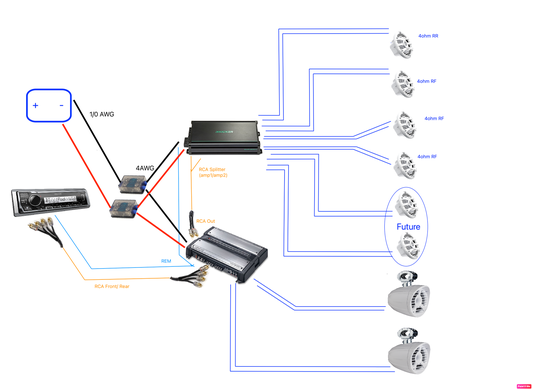
Connecting Power And Ground
Identify the amplifier’s power and ground terminals clearly. Use a proper gauge wire for power and ground connections. Connect the power wire to the positive terminal of the battery or power source. Attach the ground wire to a clean, unpainted metal surface on the car chassis. Ensure all connections are tight and secure. Poor grounding can cause noise or damage.
Setting Up The Test Environment
Setting up the right environment is crucial before you start testing your car amplifier at home. A well-prepared space helps you focus, prevents damage to your equipment, and ensures accurate results. Let’s look at how to create the perfect setup that suits your needs and gear.
Choosing The Right Space
Pick a quiet, clutter-free area where you can spread out your equipment comfortably. A garage or a spare room often works well, as it provides enough space and reduces outside noise interference.
Make sure the surface you use is sturdy and level to avoid any accidental falls or disconnections. If you have pets or children, consider a spot that minimizes distractions and accidental damage.
Have you thought about lighting? Good lighting helps you see your connections clearly and avoid mistakes when wiring the amplifier.
Connecting Audio Sources
Start by gathering your audio sources—this could be a smartphone, MP3 player, or car head unit. Use quality cables to ensure a clear signal reaches your amplifier.
Connect the audio source to the amplifier’s input using RCA cables or speaker wire, depending on your amplifier model. Double-check the connections to prevent loose contacts that can cause static or interruptions.
Test the audio source by playing a familiar track before connecting it to the amplifier. This step helps confirm the source is working properly and avoids confusion during testing.
Credit: www.diymobileaudio.com
Testing Sound Output
Testing the sound output of a car amplifier is essential to ensure it works correctly. This process helps spot any issues with the audio quality. A clear, strong sound means the amplifier is functioning well. Low volume, buzzing, or crackling signals a problem.
Start by checking the connections and then move on to playing test tones. Finally, listen closely for any distortion or unwanted noise.
Checking Speaker Connections
First, make sure all speaker wires connect firmly to the amplifier. Loose wires can cause weak or no sound. Look for any broken or frayed cables. Check the polarity of each wire. The positive wire should connect to the positive terminal and the same for the negative. Proper connections prevent phase issues and improve sound clarity.
Playing Test Tones
Use test tones to evaluate the amplifier’s output. These tones are steady sounds at different frequencies. Play a low-frequency tone to check bass response. Next, try mid and high-frequency tones for clarity. Use a phone or test tone CD for this. Keep the volume low at first to avoid damage.
Listening For Distortion
Listen carefully as the test tones play. Distortion sounds like crackling, buzzing, or popping. It usually means the amplifier is overloaded or damaged. Distortion can also come from bad speaker connections. If you hear distortion, lower the volume and check all wires again. Clear, clean sound means the amplifier is healthy.
Measuring Amplifier Performance
Measuring amplifier performance is key to understanding if your car amplifier is delivering the power and quality it promises. You don’t need fancy equipment or a professional workshop for this—just some basic tools and careful steps. Knowing how to measure performance can save you from costly repairs and ensure your sound system performs at its best.
Using A Multimeter
A multimeter is your best friend for checking an amplifier’s health. It measures electrical values like voltage, current, and resistance, which are crucial for diagnosing issues.
Start by setting your multimeter to the appropriate measurement mode depending on what you want to check. For beginners, voltage and resistance are easier starting points. Make sure your amplifier is off before connecting the probes to avoid any damage.
Have you ever wondered why your bass sounds weak or distorted? Measuring resistance across speaker terminals can reveal wiring problems or speaker faults. If the reading is too high or infinite, it could mean a broken wire or damaged speaker coil.
Testing Voltage And Current
Voltage and current readings tell you if your amplifier is getting the right power and delivering it correctly to your speakers.
- Voltage Test:With the amplifier on and connected, place the multimeter probes on the amplifier’s output terminals. The voltage should match the amplifier’s rated output within a small margin.
- Current Test:This is trickier but essential for spotting overloads. Using a clamp meter or setting your multimeter to current mode, measure the current flowing through the amplifier circuit while playing music at moderate volume.
Too high or too low voltage and current readings often point to power supply issues or internal faults. Have you checked these values before blaming your speakers or cables? Testing these can pinpoint whether the problem lies inside your amplifier or elsewhere in your system.

Credit: audiointensity.com
Troubleshooting Common Issues
Troubleshooting common issues helps keep your car amplifier working well. Many problems are easy to find and fix at home. Knowing what to check can save time and money. This guide explains how to spot and solve typical amplifier problems.
No Power Or Sound
Check the power connections first. Loose or broken wires cause no power. Use a multimeter to test voltage at the amplifier terminals. Ensure the fuse is not blown. Also, inspect the remote turn-on wire; it must receive power to activate the amp.
Look at speaker wires for damage or disconnection. Test the source device and cables to confirm they send audio signals. Replace any faulty cables. Confirm the amplifier’s gain and volume settings are not too low or muted.
Distorted Audio
Distorted sound often results from improper gain settings. Lower the gain knob slightly and test again. Check speaker impedance; mismatched impedance causes distortion. Use speakers with the recommended ohm rating for your amplifier.
Inspect all wiring for loose or frayed connections. Damaged cables reduce audio quality. Avoid turning the volume too high. Overdriving the amplifier leads to clipping and distortion. If distortion continues, test the amplifier with different speakers.
Overheating Problems
Overheating occurs when the amplifier runs too hot. Ensure proper ventilation around the unit. Remove any objects blocking air vents. Check for short circuits in wiring, which increase heat output.
Verify the amplifier is not overpowered by speakers. Using speakers with too low impedance strains the amp. Reduce gain and volume levels to lower heat. Consider installing a cooling fan if overheating persists.
Optimizing Sound Quality
Optimizing sound quality is key to enjoying clear and powerful music from your car amplifier. Tuning your amplifier settings helps deliver balanced audio that suits your preferences and vehicle acoustics. Small adjustments can greatly improve your listening experience.
Adjusting Gain And Bass Boost
Gain controls the amplifier’s input level. Set it too high, and sound distorts. Too low, and audio is weak. Start with the gain at a low level and slowly increase it until the sound is clear and loud without distortion.
Bass boost enhances low-frequency sounds. Use it carefully to avoid overpowering other tones. Increase the bass boost gradually while listening for a full, rich bass without muddiness. Too much bass can cause speaker damage.
Fine-tuning Crossover Settings
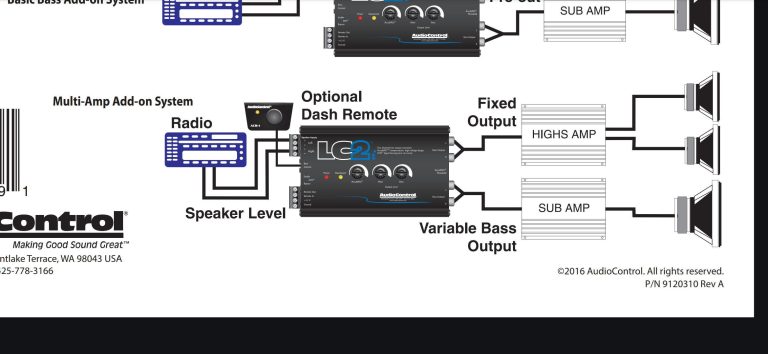
The crossover divides audio signals between speakers and subwoofers. Set the crossover frequency to match your speaker type for better sound balance. For example, use a low-pass filter for subwoofers to play only bass notes.
Adjust the high-pass filter for tweeters and mid-range speakers to block low sounds they cannot handle. Test different crossover points by listening to familiar music tracks. Aim for smooth transitions between speakers without gaps or overlaps.
Maintaining Your Amplifier
Keeping your car amplifier in top shape goes beyond just testing it once. Regular maintenance helps you avoid unexpected breakdowns and keeps the sound quality crisp. Simple care routines can save you time and money in the long run.
Regular Cleaning
Dust and dirt can quickly build up on your amplifier, blocking ventilation and causing it to overheat. Use a soft cloth or a small brush to gently remove any debris from the surface and vents. Avoid spraying cleaners directly on the device; instead, lightly dampen the cloth if needed.
Have you ever noticed your amplifier feeling unusually warm? Cleaning the vents often can prevent overheating and extend its lifespan. Don’t forget to check inside the connections for any dust accumulation, which can disrupt performance.
Checking Connections Periodically
Loose or corroded connections are a common reason amplifiers stop working properly. Regularly inspect all wiring, including power cables, ground wires, and speaker connections. Make sure each wire is tightly secured and free of rust or damage.
Try gently tugging on each wire to see if it stays put. If you find any frayed or worn-out cables, replace them immediately. Remember, poor connections can cause static noise or complete signal loss, affecting your listening experience.
Frequently Asked Questions
How Do I Know If My Car Amplifier Is Working?
Test the amplifier by connecting it to speakers and playing audio. Check for clear sound without distortion. Use a multimeter to verify the power and ground connections. If sound is weak or absent, the amplifier may be faulty.
What Tools Are Needed To Test A Car Amplifier?
You need a multimeter, test speaker or speakers, RCA cables, and a power source. Optional tools include a signal generator or an audio source like a phone. These tools help check voltage, continuity, and sound output accurately.
Can I Test A Car Amplifier Without Removing It?
Yes, testing can be done without removing the amplifier. Ensure all connections are secure and use test speakers. Measure voltage and speaker output while the system is on. This saves time and avoids disconnecting the amplifier.
How To Check Car Amplifier Power Output At Home?
Use a multimeter to measure voltage at the power terminals. Connect a test speaker and play audio at moderate volume. Listen for clear, strong sound output. Compare results with amplifier specifications for accuracy.
Conclusion
Testing a car amplifier at home is simple. Follow the steps carefully. Use basic tools like a multimeter and speakers. Check connections and power supply. Listen for clear sound quality. Ensure all parts work properly. Regular testing helps maintain your amplifier’s performance.
With practice, it becomes easier. Now, you can enjoy your music without any issues. Keep your car audio system in top shape. Regular checks prevent future problems. Happy listening!