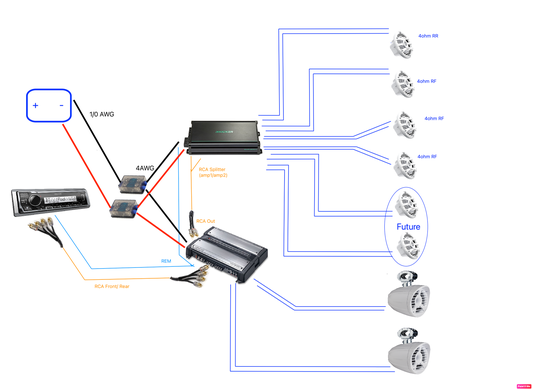
How to Connect an Amp to a Car Stereo: Step-by-Step Guide
Are you ready to take your car’s sound system to the next level? Connecting an amp to your car stereo can unlock powerful, clear audio that transforms every drive.
But if you’ve never done it before, the process might feel confusing or overwhelming. Don’t worry—this guide will walk you through each simple step, so you can enjoy booming bass and crisp highs without any hassle. Keep reading, and soon you’ll have a sound system that truly makes your music come alive.
Choosing The Right Amplifier
Choosing the right amplifier is key to enhancing your car audio system. The amplifier powers your speakers and shapes the sound quality. Picking an amplifier that fits your needs ensures clear and powerful audio without damage to your equipment.
Types Of Car Amplifiers
Car amplifiers come in different classes. Each class has pros and cons for power and sound quality.
- Class A/B:Common and affordable. Offers good sound quality and efficiency.
- Class D:Compact and very efficient. Great for bass and subwoofers.
- Class A:Best sound quality but less efficient. Usually found in high-end systems.
Matching Power With Speakers
Power matching protects speakers and improves sound clarity. Check the speaker’s power rating before choosing an amp.
- Choose an amplifier with RMS power close to speaker RMS rating.
- Amp power too low can cause distortion and damage speakers.
- Too much power risks blowing the speakers.
Balance is important. Match power levels for clean, strong sound.
Considerations For Sound Quality
Sound quality depends on amplifier features and build quality. Look for low distortion and good signal-to-noise ratio.
- Quality components reduce noise and improve clarity.
- Adjustable gain and crossover controls help fine-tune sound.
- Proper wiring and placement also affect performance.
Choose an amplifier that meets your sound expectations and system setup.
Gathering Necessary Tools And Materials
Before you start connecting an amp to your car stereo, gathering all the right tools and materials is crucial. Missing even one small component can delay your project or cause problems later. Having everything at hand makes the installation smoother and less frustrating.
Essential Wiring Components
Wiring is the backbone of your amp connection. You’ll need:
- Power wire:Usually 8 or 4 gauge, depending on the amp’s power requirements.
- Ground wire:Same gauge as the power wire to ensure proper grounding.
- Remote turn-on wire:This small wire signals the amp to power on with your stereo.
- RCA cables:These carry the audio signal from your head unit to the amp.
- Speaker wire:To connect the amp output to your speakers or subwoofer.
- Fuse holder and fuse:Protects your system from electrical damage.
Choosing the right gauge and quality matters. Have you checked your amp’s manual for recommended wire sizes?
Tools For Installation
Having the right tools will save you time and prevent mistakes. Essential tools include:
- Wire strippers:For cleanly removing insulation without damaging the wire.
- Crimping tool:Helps you secure connectors tightly to wires.
- Multimeter:To test voltage and continuity, ensuring your connections are correct.
- Socket wrench set:For loosening and tightening bolts on battery terminals and mounting brackets.
- Electrical tape or heat shrink tubing:To insulate and protect your wire joints.
- Screwdrivers:Both flathead and Phillips for various screws.
Skipping the multimeter often leads to guesswork. How confident are you in testing your wiring before powering the system?
Safety Gear And Precautions
Working with car electronics involves risks. Protect yourself by using:
- Safety glasses:To shield your eyes from sparks or debris.
- Gloves:Insulated gloves help prevent electrical shocks and cuts.
- Disconnect the car battery:Always disconnect the negative terminal before starting any electrical work.
Ignoring safety can lead to costly mistakes or injuries. Do you have a habit of double-checking safety steps before diving in?
Preparing The Car Stereo System
Preparing your car stereo system is a crucial first step before connecting an amp. This preparation ensures safety and creates a clean setup for better sound quality. Taking your time here can save frustration later and protect your vehicle’s electrical components.
Disconnecting The Battery
Always start by disconnecting the car battery. This prevents any accidental short circuits while working with electrical parts. Simply use a wrench to remove the negative terminal first, then the positive.
Have you ever had a fuse blow unexpectedly? Disconnecting the battery stops that from happening and keeps you safe from electric shocks.
Accessing The Stereo Unit
Next, you’ll need to access the stereo unit itself. Most car stereos are held in by screws or clips, often hidden behind trim panels. Gently pry off these panels using a plastic tool to avoid damaging your dashboard.
Check your car’s manual for specific instructions on removing the stereo. It’s a good idea to keep all screws in a small container so nothing gets lost during reassembly.
Removing Factory Speakers
Removing the factory speakers helps you replace them with higher-quality ones that work well with your new amp. Door panels or speaker grilles usually cover the speakers, so start by removing those carefully.
- Unscrew any visible screws holding the speaker in place.
- Disconnect the wiring harness gently to avoid damaging the connectors.
- Take note of speaker wiring colors for easier installation of new components.
Have you noticed how much better your music sounds after upgrading speakers? Removing the old ones properly sets the stage for that improvement.
Running Power And Ground Wires
Running power and ground wires is vital for connecting an amp to a car stereo. These wires supply the necessary electricity and complete the circuit. Correct wiring ensures the amp works safely and efficiently. Poor wiring can cause noise, voltage drops, or damage.
This part of the installation needs attention and care. Use the right tools and materials. Follow safety precautions to avoid electrical hazards. Proper routing and grounding reduce interference and improve sound quality.
Locating The Battery Connection
Find the positive terminal on the car battery. This is the main power source for the amp. Use a wire with an appropriate gauge for your amp’s power needs. Attach a fuse holder near the battery terminal to protect the system.
Keep the connection tight and clean. Avoid corrosion by checking for rust or dirt. Use a ring terminal to secure the wire to the battery terminal firmly.
Routing Power Wire Safely
Run the power wire through the firewall using a grommet to prevent damage. Avoid sharp edges and hot engine parts. Use wire loom or conduit for extra protection.
Keep the power wire away from signal cables to reduce noise. Secure the wire along the car frame with zip ties. Do not pull the wire tight; leave some slack for movement.
Securing A Proper Ground
Find a clean, bare metal spot close to the amp for grounding. Remove paint and rust with sandpaper for a solid connection. Attach the ground wire with a ring terminal and tighten the bolt securely.
Use a ground wire that is the same gauge as the power wire. A poor ground causes noise and weak performance. Check the ground connection regularly to keep it solid and clean.
Connecting The Remote Turn-on Wire
Connecting the remote turn-on wire is a key step in linking your amplifier to the car stereo. This wire sends a small signal to the amp, telling it to power on only when the stereo is active. This prevents the amplifier from draining the car battery when the stereo is off. Proper handling of this wire ensures your sound system works smoothly and safely.
Identifying The Remote Wire
Start by locating the remote turn-on wire from your car stereo. It is usually a thin blue wire or blue with a white stripe. Check your stereo’s manual to confirm the wire’s color and position. Use a test light or multimeter to verify the wire only carries voltage when the stereo is on. This prevents accidental power to the amplifier at the wrong times.
Splicing And Securing Connections
Once identified, you need to splice the remote turn-on wire carefully. Cut the wire gently, avoiding damage to the insulation. Strip a small section of the insulation to expose the copper wire inside. Use a wire connector or solder the wires together for a strong connection.
- Wrap the connection with electrical tape or heat shrink tubing.
- Ensure the splice is tight and secure to avoid power loss.
- Route the wire away from moving parts or heat sources.
Secure the wire along the car’s frame using zip ties. This prevents the wire from moving and causing shorts. Double-check all connections before powering the stereo to avoid any problems.

Credit: www.amazon.ca
Wiring The Signal Cables
Wiring the signal cables is a crucial part of connecting your amp to a car stereo. These cables carry the audio signal from your head unit to the amplifier, ensuring clear and powerful sound. Getting this step right can make a noticeable difference in your car’s audio quality.
Using Rca Cables
RCA cables are the most common choice for signal transmission. They offer a clean and strong signal path from the stereo to the amp. Make sure you pick cables with good shielding and solid connectors to avoid signal loss or noise.
Choose cables long enough to reach your amplifier without stretching or bending sharply. Running them along the car’s frame or existing wiring harness can keep things neat and safe.
Avoiding Interference
Signal interference can ruin your sound with annoying hums or static. Keep RCA cables away from power wires to minimize this problem. If you notice interference, try crossing signal cables and power cables at right angles rather than running them parallel.
Using cables with thicker shielding or adding ferrite beads can also reduce noise. Have you ever heard a hum in your system and wondered where it’s coming from? Most likely, it’s interference you can fix by re-routing your cables carefully.
Connecting To Amplifier Inputs
Once your RCA cables are routed, connect them to the amplifier’s input jacks. Make sure the left and right channels match correctly to avoid audio imbalance. Tighten the connectors firmly but gently to prevent damage.
Some amps have multiple input options, including high-level inputs for speaker wire connection. Check your amplifier’s manual to use the proper input type. This step ensures your amplifier receives a clean, accurate signal for the best sound performance.
Hooking Up The Speakers To The Amplifier
Hooking up the speakers to the amplifier is a key step in your car audio setup. Proper connections ensure clear sound and prevent damage. This part involves handling speaker wires and making sure they connect correctly to the amplifier terminals.
Determining Speaker Wire Polarity
Speaker wire polarity means matching positive and negative wires. The positive wire connects to the amplifier’s positive terminal. The negative wire connects to the negative terminal. Check wire colors or markings to identify polarity. Usually, red or a stripe means positive. Black or plain wire is negative. Keeping polarity correct avoids sound issues like weak bass or distortion.
Running Speaker Wires
Run the speaker wires from the amplifier to the speaker locations carefully. Avoid sharp bends and tight spaces. Use wire clips or zip ties to secure the wires along the car frame. Keep wires away from heat sources and moving parts. Measure wire length to ensure enough slack for connections. Clean wire ends before connecting to improve contact.
Connecting To Speaker Terminals
Connect the speaker wires firmly to the amplifier’s speaker terminals. Loosen terminal screws or use push connectors depending on your amp. Insert the positive wire into the positive terminal and tighten securely. Repeat for the negative wire. Double-check all connections for tightness. Loose wires can cause poor sound or cutouts. Finally, connect the other wire ends to the speakers, matching polarity again.

Credit: www.youtube.com
Mounting The Amplifier
Mounting the amplifier is a crucial part of connecting it to your car stereo. A proper mount ensures stability, safety, and optimal performance. Taking time to mount it correctly can save you from future headaches like rattling noises or overheating issues.
Choosing The Installation Location
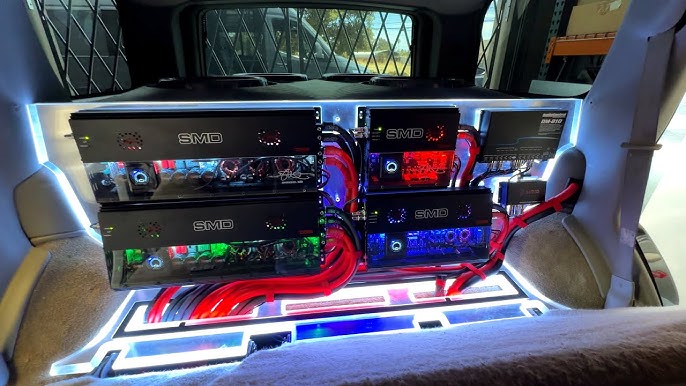
Your amplifier needs a spot that’s both accessible and safe. Common places include under the seat, in the trunk, or behind a panel. Think about where you can easily reach it for adjustments without compromising your car’s space.
Also, consider wiring lengths. You don’t want to run cables across the entire car if you can avoid it. A closer location to the battery or stereo makes installation neater and reduces signal loss.
Securing The Amplifier
Once you pick the spot, the next step is making sure the amplifier stays put. Use sturdy brackets or mounting screws designed for your amp’s weight and size. Loose mounting can cause vibrations that damage the unit or create unwanted noise in your audio system.
If you’re mounting under a seat, check for any seat movement that might affect the amp. Secure the cables as well to prevent them from snagging or pulling loose during drives.
Ensuring Proper Ventilation
Amplifiers generate heat, and poor ventilation can lead to overheating and failure. Leave enough space around your amp for air to flow freely. Avoid tight compartments or stacking items on top of the unit.
Have you noticed your amp getting unusually hot after a long drive? That’s a sign it needs better airflow. Adding small vents or using cooling fans can extend your amplifier’s lifespan and keep your sound crisp.
Testing The System
Testing the system is the moment you see if all your hard work pays off. It’s where you find out if your amp and stereo are communicating perfectly or if tweaks are still needed. Don’t rush this part—careful testing can save you from future headaches and ensure your sound is crisp and powerful.
Reconnecting The Battery
Before powering anything up, safely reconnect your car’s battery. Make sure the terminals are clean and secure to avoid any loose connections that might cause sparks or interruptions.
Once connected, double-check that all amp wiring is correctly attached and insulated. This step might seem simple, but a poor battery connection can cause your system to fail or even damage components.
Powering On The Stereo
Turn on your car stereo and listen carefully. Does the amp power up without any strange noises or clicks? If you hear anything unusual, turn off the system immediately to prevent damage.
Check if the stereo recognizes the amp and that the speakers respond. If there’s no sound, revisit your wiring or fuse placement. Sometimes, a tiny misstep in wiring can stop the whole setup from working.
Adjusting Amplifier Settings
Now that the system is on, fine-tune the amplifier’s gain, bass boost, and crossover settings. Start with the gain low and increase it slowly to avoid distortion or speaker damage.
Use your favorite music tracks to test different frequencies. Adjust the crossover so your speakers get the right range of sound; this can dramatically improve clarity and power.
Ask yourself: Is the bass punchy without overwhelming the mids and highs? If not, keep adjusting until you find that perfect balance.
Troubleshooting Common Issues
Connecting an amplifier to your car stereo can boost your sound experience, but sometimes things don’t go as planned. Troubleshooting common issues will save you time and frustration. Let’s look at the most frequent problems and how you can fix them quickly.
No Power To Amplifier
If your amp isn’t turning on, the first thing to check is the power connection. Make sure the fuse on the power wire is not blown. A simple fuse replacement can often bring your amp back to life.
Next, verify that the ground wire is securely connected to a clean, unpainted metal surface. A poor ground connection is a common culprit for power issues.
Have you checked the remote turn-on wire? This small wire signals your amp to power up when the stereo is on. If it’s loose or disconnected, the amp won’t receive the signal to start.
Distorted Sound
Distortion usually means your amp is working too hard or the settings are off. Start by lowering the gain knob on your amplifier to prevent signal clipping. This simple adjustment can clear up distorted audio immediately.
Also, check your speaker wiring for loose connections or damaged cables. Faulty wiring can cause sound distortion or intermittent sound issues.
Sometimes, using speakers with a lower wattage rating than your amp’s output causes distortion. Matching the amp’s power output to your speakers’ capacity is key to clean sound.
Ground Loop Noise
That annoying humming or buzzing sound is often a ground loop issue. It happens when there are multiple ground paths creating interference.
Try moving the ground wire to a different metal spot on the car chassis. This can break the loop and eliminate the noise.
If the problem persists, consider installing a ground loop isolator. These devices interrupt the unwanted current and stop the hum.
Have you ever had to tackle ground loop noise yourself? Sometimes, just shifting a wire a few inches makes all the difference.
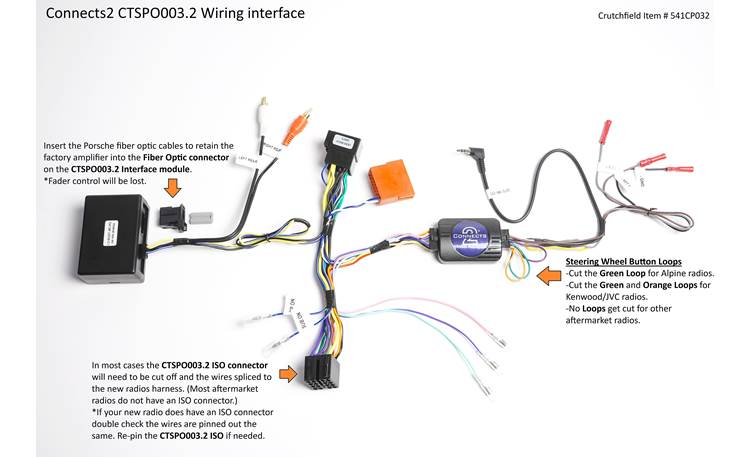
Credit: www.crutchfield.ca
Frequently Asked Questions
How Do I Safely Connect An Amp To My Car Stereo?
To safely connect an amp, disconnect the car battery first. Use quality cables and connectors for clear sound. Securely mount the amp to prevent movement. Follow the car stereo and amplifier manuals for wiring details. Ensure all connections are tight and properly insulated to avoid short circuits.
What Tools Are Needed To Connect An Amp?
You’ll need screwdrivers, wire strippers, and a multimeter for the job. Additionally, have quality RCA cables, speaker wires, and a fuse holder. A crimping tool helps secure connections. Ensure all tools are in good condition for effective installation and safety.
Can I Connect An Amp Without Rca Cables?
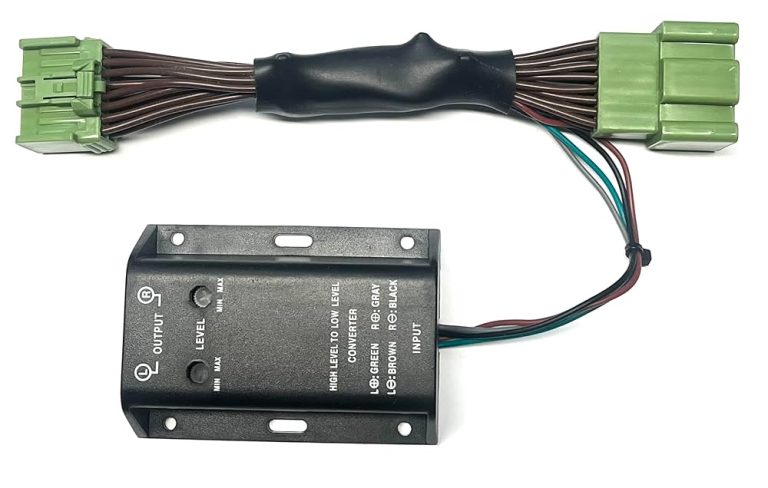
Yes, you can use a line output converter instead. It connects to the speaker wires and converts them. This allows you to connect the amp without RCA cables. Ensure the converter is compatible with your car stereo. Follow the manufacturer’s instructions for optimal results.
What Is The Best Amp Location In A Car?
Place the amp in a well-ventilated area, like the trunk or under a seat. Avoid placing it near heat sources or moving parts. Ensure it’s securely mounted to prevent movement during driving. Proper location ensures optimal performance and longevity of the amplifier.
Conclusion
Connecting an amp to your car stereo improves sound quality a lot. Follow the steps carefully to avoid mistakes or damage. Use the right tools and check all connections twice. Keep wires neat and secure to prevent problems later. Take your time and enjoy the clearer, stronger sound.
Simple steps lead to better music in your car. Now, your ride sounds just the way you want.