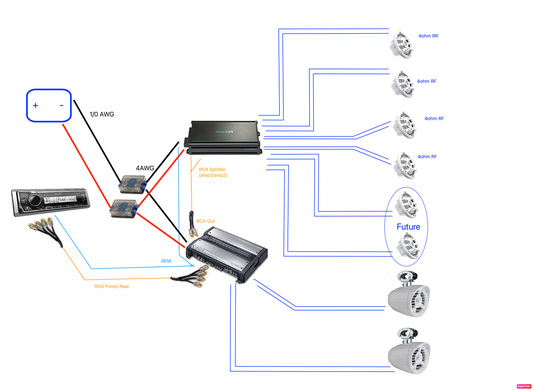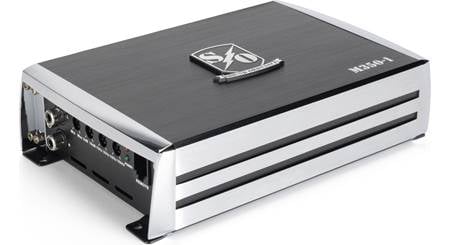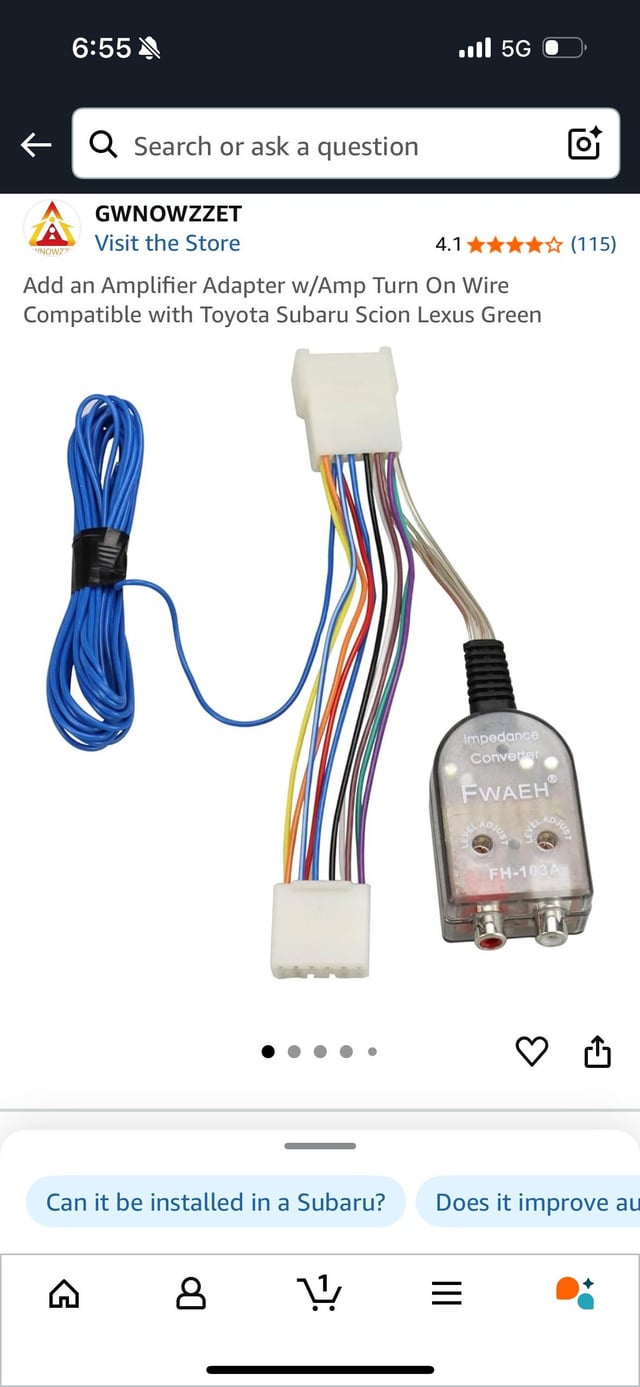
How to Install a Car Amplifier to a Factory Radio: Easy Step-by-Step Guide
Are you ready to boost your car’s sound system without replacing your factory radio? Installing a car amplifier can take your music to the next level, giving you richer bass and clearer sound.
But if you’re worried it sounds complicated, don’t be. This guide will show you exactly how to install a car amplifier to your factory radio, step by step. By the end, you’ll have a powerful setup that makes every drive more enjoyable.
Keep reading—you’re closer than you think to transforming your car’s audio experience.
Credit: www.mazda3revolution.com
Tools And Materials Needed
Installing a car amplifier to a factory radio requires specific tools and materials. Having the right equipment ensures a smooth and safe installation. This section lists everything needed for a successful setup. Preparing tools and materials beforehand saves time and avoids mistakes.
Basic Tools
- Screwdrivers (flathead and Phillips) for panel removal
- Wire cutters and strippers for clean wire connections
- Crimping tool to secure wire connectors
- Socket wrench set for bolts and screws
- Multimeter to check electrical connections and voltage
Wiring And Connectors
- Amplifier wiring kit with power, ground, and remote wires
- RCA cables to connect the factory radio to the amplifier
- Speaker wire for connecting amplifier to speakers
- Fuse holder and fuse to protect the electrical system
- Butt connectors or solder for secure wire joins
Additional Materials
- Electrical tape for insulation and securing wires
- Zip ties to organize and bundle wiring neatly
- Panel removal tools to avoid damaging interior parts
- Heat shrink tubing for durable and safe wire covers
Preparing Your Vehicle
Preparing your vehicle is a crucial first step before installing a car amplifier to a factory radio. It ensures safety and prevents damage to your car’s electrical system. Taking time here can save you from costly mistakes later.
Disconnecting The Battery
Before touching any electrical components, disconnect your vehicle’s battery. This step protects you from electrical shocks and prevents short circuits.
Locate the negative terminal, usually marked with a minus (-) sign or black cover. Use a wrench to loosen the nut and carefully remove the cable. Keep the cable away from the battery to avoid accidental contact.
Have you ever skipped this step and ended up resetting your car’s settings? It’s a simple precaution that keeps your vehicle’s electronics safe and your installation smooth.
Removing The Factory Radio
Removing the factory radio requires patience and the right tools. Start by removing any trim panels around the radio using a plastic pry tool to avoid damaging the dashboard.
Next, unscrew the mounting bolts holding the radio in place. Carefully pull the radio out just enough to access the wiring connectors behind it.
Disconnect these connectors by pressing the release tabs. Keep track of each connector’s position—you’ll need to reconnect some of these for the amplifier installation.
Have you noticed how some radios have hidden screws or clips? Taking your time here will prevent broken parts and frustration down the line.
Locating Wiring Harnesses
Locating the wiring harnesses in your car is a key step before installing an amplifier to a factory radio. These harnesses connect your car’s electrical system to the radio and amplifier, so knowing where to find and identify them can save you time and avoid mistakes. Take a moment to understand the different wires and their functions to make your installation smoother.
Identifying Power And Ground Wires
Power wires supply electricity to your amplifier, while ground wires complete the circuit by connecting to the car’s metal frame. Usually, the power wire is red, and the ground wire is black, but colors can vary by vehicle model. Use a multimeter to test for 12 volts on the power wire and ensure the ground wire has continuity with the car’s chassis.
Don’t just guess based on color—testing wires is crucial. Have you ever assumed a wire’s purpose and ended up blowing a fuse? Checking with a multimeter helps you avoid that headache.
Finding Speaker Wires
Speaker wires carry the audio signal from your factory radio to the car’s speakers. These wires often come in pairs with one solid color and one striped wire. You can trace these wires from the radio harness to the speakers or use a wire tracer tool to confirm which pairs connect to each speaker.
Be careful not to confuse speaker wires with power wires; mixing these up can damage your amplifier. If your car’s manual is available, it often lists wiring colors and functions, making this step easier.
Locating Remote Turn-on Wire
The remote turn-on wire signals the amplifier to power up when the radio turns on. This wire is usually blue or blue with a white stripe and delivers 12 volts only when the radio is active. If you can’t find this wire, tapping into the radio’s antenna power wire is a common alternative since it also switches on with the radio.
Have you checked your radio harness for a blue wire? Confirming this wire’s presence and function prevents your amplifier from staying on and draining your battery. Using a test light or multimeter will help verify the correct wire.
Connecting The Amplifier
Connecting the amplifier to a factory radio requires careful attention. This step ensures your amplifier gets power, communicates with the radio, and sends sound to the speakers. Proper connections prevent damage and improve sound quality. Follow the instructions below to wire your amplifier correctly.
Wiring Power And Ground
Start by connecting the power wire from the amplifier to the car’s battery. Use a fuse near the battery to protect your system from power surges. The ground wire must connect to a clean, bare metal part of the car’s chassis. A solid ground connection helps avoid noise and interference in your sound system. Make sure the wires are thick enough to handle the amplifier’s power needs.
Connecting Speaker Wires
Speaker wires carry the amplified sound from the amplifier to the car speakers. Match the positive and negative terminals on the amplifier and speakers carefully. This prevents phase issues and keeps sound clear. Use high-quality speaker wires to reduce signal loss. If your factory speakers have connectors, remove them carefully or use adapters to connect the wires securely.
Attaching Remote Turn-on Wire
The remote turn-on wire signals the amplifier to power on when the radio starts. Connect this wire to the factory radio’s remote turn-on lead or the accessory power source. This connection saves battery by turning the amplifier off when the radio is off. Use a small gauge wire and secure all connections with electrical tape or connectors to avoid loose contacts.
Mounting The Amplifier
Mounting the amplifier correctly is crucial for its performance and safety. The amplifier needs a stable, dry, and ventilated spot. This prevents overheating and damage. Proper mounting also reduces noise and vibration issues. Finding the right place and securing the amplifier firmly ensures long-term use.
Choosing The Right Location
Pick a spot near the car battery or the factory radio. This keeps wiring simple and short. Avoid places exposed to water or dirt. Common locations include under seats, in the trunk, or behind panels. Ensure the location has good airflow for cooling. Avoid tight spaces that trap heat.
Securing The Amplifier
Use screws or brackets to hold the amplifier firmly in place. Loose mounting causes rattling and noise. Check the surface is flat and solid for mounting. Use rubber pads to reduce vibration. Make sure all wires are neat and away from moving parts. Proper securing protects the amplifier and improves sound quality.
Testing The Setup
Testing the setup after installing a car amplifier to a factory radio is crucial. It ensures everything works smoothly and prevents damage to your system. This step lets you catch any wiring mistakes or connection issues before hitting the road.
Reconnecting The Battery
Before powering on your system, reconnect your car battery carefully. Make sure the connections are tight and secure to avoid electrical shorts or sparks.
Once connected, check for any warning lights on your dashboard. If something seems off, double-check your wiring to avoid potential damage.
Powering On And Adjusting Settings
Turn on your radio and amplifier slowly. Listen closely for any unusual noises, like buzzing or distortion, which can indicate wiring problems.
Adjust the amplifier’s gain and crossover settings to match your speakers. Start with low settings and increase gradually to prevent speaker damage.
Have you noticed how small tweaks to the gain can dramatically improve sound clarity? Experiment with settings until you find the perfect balance for your music taste.
Troubleshooting Common Issues
Installing a car amplifier to a factory radio can boost your audio experience, but sometimes things don’t work as expected. Troubleshooting common issues helps you quickly identify and fix problems without frustration. Let’s look at some typical challenges and how to solve them.
Check The Power And Ground Connections
One of the most frequent issues is improper power or ground wiring. Make sure your amplifier’s power wire is connected securely to the battery’s positive terminal and fused correctly. A loose ground connection can cause the amp to cut out or produce noise, so double-check it’s attached to a clean, unpainted metal surface.
I once spent hours hunting down a humming noise, only to find the ground wire wasn’t fully tightened. Fixing that small detail cleared the sound immediately. Have you checked your ground connection lately?
Verify The Remote Turn-on Wire
The remote turn-on wire signals the amplifier to power on when the radio is active. If this wire isn’t connected properly, your amp won’t turn on at all. Trace this wire from your factory radio harness to the amplifier and ensure it’s secure and undamaged.
Sometimes the remote wire doesn’t provide enough voltage, especially with factory radios. In those cases, using a relay or an aftermarket interface might solve the problem. Could your remote wire be the missing link?
Inspect Speaker And Rca Cable Connections
Loose or damaged speaker wires can cause weak or no sound from the amplifier. Make sure all speaker wires are connected firmly to the correct terminals and that no wires are shorting out. Similarly, check RCA cables for any cuts or poor connections, as these carry the audio signal to the amp.
- Look for bent or broken pins in the RCA plugs.
- Avoid running RCA cables alongside power cables to reduce interference.
Wiring mistakes like swapped left and right channels can be confusing. Take a moment to test each speaker individually. Have you tried swapping cables to isolate the problem?
Adjust Amplifier Gain And Settings Properly
Sometimes the amplifier is working, but the sound is distorted or too quiet. This often happens if the gain or crossover settings are off. Start with the gain low and gradually increase it until the sound is clear and loud enough without distortion.
Factory radios usually output lower voltage signals than aftermarket units, so setting the gain too high can cause clipping. Don’t ignore your amp’s manual; it often provides guidance on the correct settings based on your radio’s output. Have you experimented with your amplifier’s settings yet?
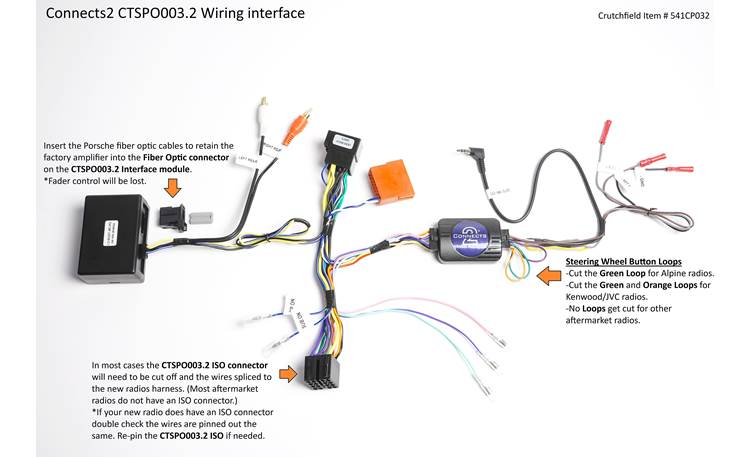
Credit: www.crutchfield.ca
Credit: www.elementownersclub.com
Frequently Asked Questions
How Do I Connect A Car Amplifier To A Factory Radio?
To connect a car amplifier to a factory radio, use a line output converter. This device converts speaker-level signals to RCA signals. Connect the converter to the speaker wires, then link it to the amplifier’s input. Ensure proper grounding and power connections for safe installation.
What Tools Are Needed To Install A Car Amplifier?
You need basic tools like wire strippers, screwdrivers, a drill, and a multimeter. Additionally, have RCA cables, power and ground wires, a fuse holder, and mounting hardware. These tools help ensure a secure, safe, and effective amplifier installation.
Can I Use Factory Speaker Wires For Amplifier Input?
Yes, factory speaker wires can be used with a line output converter. The converter adapts the speaker-level signal to a low-level input suitable for amplifiers. This method avoids cutting into the factory radio and preserves its original functionality.
Where Should I Mount The Car Amplifier For Best Performance?
Mount the amplifier in a dry, ventilated area like under a seat or in the trunk. Avoid places exposed to moisture or heat. Proper placement ensures good cooling and easy access for wiring and adjustments.
Conclusion
Installing a car amplifier to a factory radio is simple. Follow the steps carefully for best results. Double-check connections for safety. Ensure you have the right tools. This ensures smooth installation. Enjoy enhanced sound quality. Your car audio experience will improve greatly.
Remember, patience is key. Take your time with each step. You’ll soon enjoy your favorite tunes. Loud and clear. Happy driving with your new setup! If unsure, seek help from a professional. Enjoy the music journey!