How to Wire a Car Stereo Amplifier: Easy Steps for Perfect Sound
Are you ready to take your car’s sound system to the next level? Wiring a car stereo amplifier might seem tricky, but with the right steps, you can do it yourself and enjoy powerful, clear audio on every drive.
This guide will walk you through the process in simple, easy-to-follow steps. By the end, you’ll have the confidence to connect your amplifier perfectly and hear your music like never before. Keep reading, and let’s make your car sound amazing!
Credit: www.tccoa.com
Choosing The Right Amplifier
Choosing the right amplifier is key to enhancing your car audio experience. It ensures your speakers perform well and sound clear. Picking an amplifier that fits your setup prevents damage and improves sound quality.
Types Of Car Amplifiers
Car amplifiers come in different types for different needs.
- Mono Amplifiers:Designed for subwoofers, delivering deep bass.
- Two-Channel Amplifiers:Power two speakers or one subwoofer and one speaker.
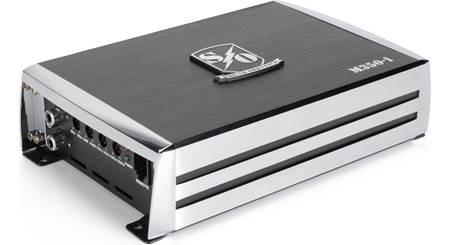
- Four-Channel Amplifiers:Ideal for powering multiple speakers in your car.
- Multi-Channel Amplifiers:Support several speakers and subwoofers at once.
Choose the type based on your speaker setup and sound goals.
Matching Amplifier To Speakers
Amplifier and speaker compatibility is crucial. The amplifier must provide enough power without overloading the speakers. Check speaker impedance, usually 2 or 4 ohms, and match it with the amplifier’s output. Using mismatched components can cause distortion or damage.
Look at the speaker’s power handling capacity. The amplifier’s power output should stay within this range for best performance.
Power Ratings Explained
Power ratings tell how much energy an amplifier can provide. These include RMS (Root Mean Square) and peak power.
- RMS Power:The continuous power the amplifier can deliver safely.
- Peak Power:The maximum power for short bursts.
Use RMS power as the main guide. Match it closely with your speakers’ RMS rating. This balance keeps sound clear and prevents damage.
Gathering Essential Tools And Materials
Before you dive into wiring your car stereo amplifier, gathering the right tools and materials is key. Having everything ready saves time and prevents frustration. It also helps you avoid mistakes that can damage your vehicle’s electrical system.
Wiring Kits And Accessories
Look for a quality wiring kit designed specifically for car amplifiers. These kits usually include power cables, ground wires, RCA cables, speaker wires, and a fuse holder. Buying a complete kit ensures compatibility and reduces the guesswork.
Don’t overlook extras like wire connectors, terminals, and electrical tape. These small accessories make your connections secure and tidy. Imagine struggling with loose wires after installation—avoiding that hassle is worth the small investment.
Tools Needed For Installation
Essential tools include a wire stripper, crimping tool, and a multimeter. A wire stripper helps you remove insulation cleanly without damaging the wires. Crimping tools provide strong, reliable connections between wires and terminals.
A multimeter is invaluable for checking voltage and continuity. It helps you troubleshoot and confirm your wiring is correct before powering up the system. Have you ever powered a system only to realize a wire was in the wrong place? A multimeter prevents those costly errors.
Safety Gear
Protecting yourself is just as important as protecting your car’s electronics. Safety glasses shield your eyes from sparks or debris when cutting or stripping wires. Gloves provide grip and protect your hands from sharp edges.
Consider using insulated tools to reduce the risk of electric shock. Remember, even a small mistake can cause short circuits or injury. Are you prepared to work safely and confidently throughout the installation?
Preparing Your Car For Installation
Getting your car ready for installing a stereo amplifier sets the foundation for a smooth and safe upgrade. Taking the right steps before you connect anything helps avoid damage to your vehicle’s electrical system and ensures your new amplifier works perfectly. Let’s break down what you need to do before starting the wiring process.
Disconnecting The Battery
Before touching any wires, disconnect your car’s battery. This simple action prevents electrical shorts and protects both you and your car’s electronics from accidental shocks or damage.
Use a wrench to loosen the negative terminal first, then remove it completely. Keep the terminal away from the battery to avoid any accidental contact during installation. Have you checked if your car’s manual suggests any special precautions for disconnecting the battery?
Locating The Mounting Spot
Finding the right place to mount your amplifier is crucial. Look for a spot that’s dry, ventilated, and close enough to your subwoofer and head unit to minimize long cable runs.
Common locations include under a seat, in the trunk, or behind a panel. Think about how easy it will be to access the amplifier later for adjustments or maintenance. Have you tested how much space the amplifier will actually take up in your chosen spot?
Running Wires Safely
Running wires neatly and safely protects them from damage and interference. Plan your wire paths to avoid hot engine parts, moving components, and sharp edges that could wear through insulation.
Use wire loom, grommets, and zip ties to secure cables and reduce noise. Remember, a clean wire job not only looks professional but also improves sound quality and reliability. What’s your plan for keeping power and signal wires separate to avoid interference?
Connecting Power And Ground Wires
Connecting the power and ground wires is a crucial step in wiring your car stereo amplifier. These connections provide the electricity needed for your amplifier to perform at its best. If not done correctly, you risk poor sound quality or even damaging your equipment.
Choosing The Right Gauge Wire
The thickness of the wire, or gauge, impacts how much current can safely flow to your amplifier. Too thin a wire can overheat and cause voltage drops, which hurt performance. It’s best to match the wire gauge with your amplifier’s power rating—usually between 8 and 4 gauge for most setups.
Check your amplifier’s manual for recommendations. If you have a 500-watt amp, 8-gauge wire might work, but a 1000-watt amp will likely need thicker 4-gauge wire. Using the right gauge prevents power loss and keeps your system running smoothly.
Installing The Fuse Holder
A fuse holder is your amplifier’s safety net. It protects the wiring and your car from electrical shorts. You should install the fuse holder within 18 inches of the battery’s positive terminal to catch any power surges immediately.
Pick a fuse rated slightly above your amplifier’s max current draw. If you’re unsure, it’s safer to go a bit higher than lower. Without this fuse, a short circuit could cause serious damage or even start a fire.
Grounding Tips For Stability
The ground wire completes the electrical circuit and is just as important as the power wire. Use a short, thick wire to connect the amplifier’s ground terminal directly to a clean, bare metal spot on your car’s chassis. Avoid painted or rusty areas—they reduce conductivity and cause noise.
Think about your ground connection as the amplifier’s anchor. A solid ground reduces electrical interference and keeps your sound clear. If you notice buzzing or humming, check your ground connection first—it’s often the culprit.
Wiring The Remote Turn-on Lead
Wiring the remote turn-on lead is essential to power your car stereo amplifier correctly. This wire signals the amplifier to switch on only when the stereo is active. Connecting it properly prevents battery drain and protects your system.
Finding The Remote Wire
Locate the remote turn-on wire in your car stereo harness. It is usually a thin blue wire or blue with a white stripe. Check the stereo manual or wiring diagram to be sure. Use a multimeter or test light to confirm it only has 12 volts when the stereo is on.
Connecting To The Amplifier
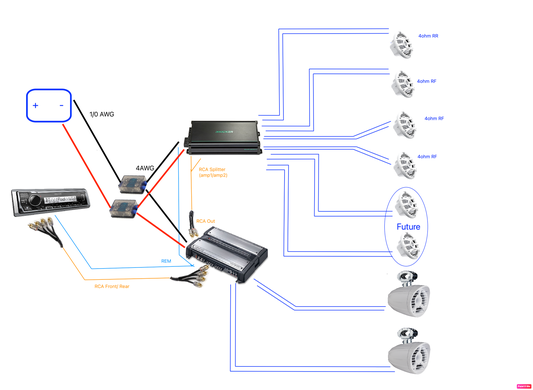
Run the remote turn-on wire from the stereo to the amplifier’s remote terminal. Use proper connectors or solder the wire for a secure connection. Avoid stretching or pinching the wire along its path. Keep the wire away from power cables to reduce noise.
Testing The Connection
Turn on the car stereo and observe the amplifier. The amplifier should power on with the stereo. Check the remote wire voltage with a multimeter to confirm it reads 12 volts. If the amplifier does not turn on, recheck the connections and wire location.
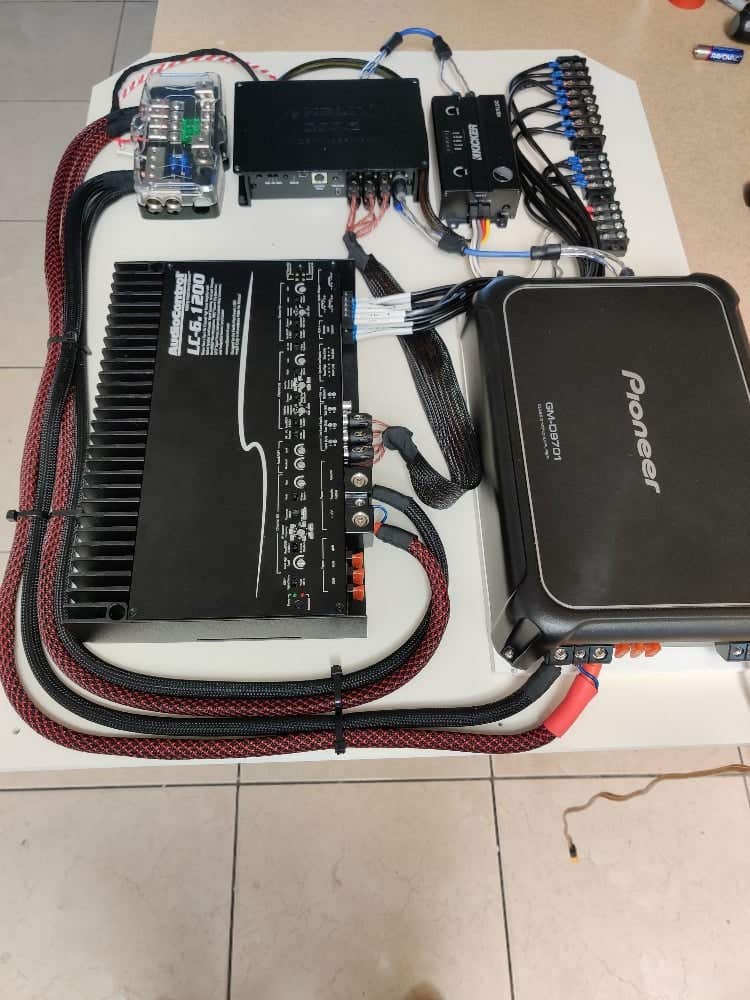
Credit: www.diymobileaudio.com
Hooking Up The Rca And Speaker Wires
Hooking up the RCA and speaker wires is essential for a clear, powerful sound in your car stereo system. Proper wiring ensures the amplifier receives the right signals and sends clean audio to your speakers and subwoofers.
Careful handling of these cables helps avoid noise and interference. Follow simple steps to connect everything safely and efficiently.
Running Rca Cables
Choose high-quality RCA cables for better sound quality. Run these cables from the head unit’s RCA outputs to the amplifier’s RCA inputs.
Keep the RCA cables away from power wires to reduce noise. Use cable ties to secure them along the car’s frame or under trim panels.
Measure the length needed before cutting or buying cables. Avoid stretching or bending cables sharply to protect internal wiring.
Connecting Speaker Wires
Select speaker wires with proper gauge to handle the amplifier’s power. Thicker wires carry more power without loss.
Strip about half an inch of insulation from each wire end. Connect the positive wire to the amplifier’s positive terminal and the negative wire to the negative terminal.
Match the wire colors or labels with the speaker terminals for correct polarity. Secure connections tightly to prevent loose contacts and sound loss.
Avoiding Interference
Keep RCA cables separate from power cables to prevent electrical noise. Cross cables at right angles if they must intersect.
Use shielded RCA cables to block external interference. Check connections regularly for corrosion or damage.
Ground the amplifier properly to reduce hum and buzzing sounds. Use clean metal surfaces for grounding points.
Adjusting Amplifier Settings
Adjusting your car stereo amplifier settings is crucial to getting the best sound out of your system. It’s not just about turning knobs; it’s about understanding how each control affects your audio. Proper adjustments can bring clarity, balance, and power to your music, making every drive more enjoyable.
Setting Gain And Bass Boost
Gain controls the amplifier’s input sensitivity. Set it too high, and your sound will distort; too low, and you won’t get enough volume. Start with the gain turned down, then slowly increase it until you hear clear, strong sound without distortion.
Bass boost adds punch to low frequencies, but it needs careful handling. Too much bass boost can muddy your sound and strain your speakers. Try small increments and listen closely to how it changes the depth and power of your bass.
Crossover Controls
Crossover controls decide which frequencies your amplifier sends to your speakers or subwoofers. Using the right crossover setting ensures each speaker plays the frequencies it handles best.
- Set the low-pass filter for subwoofers to block higher frequencies that they can’t reproduce well.
- Use the high-pass filter for door speakers to prevent them from handling deep bass.
Adjust these filters by ear or with a frequency analyzer app to avoid overlap or gaps in sound. Have you checked if your crossover settings are causing any frequency conflicts in your setup?
Fine-tuning For Sound Quality
Fine-tuning involves balancing all settings to suit your music taste and car acoustics. Make small changes and listen to a variety of tracks to find what sounds best.
Consider your car’s interior materials and speaker placement; they affect how sound travels and reflects. Don’t hesitate to readjust gain, bass boost, and crossover settings as you switch music genres or seating positions.
Have you tried adjusting your settings while driving versus parked? The difference in background noise might surprise you and help you get the perfect sound on the road.
Testing And Troubleshooting
Testing and troubleshooting your car stereo amplifier is key to ensure great sound and system safety. This step helps spot wiring errors and performance issues. Testing early avoids damage and frustration later.
Powering Up The System
Turn on your car’s ignition without starting the engine. Check if the amplifier’s power and remote turn-on lights are on. If the lights do not come on, examine the fuse and wiring connections. Use a multimeter to verify the 12V power and ground connections. Keep the volume low during the first power-up to prevent speaker damage.
Checking For Distortion
Play music with clear bass and listen carefully. Distortion sounds like buzzing, crackling, or rattling. It may come from poor wiring, weak ground, or incorrect gain settings. Adjust the amplifier’s gain knob slowly until the sound is clean and loud enough. Avoid turning the gain too high, which causes distortion and damages speakers.
Common Wiring Issues
- Loose or corroded ground connection causing noise or no power
- Incorrect or reversed speaker polarity creating weak or hollow sound
- Blown fuses interrupting power to the amplifier
- Wrong wire gauge leading to voltage drops and overheating
- Improper remote turn-on wire connection preventing amplifier activation
Double-check all wire connections for tightness and correct placement. Replace any damaged or thin wires. Secure wires away from sharp edges or heat sources to avoid shorts.
Maintaining Your Amplifier
Maintaining your car stereo amplifier ensures it performs well for a long time. Regular care protects the amplifier from damage and keeps sound quality sharp. Simple maintenance steps can prevent costly repairs and improve overall reliability.
Cleaning And Inspection
Dust and dirt can harm your amplifier’s parts. Clean the amplifier surface with a dry cloth regularly. Check all wires and connections for looseness or damage. Look for signs of corrosion or worn insulation. Tighten any loose screws or terminals carefully. Inspect the amplifier for unusual smells or sounds that may signal issues.
Preventing Overheating
Heat can damage your amplifier quickly. Ensure the amplifier has enough space around it for airflow. Avoid placing it near heat sources or in direct sunlight. Use cooling fans if the amplifier runs hot during use. Turn off the amplifier when not in use to avoid unnecessary heat buildup.
Upgrading Components
Upgrading parts can improve amplifier performance and lifespan. Replace old or damaged wires with higher quality ones. Consider upgrading the fuse to a more reliable type. Use better connectors to ensure a solid electrical connection. Upgrade speakers and subwoofers to reduce amplifier strain and improve sound.
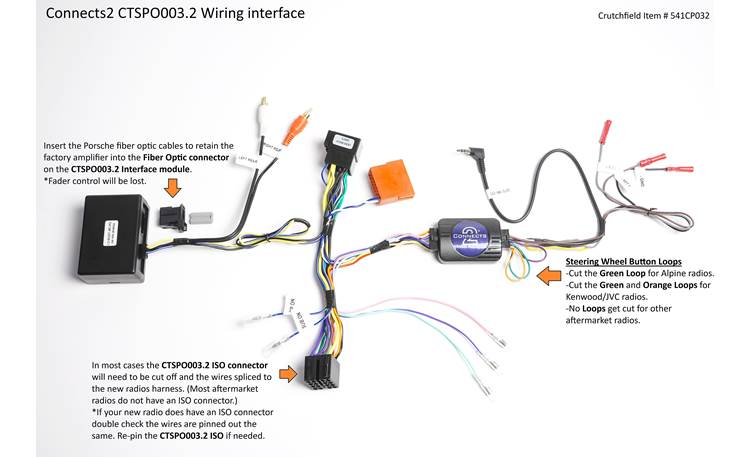
Credit: www.crutchfield.ca
Frequently Asked Questions
How Do I Connect An Amplifier To A Car Stereo?
To connect an amplifier, first disconnect the car battery. Run a power cable from the battery to the amplifier. Connect the ground wire to a metal part of the car. Use RCA cables to connect the stereo’s output to the amplifier’s input.
What Gauge Wire Is Best For Car Amplifiers?
The best wire gauge depends on the amplifier’s power output. Typically, use 8-gauge wire for up to 500 watts. For higher wattages, use 4-gauge or 2-gauge wire. Ensure the wire can handle the current load to prevent overheating.
Do I Need A Fuse For My Amplifier?
Yes, a fuse is essential for safety. Install it near the battery to protect the wiring. The fuse should match the amplifier’s power rating. It prevents damage from short circuits or overloads, ensuring your audio system remains safe.
Can I Install An Amplifier Without A Remote Wire?
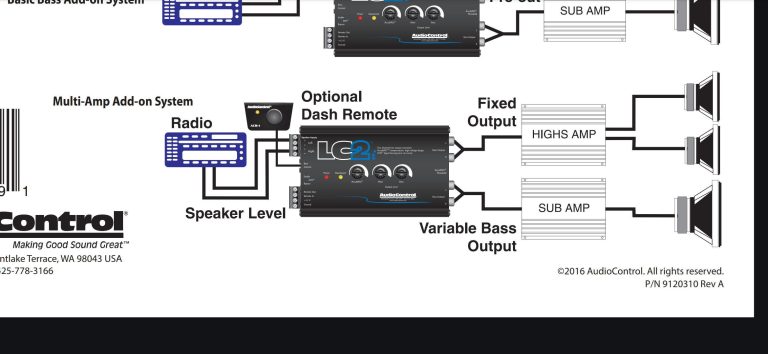
Yes, but you’ll need a workaround. Use a line output converter with a remote turn-on feature. Alternatively, use a relay connected to the ignition switch. This ensures the amplifier turns on and off with the car, preventing battery drain.
Conclusion
Wiring a car stereo amplifier can improve your sound quality. Follow the steps carefully to avoid mistakes. Use the right tools and check all connections twice. Take your time and stay safe during installation. Good wiring helps your system work better and last longer.
Enjoy clearer music and stronger bass on every drive. Simple steps lead to great results. Keep this guide handy for future reference. Your car audio will thank you.