How to Install a Car Stereo Amplifier: Easy Step-by-Step Guide
Are you ready to boost your car’s sound system and enjoy music like never before? Installing a car stereo amplifier can take your audio experience to the next level.
But if you’ve never done it before, the idea might seem tricky or even overwhelming. Don’t worry—you’re in the right place. This guide will walk you through each step clearly and simply, so you can confidently upgrade your ride’s sound without stress.
Keep reading, and soon you’ll be driving with powerful, crystal-clear music that turns every trip into a great experience.
Choosing The Right Amplifier
Choosing the right car stereo amplifier is key to getting the sound quality you want. An amplifier that fits your setup can make a huge difference in how your music sounds on the road. Before buying, you need to understand different amplifier types, how they match your speakers, and what power ratings really mean for your system.
Types Of Amplifiers
There are mainly three types of car stereo amplifiers: Class A/B, Class D, and Class T. Class A/B amps offer great sound quality but tend to be larger and use more power. Class D amplifiers are more efficient and compact, perfect if you want loud sound without draining your battery quickly.
Class T amps are a mix of both, providing good sound quality with decent efficiency. Knowing these differences helps you pick an amp that fits your car space and listening style. Think about whether you prefer clarity or power, or if you need a balance of both.
Matching Amplifier To Speakers
Matching your amplifier to your speakers is crucial to avoid damage and get the best sound. Check the speaker’s impedance (measured in ohms) and make sure the amp supports it. Most car speakers are 4 ohms, but some subwoofers might be 2 or 8 ohms.
Also, consider the number of channels your amp has. A mono amp is great for a subwoofer, while a 4-channel amp can power all your door speakers. Ask yourself: do you want to power just a sub, or the whole system? This will guide your amplifier choice.
Power Ratings And Specifications
Power ratings tell you how loud and clear your sound will be. Look for RMS power ratings instead of peak power—RMS gives a realistic idea of continuous output. Match your amp’s RMS power to your speakers’ RMS handling for clean sound without distortion.
Also, check the signal-to-noise ratio and total harmonic distortion (THD). Lower THD means less distortion, so your music stays crisp. If you want to feel the bass without muddiness, pay attention to these specs—they matter more than you might think.
Gathering Necessary Tools
Before installing a car stereo amplifier, gather all necessary tools. Having the right tools makes the job easier and safer. Missing tools can cause delays or damage. Prepare your workspace and collect everything you need.
Basic Tools Required
- Screwdrivers (flathead and Phillips)
- Wire strippers
- Crimping tool
- Socket wrench set
- Electrical tape
- Multimeter
- Panel removal tool
Safety Equipment
- Insulated gloves to protect from electric shock
- Safety glasses to shield your eyes
- Work light for better visibility
- Disconnect battery before starting
Optional Accessories
- Fuse holder for extra circuit protection
- Heat shrink tubing for secure wire connections
- Zip ties to organize cables
- Electrical contact cleaner for better connections
Preparing Your Vehicle
Preparing your vehicle is a crucial step before installing a car stereo amplifier. It ensures safety and makes the installation process smoother. Proper preparation helps avoid damage to your car’s electrical system and components.
Start by creating a clean workspace around your vehicle. Gather all the necessary tools and materials. Clear out any items that might block access to the stereo area or amplifier location.
Disconnecting The Battery
Disconnect the negative terminal of your car battery first. This prevents any electrical shorts or shocks during installation. Use a wrench to loosen the terminal clamp. Remove the cable and keep it away from the battery post. Never touch both battery terminals at the same time. This simple step protects you and your vehicle’s electronics.
Removing The Car Stereo
Remove the car stereo carefully to access wiring and space for the amplifier. Start by taking off the dashboard panels around the stereo. Use a trim removal tool to avoid damage. Unscrew the mounting screws holding the stereo in place. Gently pull the stereo out and disconnect the wiring harness and antenna cable. Keep all screws and panels safe for reassembly.
Planning The Installation Location
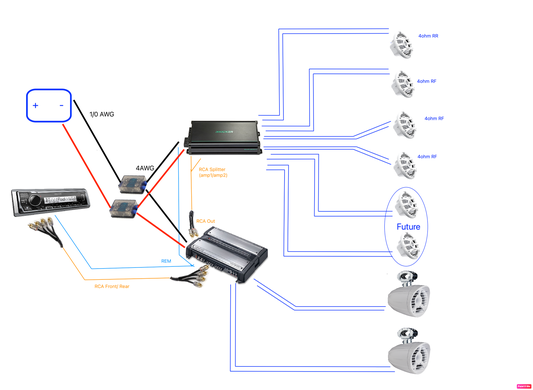
Choose a spot that fits the amplifier and allows good ventilation. Avoid places near heat sources like the engine or exhaust. Common locations include under seats, in the trunk, or behind panels. Check that the location offers easy access to power wires and speaker cables. Measure the amplifier size to confirm it fits well. Secure the amplifier firmly to prevent movement while driving.
Credit: www.diymobileaudio.com
Wiring The Amplifier
Wiring the amplifier is a crucial part of installing your car stereo system. Proper wiring ensures your amplifier works efficiently without any electrical issues. Let’s break down the key wiring steps to help you get your amplifier connected right.
Running Power Cable
The power cable delivers electricity from your car’s battery to the amplifier. Choose a cable thick enough to handle your amplifier’s power needs—usually 8 or 4 gauge works well.
Run the cable through a safe path, avoiding sharp edges and heat sources. Don’t forget to add an in-line fuse near the battery to protect your system from power surges.
Grounding The Amplifier
Grounding is just as important as the power connection. Find a clean, bare metal spot near the amplifier to attach the ground wire.
A poor ground can cause buzzing sounds and erratic amplifier behavior. Make sure the connection is tight and free of paint or rust for the best contact.
Connecting Remote Turn-on Wire
The remote turn-on wire tells your amplifier when to power up. This wire usually connects to the stereo’s remote output or ignition switch.
If you skip this, your amplifier won’t turn on with the stereo, leaving you with no sound. Keep the wire short and secure to avoid signal loss.
Wiring The Rca Cables
RCA cables carry the audio signal from your head unit to the amplifier. Use high-quality cables to prevent signal interference and noise.
Run the RCA cables away from power cables to avoid hums and static. Connect them firmly to the matching input jacks on the amplifier.
Speaker Wire Connections
Speaker wires deliver the amplified sound to your speakers. Use wires with sufficient thickness, typically 16 or 14 gauge, depending on your speaker setup.
Pay attention to polarity—connect positive to positive and negative to negative. Incorrect wiring can cause phase issues and poor sound quality.
Mounting The Amplifier
Mounting the amplifier is a key step in installing a car stereo amplifier. It keeps the amplifier safe and ensures it works well. Choose a spot that fits the size of the amplifier and offers easy access for wiring. The mounting place must hold the amplifier firmly to avoid movement during driving.
Selecting A Secure Spot
Pick a location free from moisture and dirt. Common spots include under the seat or in the trunk. Make sure the spot does not block other car parts. Check that the amplifier will not touch metal parts to avoid shorts. The spot should allow simple cable routing to the battery and stereo.
Drilling And Fastening
Use the amplifier’s mounting holes as a guide. Mark spots for drilling carefully. Drill small pilot holes first for accuracy. Use screws and nuts that fit well with the amplifier. Tighten screws firmly but avoid over-tightening to prevent damage. Secure the amplifier so it does not move or vibrate.
Ensuring Proper Ventilation
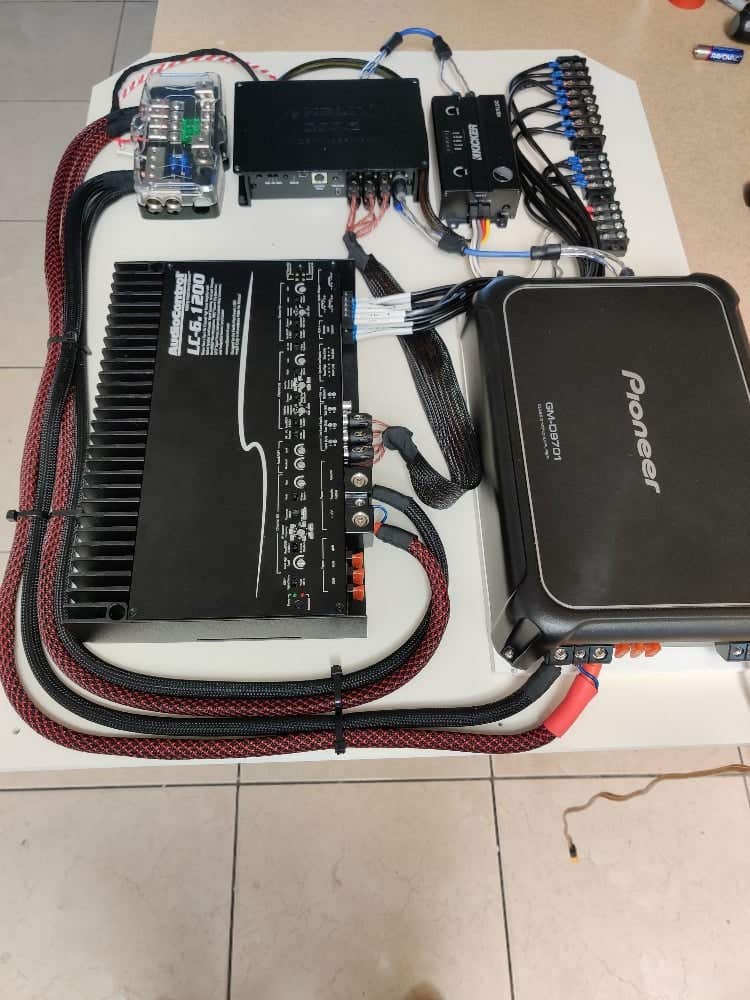
The amplifier needs air to stay cool. Avoid placing it in enclosed spaces without airflow. Leave enough space around the amplifier for heat to escape. Do not cover the amplifier with cloth or other materials. Proper ventilation helps prevent overheating and extends amplifier life.

Credit: stingersolutions.com
Testing The System
Testing the car stereo amplifier is essential after installation. It ensures everything works safely and sounds great. This process prevents damage to the system and helps find any issues early. Follow these steps carefully for the best results.
Reconnecting The Battery
Before testing, reconnect the car battery securely. Check that all amplifier wires are tight and properly insulated. Avoid any loose connections to prevent short circuits. This step powers the system and prepares it for activation.
Powering On The Amplifier
Turn on the car ignition and then switch on the amplifier. Listen for a click or light indicating the unit powers up. Watch for any unusual sounds or smells from the amplifier. If the amplifier does not turn on, recheck the wiring and fuses.
Adjusting Gain And Settings
Set the amplifier gain to a low level first. Slowly increase the gain while playing music at a low volume. Adjust bass, treble, and other settings to match your preferences. Keep the volume moderate to avoid speaker damage during testing.
Checking For Sound Quality And Issues
Listen carefully to the audio output from all speakers. Check for clear, distortion-free sound and balanced volume. Identify any buzzing, crackling, or rattling noises. Fix wiring or grounding problems if you notice any sound issues.
Troubleshooting Common Problems
Troubleshooting common problems during car stereo amplifier installation saves time and frustration. Many issues arise from simple mistakes or overlooked details. Knowing how to identify and fix these problems ensures better sound and reliable performance.
Check all wiring connections first. Loose or incorrect wiring causes most troubles. Use a multimeter to verify power and ground connections. Inspect the fuse and replace it if blown. Make sure the amplifier turns on and off with the car’s ignition.
No Power To Amplifier
Start by checking the fuse on the power wire. A blown fuse stops power flow. Ensure the power wire connects to the battery with a secure ring terminal. Test the remote turn-on wire for voltage when the stereo is on. A faulty ground connection can also prevent power. Tighten the ground wire to a clean metal surface.
Distorted Sound
Distortion often comes from poor speaker wiring or incorrect gain settings. Inspect all speaker wires for damage or loose connections. Adjust the gain control to a lower setting. High gain causes distortion and damages speakers. Use quality speaker wires to reduce interference. Avoid running power and audio cables close together.
Overheating Issues
Amplifiers overheat when airflow is blocked or the gain is too high. Mount the amplifier in a well-ventilated area. Avoid placing it near heat sources. Lower the gain to reduce power draw. Clean dust from the amplifier’s vents regularly. Check that speaker impedance matches the amplifier’s specifications.
Ground Loop Noise
Ground loop noise sounds like a constant humming or buzzing. It happens when different components have different ground potentials. Use a single grounding point for all audio components. Try a ground loop isolator to break the loop. Keep power and signal cables separate to minimize interference. Check all connections for corrosion or looseness.

Credit: www.youtube.com
Frequently Asked Questions
How Do I Connect A Car Amplifier To The Stereo?
To connect a car amplifier, run RCA cables from the stereo’s output to the amp’s input. Connect the amp to the car battery with a power wire. Ground the amplifier to the car’s chassis. Finally, connect speaker wires from the amp to your speakers.
What Tools Are Needed To Install A Car Amplifier?
You need wire strippers, screwdrivers, a drill, a fuse holder, and crimp connectors. Also, have electrical tape and a multimeter to check connections. These tools help ensure a safe and proper installation of your car amplifier.
Where Should I Mount My Car Stereo Amplifier?
Mount the amplifier in a dry, ventilated area with enough space for heat dissipation. Common locations include under a seat or in the trunk. Avoid places exposed to moisture or direct sunlight to prevent damage and overheating.
How Do I Wire The Power For A Car Amplifier?
Run a thick power cable from the battery’s positive terminal to the amplifier. Use an inline fuse within 18 inches of the battery for safety. Connect the amplifier’s ground wire to a clean metal surface on the car’s chassis.
Conclusion
Installing a car stereo amplifier can seem tricky. But, with the right steps, it’s manageable. First, gather all necessary tools and materials. Then, follow the wiring instructions carefully. Ensure every connection is tight and secure. Double-check your work before powering up the system.
Once installed, enjoy the improved sound quality. Your favorite songs will sound much better. Remember, patience and attention to detail are key. Don’t rush the process. Take your time. With practice, you’ll become more confident in car audio projects. Enjoy your enhanced driving experience with your new amplifier!