How Do I Change My Car Stereo: Easy Steps for a Pro Upgrade
Are you tired of your old car stereo that just doesn’t deliver the sound or features you want? Changing your car stereo can seem tricky, but it’s easier than you think.
Imagine enjoying your favorite songs with better sound quality, hands-free calls, and even Bluetooth streaming—all from your own dashboard. In this guide, you’ll learn simple, step-by-step tips to swap out your stereo quickly and safely. Ready to upgrade your driving experience?
Keep reading, and you’ll have your new stereo up and running in no time.
Preparing For The Upgrade
Upgrading your car stereo requires careful preparation. This helps the process go smoothly and safely. Start by gathering all tools needed for the job. Choose a stereo that fits your car and meets your needs. Before touching any wires, disconnect the car battery to avoid shocks or damage. Each step ensures a safer and easier installation.
Gathering Necessary Tools
Having the right tools saves time and frustration. Common tools include:
- Flathead and Phillips screwdrivers
- Panel removal tool
- Wire strippers and crimpers
- Electrical tape or connectors
- Socket wrench set
Check your car’s manual for any special tools needed.
Selecting The Right Stereo
Choose a stereo that fits your dashboard size. Consider features like Bluetooth, USB, or touchscreen. Check compatibility with your car’s wiring and speakers. Read reviews to find reliable brands. Avoid stereos with complicated setups if you want a simple install.
Disconnecting The Battery
Always disconnect the battery before starting. This prevents electrical shorts and injury. Use a wrench to remove the negative terminal first. Keep the cable away from the battery to avoid contact. Wait a few minutes before beginning the installation. This step is essential for safety and protects your car’s electronics.

Credit: www.crutchfield.com
Removing The Old Stereo
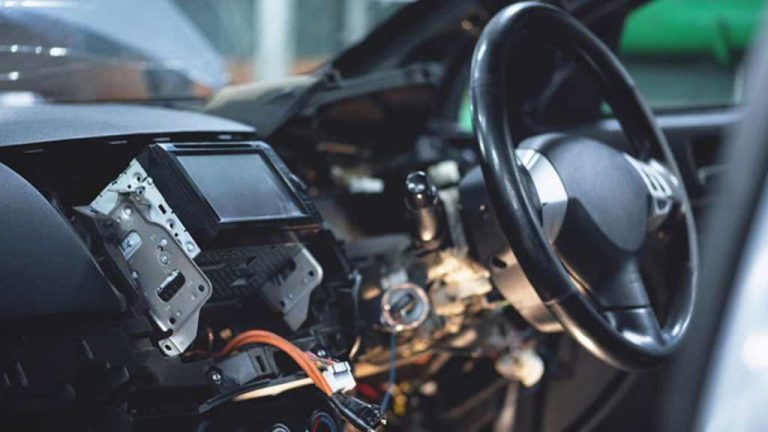
Removing the old stereo is the first step to installing a new one. It requires careful handling to avoid damage. You need to access the stereo unit, remove any trim or panels, and unplug the wiring harnesses. Taking your time makes the process smoother and safer.
Accessing The Stereo Unit
Locate the stereo in the dashboard center. It may have screws or clips holding it in place. Use a screwdriver or special stereo removal tools to release it. Gently pull the stereo out to avoid breaking any parts. Keep screws and tools nearby for reassembly.
Removing Trim And Panels
Trim pieces and panels cover the stereo edges. Use a plastic pry tool to avoid scratching surfaces. Work slowly around the edges to loosen clips without breaking them. Remove panels carefully and set them aside in a safe place. This step clears the way to fully access the stereo unit.
Unplugging Wiring Harnesses
Behind the stereo, several wires connect to it. These wires have plastic connectors called wiring harnesses. Press the release tabs on connectors to unplug them. Avoid pulling on wires directly to prevent damage. Note how wires connect for easier setup of the new stereo.
Installing The New Stereo
Installing the new stereo is the exciting part where your efforts begin to show. This process involves careful connection and secure fitting to ensure your stereo works perfectly. Follow these simple steps to complete the installation smoothly and safely.
Connecting Wiring Adapters
Use wiring adapters to link the new stereo to your car’s electrical system. These adapters match your vehicle’s wiring to the stereo’s connectors. Avoid cutting or splicing wires directly to prevent damage.
- Match each wire color from the adapter to the stereo wiring harness.
- Use crimp connectors or solder joints for a solid connection.
- Double-check connections to avoid loose or incorrect wiring.
Securing The Stereo Unit
Place the stereo unit into the mounting bracket or dash opening. Align it carefully to fit without forcing. Attach screws or brackets provided with the stereo to hold it firmly in place.
- Ensure the unit sits flush with the dashboard.
- Tighten screws evenly to prevent shifting or vibration.
- Test the stereo’s fit before fully tightening all fasteners.
Reattaching Trim And Panels
Reinstall any trim pieces or panels removed earlier. Press panels gently but firmly to snap them back into place. Check for any gaps or loose edges that might affect the finish.
- Align clips and tabs carefully to avoid breakage.
- Use a soft cloth to wipe away fingerprints or dust.
- Confirm all controls and buttons remain accessible and functional.
Credit: www.subaruoutback.org
Testing And Final Adjustments
Testing and making final adjustments is the last part of changing your car stereo. This step ensures everything works well before you finish. It helps catch any issues early, saving time and effort later.
Check every function carefully. Listen to the sound quality. Adjust settings to match your preferences. Fix any problems that appear during testing. This process guarantees the best experience with your new stereo.
Powering On And Testing Functions
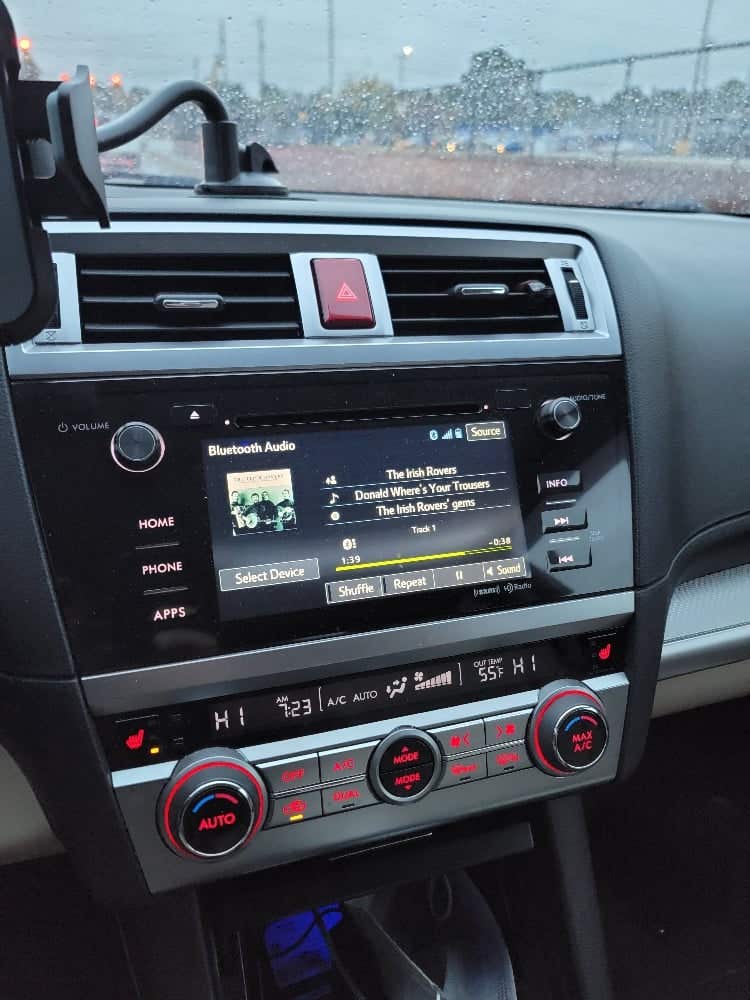
Turn on your car’s ignition to power the stereo. Watch the display for any error messages. Test basic functions like radio, Bluetooth, and CD player. Make sure all buttons and knobs respond correctly.
Try connecting your phone or USB device. Play music from different sources. Check that volume controls and presets work well. Ensure the stereo stays on without interruptions.
Adjusting Audio Settings
Set the bass, treble, and balance to your liking. Use preset equalizer modes for easier adjustment. Adjust fader controls to balance sound between front and rear speakers.
Test sound clarity at different volume levels. Avoid distortion or rattling noises. Make small changes and listen carefully after each.
Troubleshooting Common Issues
Check wiring connections if the stereo doesn’t power on. Loose wires can cause power loss or poor sound. Verify that all connectors are tight and properly seated.
If sound cuts in and out, inspect speaker wires. Look for damaged or pinched cables. Reset the stereo if it freezes or acts strangely.
Consult the stereo’s manual for error codes or unusual behavior. Many issues can be fixed with simple resets or adjustments.
Tips For A Professional Finish
Getting a professional finish when changing your car stereo isn’t just about looks—it affects performance and safety too. Small details can make a big difference in how your new stereo fits and functions. Here are some practical tips to help you achieve a clean, secure, and durable installation.
Using Quality Materials
Choosing the right materials sets the foundation for a lasting stereo setup. Opt for high-grade wiring and connectors designed specifically for automotive use. Cheap wires may look fine at first but can corrode or break, causing sound issues or electrical faults.
Also, invest in a sturdy mounting kit that fits your car model precisely. This prevents the stereo from shifting or rattling while driving. Have you noticed how a loose stereo distracts you on the road? A solid mount eliminates that problem.
Ensuring Secure Connections
Secure wiring connections are crucial for clear sound and safety. Use crimp connectors or solder joints instead of twisting wires together. This step may take extra time, but it prevents interruptions and shorts.
Double-check every connection before finalizing the installation. Tug gently on wires to confirm they won’t come loose. Have you ever dealt with a stereo that cuts out unexpectedly? Poor connections are often the culprit.
Maintaining Vehicle Interior
Protect your car’s interior during installation to avoid unnecessary damage. Cover seats and carpets with cloths or plastic sheets before starting. Small scratches or scuffs on your dash can be frustrating to fix later.
Keep screws and small parts organized in a container to avoid losing them. Clean any fingerprints or smudges off panels once the job is done. Would you want your car to look worse after a stereo upgrade? Taking care of the interior reflects your attention to detail.

Credit: www.reddit.com
Frequently Asked Questions
How Do I Remove The Old Car Stereo?
To remove the old car stereo, first disconnect the car battery. Use a stereo removal tool or screwdriver to carefully detach the stereo from the dashboard. Unplug all wiring harnesses and antenna connections. This process ensures safety and prevents any electrical issues during the installation of the new stereo.
What Tools Do I Need For Installation?
For installation, you’ll need a screwdriver, wire stripper, and crimping tool. A stereo removal tool is also helpful for detaching the old unit. These tools ensure a smooth and efficient installation process, allowing you to safely and effectively replace your car stereo without causing any damage.
Can I Install A New Stereo Myself?
Yes, you can install a new stereo yourself with the right tools and guidance. Follow the manufacturer’s instructions carefully for a successful installation. DIY installation can save money and provide a sense of accomplishment. However, consider professional help if you’re unsure or inexperienced.
Do I Need A Wiring Harness Adapter?
Yes, a wiring harness adapter is essential for connecting the new stereo to the car’s wiring. It ensures compatibility and prevents potential electrical issues. This adapter simplifies the installation process, making it easier to connect the stereo without cutting or splicing the car’s factory wires.
Conclusion
Changing your car stereo can be simple and rewarding. Take your time and follow each step carefully. Use the right tools and double-check connections. This helps avoid damage and ensures good sound quality. Enjoy your favorite music with better clarity.
You can upgrade your car’s audio without needing a professional. Just stay patient and confident throughout the process. Soon, your car will have a fresh, new stereo system. Ready to drive with great sound? Give it a try today!