How to Connect a Equalizer to Car Amplifier: Easy Step-by-Step Guide
If you want to take your car audio to the next level, connecting an equalizer to your car amplifier is the key. Imagine having full control over every sound, making your music clearer, richer, and perfectly tuned to your taste.
But how do you do it right? In this guide, you’ll discover simple, step-by-step instructions to connect your equalizer to your car amplifier easily and safely. By the end, you’ll have a system that sounds just the way you want it.
Ready to transform your driving soundtrack? Let’s dive in.
Choosing The Right Equalizer
Choosing the right equalizer is crucial for getting the best sound quality from your car audio system. The equalizer shapes the audio frequencies to match your preferences and the acoustic environment of your vehicle. Picking an equalizer that fits well with your amplifier can make all the difference in clarity and power.
Types Of Equalizers
Equalizers come in several types, each offering different levels of control over your sound. A graphic equalizerprovides fixed frequency bands with sliders, making it easy to adjust specific ranges like bass or treble. On the other hand, a parametric equalizergives you more detailed control over frequency, bandwidth, and gain, but it might require a bit more know-how to use effectively.
You might also encounter shelving equalizers, which adjust all frequencies above or below a certain point, great for quick tone shaping. Think about what kind of adjustments you want to make and how much control you want before choosing an equalizer type.
Matching Equalizer To Amplifier
Not all equalizers work perfectly with every amplifier. Your equalizer should match the input and output levels of your amplifier to avoid distortion or weak signals. Check the voltage levels and impedance ratings to ensure compatibility.
For example, if your amplifier expects a low-level input, a line-level equalizer is a better fit. If the levels don’t match, you could end up with noise or reduced sound quality. Ask yourself: does the equalizer’s output match what your amplifier can handle?
Also, consider the number of channels your amplifier supports. If you have a multi-channel amp, you might need an equalizer that can handle multiple channels separately. This ensures each speaker gets the right frequency adjustments without confusion.

Credit: www.reddit.com
Gathering Necessary Tools And Equipment
Before you start connecting your equalizer to the car amplifier, gathering the right tools and equipment is crucial. Having everything ready saves time and prevents frustration during installation. It also helps avoid damage to your car’s audio system and ensures a clean, professional setup.
Required Cables And Connectors
To link your equalizer with the amplifier, you’ll need specific cables and connectors. RCA cables are the most common choice because they carry audio signals with minimal interference. Make sure you get good quality RCA cables long enough to reach between the equalizer and amplifier.
Besides RCA cables, you might need:
- Speaker wire:For connecting the amplifier to your speakers or subwoofer.
- Power cable:To supply power from your car’s battery to the amplifier.
- Ground wire:Essential for safety and reducing electrical noise.
- Fuse holder and fuse:To protect your system from power surges.
Don’t forget connectors such as ring terminals and spade connectors for secure wiring. Loose or poor connections can cause signal loss or damage, so double-check that your connectors fit snugly.
Safety Precautions
Working with car audio systems involves electricity, so safety should be your top priority. Disconnect the car battery before starting any wiring to avoid electrical shocks or short circuits. This simple step can save you from costly repairs and personal injury.
Wear protective gloves and use insulated tools to further reduce risks. Keep your workspace well-lit and free of clutter to prevent accidents. Have a fire extinguisher nearby just in case—safety is not negotiable.
Think about this: Have you ever underestimated a small safety step only to regret it later? Taking these precautions seriously can keep your installation smooth and problem-free.
Preparing Your Car Audio System
Preparing your car audio system is a key step before connecting an equalizer to your amplifier. This process ensures safety and helps avoid damage to your equipment. Taking time to prepare makes installation smoother and protects your car’s electrical system.
Start by creating a safe environment to work in. Clear the area around your car amplifier and equalizer. This makes it easier to access cables and connections. Proper preparation also prevents accidental short circuits and other issues.
Disconnecting The Battery
Always disconnect the car battery before working on the audio system. This stops electrical current from flowing. It lowers the risk of shocks and short circuits during installation.
Use a wrench to loosen the negative terminal first. Remove the cable carefully and keep it away from the battery. Wait a few minutes to let the system fully power down. Only then, begin working on the amplifier and equalizer.
Locating The Amplifier And Equalizer
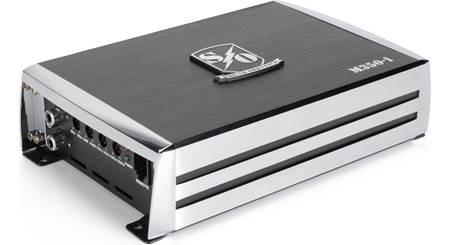
Find the amplifier in your car. It is usually under the seat, in the trunk, or behind panels. Look for a metal box with multiple wires connected to it. The equalizer may be near the amplifier or inside the dashboard.
Check your car manual if you have trouble locating these parts. Knowing their exact location helps plan cable routing. It also prevents damage to other car components during installation.

Credit: www.amazon.com
Connecting The Equalizer To The Amplifier
Connecting an equalizer to a car amplifier improves your sound system’s quality. This setup allows you to adjust audio frequencies easily. Proper connection ensures clear sound without noise or interference. Follow the steps carefully to avoid issues.
Wiring Input And Output Cables
Start by identifying the input and output ports on both devices. The equalizer’s input connects to the head unit or source. Use RCA cables to link the equalizer’s output to the amplifier’s input. Match the left and right channels correctly to avoid sound imbalance.
Use good quality RCA cables for a stable connection. Keep cables away from power wires to reduce noise. Measure cable length to avoid excess slack inside your car.
Securing Connections Properly
Ensure all cable connections are tight and secure. Loose connections cause poor sound or signal loss. Use cable clamps or zip ties to hold wires in place. Avoid pulling or bending cables sharply to prevent damage.
Double-check each connection before powering on the system. A stable setup reduces the chance of static or crackling sounds. Clean connectors if needed to maintain good contact.
Adjusting Equalizer Settings
Adjusting the equalizer settings is key to getting the most from your car amplifier and speakers. It shapes how each frequency sounds, allowing you to tailor your music to your taste and the acoustics of your vehicle. Knowing how to fine-tune these settings can turn a good sound system into a great one.
Basic Frequency Tuning
Start by understanding the frequency bands on your equalizer. Typically, these include bass (low frequencies), midrange, and treble (high frequencies). Adjusting each band affects different parts of your music:
- Bass:Controls the deep sounds like drums and bass guitar.
- Midrange:Affects vocals and most instruments.
- Treble:Adjusts the clarity and brightness of the sound.
Try setting all sliders to the middle position first, then adjust one band at a time. Increase the bass if your music feels flat, but beware of overpowering the mids and highs. Lower the treble if the sound feels too sharp or harsh.
Optimizing Sound Quality
Fine-tuning your equalizer is about balance, not just boosting every frequency. Listen carefully to different types of music and make small adjustments. Notice how raising the mids can make vocals clearer without losing the punch of the bass.
Ask yourself: Does the sound feel natural or strained? If your bass is booming but the lyrics are hard to hear, dial down the bass slightly and lift the mids. You might also want to reduce high frequencies if they cause ear fatigue during long drives.
Remember, every car interior is unique. What works in your friend’s car might not suit yours. Don’t be afraid to experiment and trust your ears. Adjusting the equalizer is a personal journey towards your perfect sound.
Testing The Setup
Testing your equalizer and car amplifier setup is a crucial step to ensure everything works smoothly and sounds great. This is where you confirm that all connections are secure and your adjustments deliver the desired audio performance. Taking the time to test will save you from frustration and help you get the most out of your system.
Powering On And Checking Sound
Start by turning on your car’s ignition and then powering on the amplifier and equalizer. Keep the volume low at first to avoid any sudden loud sounds that might damage your speakers. Listen carefully to the sound output and check if the audio flows clearly through all speakers, especially the subwoofer.
Play different types of music to test various frequencies. Notice if bass feels strong but not distorted and highs are crisp without harshness. If the sound seems off, adjust the equalizer settings gradually and observe how the changes affect the audio.
Troubleshooting Common Issues
If you hear humming, buzzing, or no sound at all, don’t panic. These are common issues that often have simple fixes. Check all your wiring connections first—loose or poor contacts are frequent culprits.
- Ensure the RCA cables are firmly plugged in and not damaged.
- Confirm the ground wire is properly connected to a clean metal surface.
- Verify the amplifier’s gain and crossover settings match your system’s specifications.
Still no luck? Try swapping cables to identify if a faulty wire is causing the problem. Also, double-check the equalizer’s input and output configurations. Have you adjusted the settings to suit your car’s acoustics, or are you using default presets that might not fit your setup?

Credit: www.youtube.com
Frequently Asked Questions
How Do I Connect An Equalizer To A Car Amplifier?
To connect, link the equalizer’s output to the amplifier’s input using RCA cables. Ensure the connections are secure and match channels correctly.
Can I Use A Graphic Equalizer With Any Car Amplifier?
Yes, most car amplifiers support graphic equalizers. Check compatibility and use proper cables for optimal sound adjustment.
Why Should I Add An Equalizer Before The Amplifier?
An equalizer before the amplifier shapes the audio signal, improving sound quality and reducing distortion before amplification.
What Cables Are Needed To Connect Equalizer And Amplifier?
Use high-quality RCA cables for connecting the equalizer output to the amplifier input. This ensures clear, noise-free signal transmission.
Conclusion
Connecting an equalizer to a car amplifier improves sound quality. It enhances your listening experience significantly. Start by gathering the right tools and equipment. Follow the steps carefully to avoid errors. Test the setup after connecting to ensure proper function.
Troubleshooting helps if problems arise during the process. Enjoy a superior sound system in your car. With patience, the installation becomes straightforward. Experience music with clarity and depth. Make every drive more enjoyable. Happy listening!