How to Hook Up an Amplifier to a Car Stereo: Step-by-Step Guide
Master Automotive Systems Engineer & Performance Vehicle Specialist at CarSpeedNest Automotive Testing Lab · ASE Certified Master Technician, Mobile Electronics Certified Professional (MECP Master), Certified Dyno Diagnostic Specialist · 14+ years in dyno testing, electronic sensor calibration, automotive wiring harnesses, and precision drivetrain maintenance
If you want to boost your car’s sound system and feel every beat like never before, hooking up an amplifier is the way to go. But maybe you’re wondering how to do it without messing up your stereo or spending a fortune on a pro.
Don’t worry—you’re in the right place. This guide will walk you through the simple steps to connect an amplifier to your car stereo, so you can enjoy clearer, louder, and richer sound. Ready to transform your driving soundtrack? Let’s get started.
Credit: audiointensity.com
Gathering Tools And Equipment
Before you dive into hooking up your amplifier to your car stereo, gathering the right tools and equipment is crucial. Having everything ready saves you from frustrating interruptions and ensures a smoother installation process. Let’s break down what you need to get started.
Essential Tools
Start with basic tools that make wiring and mounting straightforward. A good set of wire strippers, screwdrivers (both Phillips and flathead), and a socket wrench set are must-haves.
Don’t forget a multimeter to test your connections and ensure everything works safely. Electrical tape and zip ties help keep wires neat and secure. If you plan to drill holes for mounting, a power drill with the right bits will come in handy.
Choosing The Right Amplifier
Pick an amplifier that matches your audio needs and car’s stereo system. Consider its power output to avoid overpowering your speakers or underwhelming your setup.
Think about the number of channels you need—do you want to power just your subwoofer or all your speakers? Also, check the amplifier’s size to make sure it fits comfortably in your car without blocking any vents or compartments.
Selecting Compatible Wiring
Your wiring must handle the amplifier’s power and match your car’s electrical system. Use high-quality power cables rated for your amplifier’s amperage to avoid overheating.
Speaker wires should be thick enough to carry the signal without loss—typically 16 to 12 gauge works well depending on distance and power. Don’t overlook a good ground wire; a poor ground can cause noise or damage.
Have you ever struggled with wires that were too short or tangled? Measure your car’s layout carefully before buying cables to ensure you have just the right length.
Preparing Your Car Stereo
Preparing your car stereo is the first key step before hooking up an amplifier. This process ensures safety and correct connections. Taking your time here avoids damage and poor sound quality. Follow simple steps to get your stereo ready for the upgrade.
Disconnecting The Battery
Start by disconnecting the car battery. This prevents electrical shorts and shocks. Use a wrench to loosen the negative terminal clamp. Remove it and keep it away from the battery. This step is crucial for your safety and the car’s electrical system.
Removing The Stereo Unit
Next, remove the stereo from the dashboard. Use panel removal tools to avoid damage. Carefully pull the stereo out after loosening the screws. Disconnect all wiring harnesses at the back. Keep the screws and parts safe for reinstallation.
Identifying Speaker Wires
Identify the speaker wires connected to the stereo. Use a wiring diagram or manual for your car model. Speaker wires usually come in pairs with different colors. Mark these wires clearly for proper amplifier connection. Correct wire identification ensures clear and balanced sound.
Running The Wiring
Running the wiring is a crucial part of hooking up an amplifier to your car stereo. Proper wiring ensures your amp gets the power it needs and maintains a clean signal for the best sound quality. If the wires are poorly routed or connected, you might face issues like noise interference or even damage to your equipment.
Routing The Power Wire
The power wire connects your amplifier directly to the car battery. It’s important to use a wire with the right gauge to handle the current without overheating. Run the power wire through the engine bay carefully, avoiding hot or moving parts that could damage the insulation.
Consider using a grommet when passing the wire through the firewall to prevent cuts. Keep the wire as short and direct as possible for efficiency and safety. Have you checked if your power wire includes a fuse near the battery? It’s essential to protect your system from electrical faults.
Ground Wire Placement
The ground wire completes the electrical circuit and must be connected to a clean, unpainted metal surface on your car’s chassis. The closer the ground point is to the amplifier, the better the performance and reduced risk of noise. Scrape off any paint or rust to ensure a solid connection.
Using a short, thick wire for grounding helps avoid voltage drops. If your ground connection is shaky, you might hear unwanted hums or buzzing in your speakers. Have you tried tightening or relocating the ground wire to solve such noise problems?
Connecting The Remote Turn-on Wire
This thin wire signals the amplifier to power on when your stereo is turned on. It usually connects to the remote turn-on lead on the back of your head unit. Without this connection, your amp won’t switch on automatically, causing frustration every time you start your car.
Make sure the wire is securely attached and routed away from power cables to avoid interference. Double-check the polarity and voltage to match your amplifier’s requirements. What’s your experience with remote turn-on wires causing delays or failures?
Installing Rca Cables
RCA cables carry the audio signal from your head unit to the amplifier. Choose high-quality, shielded cables to minimize noise and interference. Route these cables separately from power wires; crossing them can introduce unwanted hums and static.
Keep RCA cables away from sharp edges or tight bends that can damage the internal wiring. Check the connectors for a snug fit to prevent signal loss. Have you noticed a difference in sound clarity after upgrading your RCA cables?
Credit: www.iq-forums.com
Connecting The Amplifier
Connecting the amplifier to your car stereo is a crucial step that determines the quality and safety of your audio setup. It requires careful attention to detail, especially with the wiring. If done correctly, your amplifier will deliver powerful sound without any electrical issues.
Power And Ground Connections
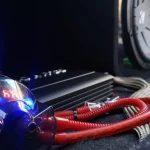
Start by connecting the amplifier’s power wire to the car’s battery. Use a fuse within 18 inches of the battery terminal to protect your system from sudden surges.
The ground wire must connect to a clean, bare metal spot on your car’s chassis. This ensures a solid connection and prevents electrical noise or interference.
A poor ground connection can cause your amplifier to malfunction or produce unwanted hums. Check that the wire gauge matches the amplifier’s requirements for both power and ground.
Hooking Up The Remote Wire
The remote wire tells your amplifier when to turn on and off. Connect it to the stereo’s remote turn-on lead, usually a blue or blue/white wire.
This small wire is vital because without it, the amplifier won’t power up when you start your car stereo. If you skip this, you might wonder why your amp stays silent even when the stereo is playing.
Make sure the connection is secure to avoid intermittent power issues that can damage your speakers over time.
Input And Output Wiring
Use RCA cables to connect the stereo’s output to the amplifier’s input. This carries the audio signal cleanly without interference.
If your stereo lacks RCA outputs, you might need a high-level to low-level converter to connect speaker wires to the amp inputs.
Next, run speaker wires from the amplifier’s output terminals to your speakers or subwoofers. Keep the wiring neat and avoid crossing power and signal cables to minimize noise.
Are you confident that your wiring will maintain signal clarity and power delivery? Double-checking connections now can save you hours of troubleshooting later.
Configuring The Amplifier
Configuring the amplifier correctly is key to getting the most from your car stereo system. This step lets you tailor the sound to your preferences and the vehicle’s acoustics. Taking the time to fine-tune settings like gain, crossover, and bass boost ensures clear and powerful audio without distortion.
Adjusting Gain And Crossover
Start by adjusting the gain to match the output level of your stereo’s head unit. Too high, and the sound will distort; too low, and you won’t get enough volume or clarity. Use a test tone or your favorite song to find the sweet spot where the sound is clean and loud without clipping.
The crossover controls what frequencies your amplifier sends to your speakers or subwoofer. Set the crossover to “low-pass” for subs, allowing only bass frequencies to pass through. For full-range speakers, use a “high-pass” setting to block low frequencies that can cause distortion.
Setting Bass Boost
Bass boost adds extra punch to your lower frequencies, but it needs to be used carefully. Too much bass boost can cause distortion and damage your speakers over time. Start with a small increase, listen closely, and adjust until the bass sounds tight and powerful without overwhelming the rest of the music.
Ask yourself: does the bass feel balanced or overpowering? Your ears are the best judge here, so take your time tuning this setting.
Testing Sound Output
Once your adjustments are in place, test the sound output with a variety of music genres. Pay attention to clarity, volume, and whether any distortion appears at higher levels. Walk around your car and listen from different positions to ensure the sound fills the space evenly.
If something sounds off, revisit the gain and crossover settings. Sometimes small tweaks make a big difference. Don’t rush this step—your perfect sound setup is worth the effort.
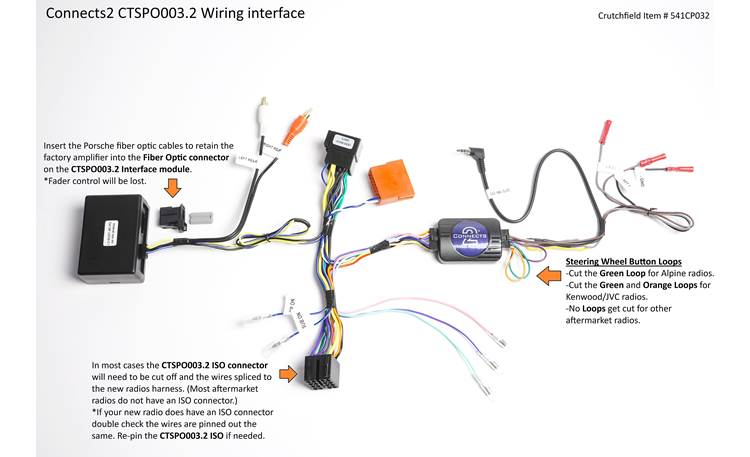
Credit: www.crutchfield.ca
Reassembling And Final Checks
After connecting your amplifier to the car stereo, it’s time to focus on reassembling everything properly and running final checks. This step is crucial to ensure your setup works safely and efficiently. Skipping these details might cause problems later, like loose connections or safety hazards.
Securing The Amplifier
Make sure your amplifier is firmly mounted in a stable location. Use screws or brackets designed for your specific amplifier model to avoid vibrations or movement while driving. A loose amplifier can cause wiring to disconnect or even damage the unit over time.
Think about the space around the amplifier. You want enough room for airflow to prevent overheating. If you notice any cables are pinched or stretched, adjust them before tightening everything down.
Reinstalling The Stereo
Once the amplifier is secure, carefully put your stereo back into the dashboard. Align it properly to avoid damaging the connectors. Take your time with the wiring harness to ensure all plugs fit snugly and click into place.
After seating the stereo, check that all buttons and knobs are accessible and functional. Sometimes, a misaligned stereo can cause buttons to stick or fail. Your goal is a clean, professional look without any gaps or loose parts.
Performing Safety Checks
Before turning on your system, double-check all power connections. Confirm the ground wire is tightly connected to a clean, bare metal surface to avoid electrical shorts. Loose grounds are a common cause of noise and system failure.
- Verify fuse placement and rating match your amplifier’s requirements.
- Inspect all wires for exposed strands or damaged insulation.
- Ensure remote turn-on wire is properly connected to the stereo.
Ask yourself: Have you tested the system on low volume first? This helps catch wiring errors without risking speaker damage. Safety checks might feel tedious, but they save you headaches and costly repairs down the road.
Frequently Asked Questions
How Do I Connect An Amplifier To A Car Stereo?
To connect an amplifier, first disconnect the battery. Run RCA cables from the stereo’s output to the amp’s input. Connect the amp’s power wire to the battery, ground wire to the car chassis, and remote turn-on wire to the stereo’s remote output.
What Tools Are Needed To Hook Up A Car Amplifier?
You need a wire stripper, crimping tool, screwdrivers, electrical tape, and a multimeter. RCA cables, power wire, ground wire, and a remote turn-on wire are also essential for proper installation.
Can I Use Factory Speakers With A New Amplifier?
Yes, factory speakers can be used, but they may not handle increased power well. Upgrading to aftermarket speakers is recommended for better sound quality and durability when using an amplifier.
Where Should I Ground My Car Amplifier?
Ground the amplifier to a clean, unpainted metal surface close to the amp. A solid ground ensures stable power flow and prevents noise or interference in your audio system.
Conclusion
Connecting an amplifier to a car stereo enhances your music experience. Follow the steps carefully for a smooth setup. Ensure all connections are secure. Double-check wires and power sources. Troubleshooting might be necessary if sound is unclear. Enjoy clearer and louder audio once everything is set.
Remember, patience and precision are key. Consult your car’s manual if needed. Practice makes perfect, so don’t rush. Take your time to enjoy the process. Happy listening on your next drive!

Similar Posts