How to Program Car Stereo: Easy Steps for Perfect Sound Setup
Master Automotive Systems Engineer & Performance Vehicle Specialist at CarSpeedNest Automotive Testing Lab · ASE Certified Master Technician, Mobile Electronics Certified Professional (MECP Master), Certified Dyno Diagnostic Specialist · 14+ years in dyno testing, electronic sensor calibration, automotive wiring harnesses, and precision drivetrain maintenance
Have you ever struggled to get your car stereo to play just the way you want? Whether it’s setting your favorite stations, adjusting the sound, or syncing your phone, programming your car stereo can feel tricky.
But what if you could take full control, making your drives more enjoyable with clear music and easy access to your playlists? In this guide, you’ll discover simple, step-by-step tips to program your car stereo quickly and confidently. By the end, you’ll have the skills to customize your audio experience exactly the way you like it.
Ready to unlock your car stereo’s full potential? Let’s dive in!
Choosing The Right Stereo
Choosing the right car stereo can completely change your driving experience. It’s not just about playing music; it’s about getting the features and sound quality that fit your lifestyle. Knowing what to look for helps you avoid buyer’s remorse and makes installation smoother.
Types Of Car Stereos
Car stereos come in several styles, each with its own benefits. Single-DIN units are compact and simple, perfect if you want basic functions without a large display. Double-DIN stereos offer bigger screens and advanced features like touch controls and navigation.
There are also multimedia receivers that support video playback and smartphone integration. Think about how you usually listen to music—do you stream, use USB drives, or prefer CDs? This can guide you to the stereo type that fits your habits best.
Features To Look For
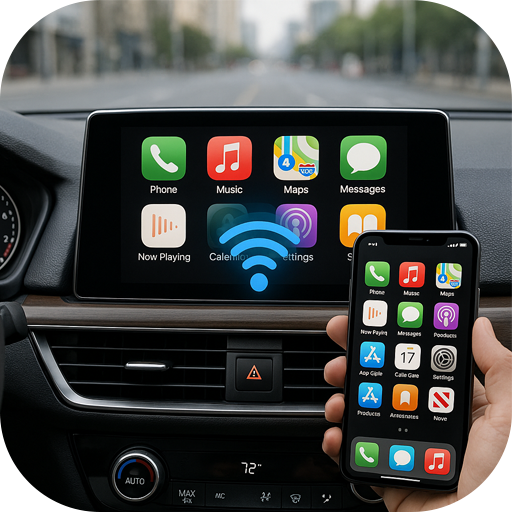
Focus on features that enhance your daily drive. Bluetooth connectivity is almost essential now for hands-free calls and wireless music streaming. Look for models with smartphone compatibility—Apple CarPlay or Android Auto can make your phone safer to use on the road.
Sound quality matters too. Check if the stereo has equalizer settings or supports external amplifiers. Other handy features include USB ports, AUX inputs, and steering wheel control compatibility. Ask yourself: which features will you actually use, not just want?
Budget Considerations
Your budget sets the boundary for your options but don’t let it limit what you really need. Basic models can be found for under $50, but they might lack modern features. Mid-range stereos, priced between $100 and $300, usually offer a good balance of quality and functionality.
High-end units with premium sound and extensive connectivity can cost $500 or more. Remember to factor in installation costs if you’re not doing it yourself. Spending a bit more upfront can save headaches and give you a stereo that lasts longer.

Credit: www.kenwood.eu
Gathering Necessary Tools
Before you start programming your car stereo, gathering the right tools is essential. Having everything ready saves time and prevents frustration. It also makes the process smoother and safer for both you and your vehicle.
Basic Tools For Installation
Some tools are must-haves for almost any car stereo installation. You’ll need a good set of screwdrivers—both flathead and Phillips—to remove panels and secure the stereo unit.
Wire strippers and crimpers are crucial for handling the wiring connections. They help you strip insulation cleanly and attach connectors firmly.
A panel removal tool protects your car’s interior trim from scratches and damage. It’s a simple investment that pays off by keeping your dashboard looking pristine.
- Flathead and Phillips screwdrivers
- Wire strippers and crimpers
- Panel removal tool
- Electrical tape or heat shrink tubing
- Multimeter for testing connections
Optional Accessories
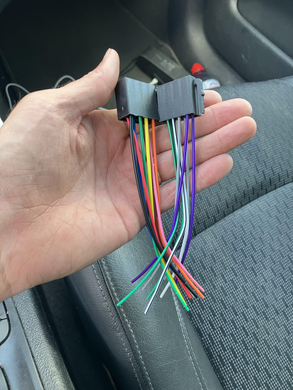
Depending on your car model and stereo, you might want some extra accessories. A wiring harness adapter can save you from cutting factory wires, making the job cleaner and reversible.
Dash kits customize your stereo’s fit, especially if you’re upgrading to a different size unit. These kits avoid gaps and loose fittings.
Consider a Bluetooth microphone or USB extension cable for improved functionality and convenience after installation.
- Wiring harness adapter
- Dash installation kit
- Bluetooth microphone
- USB extension cables
- Fuse tap for adding circuits safely
Have you checked if your car stereo model requires any specific tools or accessories? Preparing ahead means you won’t get stuck halfway through the job, wondering where to find the right part.
Removing The Old Stereo
Removing the old stereo is the first crucial step in upgrading your car’s audio system. It’s not just about pulling out the device; careful handling ensures you don’t damage the dashboard or wiring. Taking your time here saves headaches later when installing the new unit.
Safety Precautions
Before you start, disconnect your car battery to avoid electrical shocks or short circuits. This simple action protects both you and the vehicle’s electronics.
Use insulated tools designed for automotive work to reduce the risk of sparks. Avoid wearing loose clothing or jewelry that might get caught or create a hazard.
Have a clean, flat surface ready to place screws and small parts. Losing these can slow down your project and cause frustration.
Step-by-step Removal Process
- Locate and remove the trim or faceplate around the stereo. Use a plastic pry tool to avoid scratching the dashboard.
- Identify the screws or bolts securing the stereo. Keep track of their sizes and locations for reassembly.
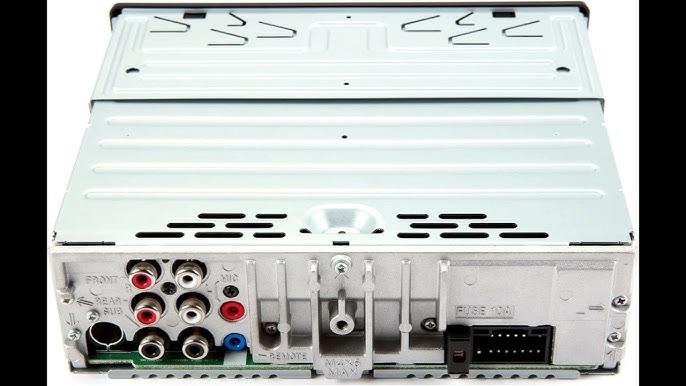
- Gently pull the stereo out until you can access the wiring harness and antenna cable at the back.
- Unplug the wiring harness carefully—don’t force connectors or pull on wires directly.
- Remove the antenna cable by pulling it straight out or releasing any clips holding it in place.
Have you ever been surprised by how many small screws and clips hold your stereo in place? Keeping everything organized makes reinstalling much easier and faster.
Installing The New Stereo
Installing the new car stereo is the moment where your efforts start to show real results. It’s not just about placing the device into the dashboard; it’s about ensuring every connection is right and the unit stays firmly in place. A properly installed stereo gives you clear sound and prevents future issues like loose wires or rattling.
Connecting Wires Correctly
Wiring can seem intimidating, but it’s crucial for your stereo to work perfectly. First, identify each wire by color and function—power, ground, speakers, and antenna. Use a wiring diagram from your stereo manual or online resources to avoid guesswork.
Secure each wire connection with crimp connectors or soldering for durability. Loose or improper connections can cause static or complete failure. Don’t forget to test the connections before finalizing the installation; a quick power-on test saves a lot of troubleshooting later.
Mounting The Stereo Securely
Once the wiring is set, focus on mounting the stereo so it won’t move while driving. Use the mounting bracket that fits your car’s dash or a universal kit designed for your stereo model. Tighten screws evenly to avoid tilting the unit.
Double-check that the stereo is flush with the dash and that no cables get pinched behind it. A secure fit reduces vibrations and protects the wiring from wear. Have you noticed how a loose stereo can ruin even the best audio experience? Keeping it tight keeps your music crisp and your drive enjoyable.
Programming Your Car Stereo
Programming your car stereo is more than just pressing buttons—it’s about tailoring your audio experience to suit your unique tastes. Getting the settings right can transform every drive, whether it’s a quick commute or a long road trip. Let’s dive into how you can make your car stereo truly yours by setting up preferences, adjusting sound quality, and saving your favorite presets.
Setting Up Audio Preferences
Start by exploring the main menu of your car stereo to find the audio settings section. Here, you can adjust basic preferences like volume limits, balance, and fade. Balance controls the sound distribution between left and right speakers, while fade adjusts it between front and rear speakers.
Think about your usual driving environment. Do you often have passengers in the back? If yes, fading sound toward the rear speakers can enhance their listening experience. Setting volume limits helps protect your ears and prevents sudden loud noises from startling you on the road.
Adjusting Equalizer Settings
The equalizer (EQ) lets you fine-tune the bass, midrange, and treble frequencies to match your music style. Many stereos offer presets like Rock, Jazz, or Classical, but customizing the EQ often yields better results. Try boosting the bass slightly if you prefer deeper sounds, or increase the treble for clearer vocals.
Don’t hesitate to experiment with different settings while playing your favorite tracks. Small changes can make a big difference in sound clarity and richness. Have you noticed how adjusting the midrange can bring out hidden details in songs?
Saving Presets
Once you’ve found the perfect settings, save them as presets for easy access later. Most car stereos allow you to store multiple presets, which is useful if you enjoy different sound profiles for genres like pop or podcasts. Naming each preset clearly helps you switch quickly without second-guessing.
Consider creating a preset for your daily commute and another for road trips with friends. This way, your stereo adapts instantly to your mood and company. How convenient would it be to have your stereo settings ready with just a single button press?
Optimizing Sound Quality
Optimizing sound quality is key to enjoying music in your car. Proper settings make every note clear and lively. Small changes improve your listening experience greatly.
Speaker Placement Tips
Speakers need the right spots for the best sound. Place front speakers near ear level for clear vocals. Avoid placing speakers too close to corners. Keep rear speakers balanced on both sides. Position tweeters to face the listener for sharp highs. Use foam pads to reduce vibrations and improve clarity.
Balancing Bass And Treble
Bass and treble control the depth and brightness of sound. Set bass to a level where it is felt but not overwhelming. Treble should add brightness without causing harshness. Adjust equalizer settings slowly while playing music. Test different genres to find a good balance. Avoid maxing out both bass and treble to prevent distortion.
Reducing Noise And Interference
Noise and interference lower sound quality noticeably. Use shielded cables to prevent electrical noise. Keep audio wires away from power cables. Check for loose connections that cause static or hum. Turn off devices that cause radio interference inside the car. Use noise filters if background noise remains high.
Troubleshooting Common Issues
Dealing with issues while programming your car stereo can be frustrating. However, many common problems have straightforward solutions that you can handle yourself. Identifying the exact issue helps you save time and avoid unnecessary trips to a mechanic or dealer.
No Sound Problems
If your stereo powers on but no sound comes out, start by checking the volume and mute settings. Sometimes the simplest fixes are overlooked.
Next, inspect the speaker connections. Loose or disconnected wires often cause this issue. If your car has a separate amplifier, ensure it’s powered and correctly connected.
Have you tried switching the audio source? Testing with radio, Bluetooth, or USB can help pinpoint if the problem lies with one particular input.
Connectivity Issues
Bluetooth pairing or USB connectivity problems are common. Make sure your phone or device is compatible and that Bluetooth is enabled on both ends.
Try deleting old paired devices from your stereo’s memory; too many stored connections can cause conflicts. Restarting both your phone and stereo often resets the connection successfully.
If your USB port isn’t recognized, check for debris or damage inside the port. Using a different cable or USB device can help determine if the issue is cable-related.
Display And Control Glitches
Screen freezes or unresponsive buttons can be irritating. First, try a soft reset by turning the stereo off and on or disconnecting the car battery briefly.
Check if your stereo’s firmware needs an update. Manufacturers often release fixes for bugs that cause display or control issues.
Have you noticed these glitches after installing a new device or accessory? Sometimes, incompatible hardware can interfere with controls and display functions.

Credit: www.youtube.com
Maintaining Your Car Stereo
Maintaining your car stereo is key to keeping your music clear and your system running smoothly. A well-maintained stereo doesn’t just sound better; it lasts longer and saves you money on repairs. Simple care routines can prevent many common issues that disrupt your driving experience.
Regular Cleaning Tips
Dust and dirt can quickly build up on your car stereo, affecting both its appearance and functionality. Use a soft, dry cloth to wipe the screen and buttons regularly. Avoid harsh chemicals that can damage the surface or seep into internal components.
Clean the knobs and ports gently with a small brush or compressed air to remove debris. Have you noticed your volume knob getting sticky or unresponsive? Cleaning might be the fix you need before considering replacement.
Software Updates
Many modern car stereos rely on software to operate smoothly and to access new features. Check your stereo’s manual or manufacturer website for update instructions. Regular updates can fix bugs, improve performance, and even add new functionalities.
Sometimes, ignoring software updates can cause compatibility issues with your smartphone or apps. Are you missing out on better sound quality or new controls just because your system is outdated?
Protecting Against Damage
Physical damage is one of the fastest ways to ruin your car stereo. Avoid placing heavy objects on your stereo or pressing buttons too hard. Protect the stereo from extreme temperatures by parking in shaded areas or using sunshades.
Spills are another common hazard. If liquid gets inside, it can short-circuit your system. Have you ever experienced a sticky mess on your stereo? Acting fast with gentle cleaning can prevent permanent damage.

Credit: www.youtube.com
Frequently Asked Questions
How Do I Program Presets On My Car Stereo?
To program presets, tune to your desired station, then press and hold a preset button until it beeps. This saves the station for quick access later.
Can I Sync My Phone With A Car Stereo?
Yes, most modern stereos allow Bluetooth or USB connection to sync phones. This enables hands-free calls and music streaming.
What If My Car Stereo Won’t Program?
Check the stereo manual for reset instructions. Ensure the ignition is on and connections are secure. Sometimes a factory reset resolves programming issues.
How To Set Clock On A Car Stereo?
Press the clock or menu button, then use tuning or seek buttons to adjust hours and minutes. Confirm settings by pressing the clock button again.
Conclusion
Programming your car stereo can be simple and fun. Follow these steps carefully. Start by reading the manual. It’s full of useful information. Next, explore the stereo settings. Adjust sound and save your favorite stations. Don’t forget to set the clock correctly.
It helps in daily schedules. Practice makes perfect. The more you use it, the easier it gets. Remember, patience is key. Enjoy your music with the perfect sound. A well-tuned stereo makes every drive enjoyable. Keep experimenting with settings. You’ll soon become more confident.
Happy driving and listening!

Similar Posts