How to Take Out a Pioneer Car Stereo: Easy Step-by-Step Guide
Are you looking to remove your Pioneer car stereo but don’t know where to start? Taking out a car stereo can feel tricky if you’ve never done it before.
But with the right steps, you can do it yourself quickly and safely. In this guide, you’ll learn exactly how to take out your Pioneer car stereo without damaging your dashboard or wiring. Keep reading, and by the end, you’ll have the confidence to handle the job like a pro.
Tools Needed
Taking out a Pioneer car stereo requires a few specific tools. Having the right tools makes the job faster and safer. These tools help protect your car’s interior from damage. Some tools are essential, while others are optional but helpful.
Essential Tools
- Flathead screwdriver – to pry off panels gently
- Phillips screwdriver – to remove screws securing the stereo
- Radio removal keys – to unlock the stereo from the mounting bracket
- Panel removal tool – to avoid scratching or breaking trim pieces
- Socket wrench set – for bolts holding the stereo or brackets
Optional Accessories
- Magnetic tray – keeps screws and small parts safe
- Flashlight – improves visibility in tight or dark areas
- Electrical tape – secures wires during removal
- Gloves – protect hands from sharp edges
- Owner’s manual – provides model-specific instructions and diagrams
Preparation Steps
Preparing to remove a Pioneer car stereo is essential for a smooth process. Proper preparation helps avoid damage to the stereo and the vehicle’s electrical system. Taking the right steps before starting makes the removal safe and efficient.
Disconnecting The Battery
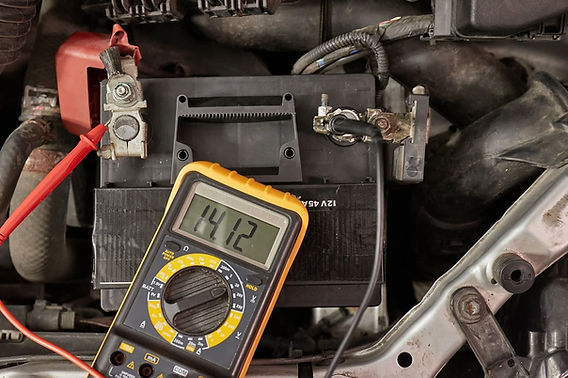
Always disconnect the car battery before working on the stereo. This step prevents electrical shocks and short circuits. Locate the battery under the hood or in the trunk. Use a wrench to loosen the negative terminal first. Remove the cable and keep it away from the battery. This stops power flow and protects the vehicle’s electronics.
Clearing The Workspace
Clear the area around the stereo before starting work. Remove any loose items from the dashboard and seats. Make sure you have enough light to see small screws and connectors. Gather all necessary tools like screwdrivers and panel removers. A clean workspace reduces the chance of losing parts or damaging the stereo.
Removing Trim Panels
Removing trim panels is an essential step before taking out a Pioneer car stereo. These panels cover the stereo and other dashboard components. Proper removal prevents damage to your car’s interior and makes stereo removal easier. Handle the panels carefully to keep clips and screws intact.
Locating Clips And Screws
Start by inspecting the trim panel closely. Look for small screws around the edges or hidden under plastic covers. Clips usually hold the panel firmly in place. These clips snap into slots and require gentle pressure to release.
- Check near the stereo and surrounding dashboard areas.
- Use a flashlight to see screws hidden in tight spaces.
- Remove any screw covers to access fasteners.
- Feel for clips by gently pressing the panel edges.
Safely Detaching Panels
Use a plastic trim removal tool to avoid scratching the dashboard. Insert the tool between the panel and dash, then gently pry outward. Work slowly around the panel to release all clips. Avoid using metal tools, which can damage your car.
- Start at one corner or edge of the panel.
- Apply steady, gentle pressure to pop clips free.
- Keep the panel close to avoid dropping it.
- If screws remain, remove them before pulling the panel.
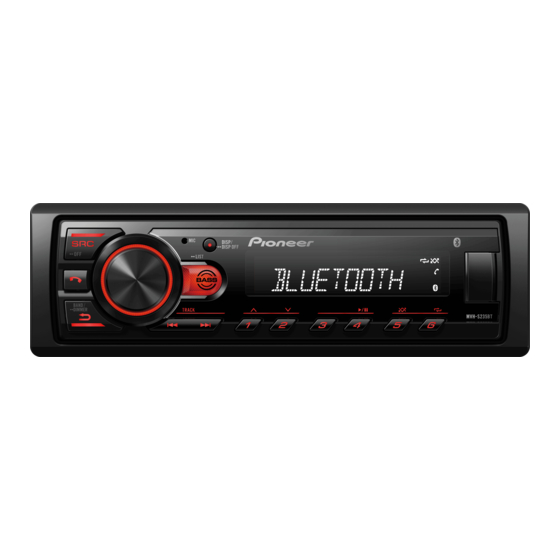
Credit: www.manualslib.com
Releasing The Stereohttps://www.amazon.com/Release-Vehicle-Disassembly-Vehicles-Mercedes/dp/B0D72RQPWQ
Releasing the Pioneer car stereo requires careful handling to avoid damage. This step is crucial to safely remove the unit from the dashboard. Follow these simple techniques to free the stereo with ease and prevent any scratches or breaks.
Using Removal Keys
Pioneer stereos often come with special removal keys. These keys slide into slots on each side of the stereo face. Insert the keys gently until you hear a click. This click means the stereo is unlocked from the dashboard.
Once unlocked, pull the stereo out carefully by holding the keys. Avoid forcing it out to protect the wiring behind. Keep the removal keys safe for future use. Without them, removing the stereo can be difficult.
Accessing Mounting Screws
Some Pioneer models use screws to hold the stereo in place. Look for small panels or trim around the stereo that can be removed. Use a flat tool to pry these panels gently.
After removing the trim, locate the screws securing the stereo. Use a screwdriver that fits properly to avoid stripping the screws. Unscrew all mounting points, then pull the stereo out slowly.
Check for any cables connected at the back before fully removing the unit. Disconnect these cables carefully to avoid damage. This process ensures the stereo comes out safely and smoothly.
Disconnecting Wiring
Disconnecting the wiring is a crucial step when removing your Pioneer car stereo. It ensures safety and prevents damage to the stereo and your vehicle’s electrical system. Taking your time to carefully handle the wiring can save you headaches later.
Identifying Connectors
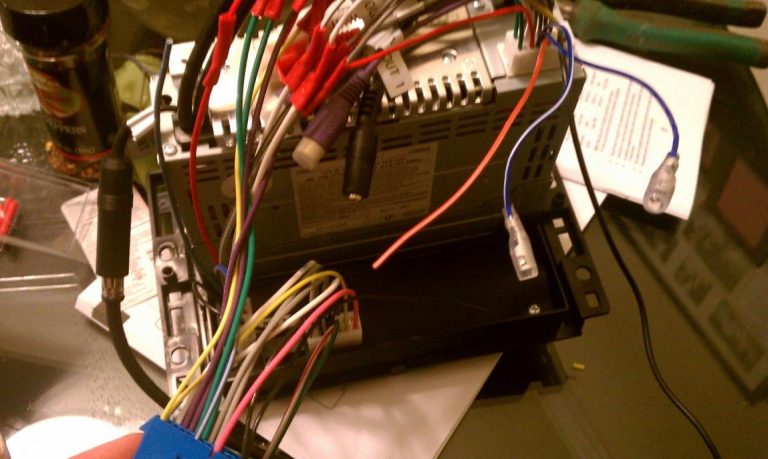
Before unplugging anything, take a close look at the wiring behind your stereo. You’ll find several connectors, each with a unique shape and color. These connectors link the stereo to your car’s power, speakers, and antenna.
Look for labels or color codes on the wires—they can guide you in recognizing which connector does what. If you’re unsure, snapping a quick photo can help you remember the setup. Have you ever unplugged the wrong wire and had to figure out what went where? Avoid that by double-checking now.
Unplugging Harnesses
Once you’ve identified the connectors, gently unplug the wiring harnesses. Most connectors have a small tab or clip that you need to press or lift before pulling them out. Never yank on the wires directly; instead, grip the plastic connector to avoid damage.
Sometimes, these clips can be stiff, especially if the stereo has been in place for years. Applying a little pressure while pressing the tab usually does the trick. If you encounter resistance, pause and inspect to avoid breaking the connector—patience pays off here.

Credit: usa.pioneer
Removing The Stereo Unit
Removing the stereo unit from your Pioneer car system requires care and the right approach. This step is crucial before installing a new stereo or performing repairs. Understanding how to safely pull out the stereo helps avoid damage to the unit and your vehicle’s dashboard.
Follow simple instructions to make the process smooth and safe.
Pulling Out The Stereo
Start by locating the release keys or screws holding the stereo. Insert the release keys into the slots on the stereo face. Gently pull the stereo towards you. It should slide out smoothly. Avoid forcing it as this can damage the frame or wiring.
Once loose, carefully pull the unit until you can reach the wiring at the back.
Handling With Care
Hold the stereo firmly but gently. Avoid pulling on the wires. Disconnect the wiring harness by pressing the release tab. Remove any antenna cables carefully. Place the stereo on a soft surface to prevent scratches. Keep all screws and keys in a safe place for reinstalling later.
Troubleshooting Tips
Troubles can happen when removing a Pioneer car stereo. Some units get stuck. Others face connection issues or tool problems. Simple tips can help avoid damage and frustration. Keep calm and follow practical advice. This section shares easy ways to fix common problems during removal.
Dealing With Stuck Units
Stuck stereos need gentle handling. Avoid forcing the unit out. Use the right tools designed for Pioneer models. A small flat screwdriver can help loosen clips carefully.
- Check if the release keys are fully inserted.
- Try rocking the stereo slightly side to side.
- Press and hold the eject button if available.
- Use a flashlight to see if any screws block removal.
If the stereo still won’t budge, pause. Recheck instructions or ask for help. Forcing can break clips or wiring.
Avoiding Common Mistakes
Removing a car stereo without care causes damage. Avoid these errors:
- Don’t pull the stereo with too much force.
- Never use sharp tools that can scratch or break parts.
- Do not disconnect wiring before unlocking the unit.
- Avoid rushing. Take your time to avoid mistakes.
Always keep track of screws and small parts. Label wires if needed. This saves time during reinstallation.

Credit: usa.pioneer
Frequently Asked Questions
How Do I Safely Remove A Pioneer Car Stereo?
First, disconnect the car battery to avoid electrical shocks. Use a stereo removal key or tools to unlock the unit. Gently pull the stereo out, avoiding force. Disconnect wiring harnesses carefully to prevent damage. Follow the user manual for model-specific steps.
What Tools Are Needed To Take Out A Pioneer Stereo?
You typically need a flat-head screwdriver, Phillips screwdriver, and stereo removal keys. Some models require panel removal tools or socket wrenches. Having the right tools ensures a smooth, damage-free removal process. Check your car and stereo model for specific requirements.
Can I Remove A Pioneer Stereo Without Professional Help?
Yes, many Pioneer stereos can be removed with basic tools and instructions. Follow safety steps and use proper tools to avoid damage. Watching tutorial videos or reading the manual helps. If unsure, consult a professional to prevent costly mistakes.
How Do I Disconnect Wiring From A Pioneer Stereo?
After pulling the stereo out, locate the wiring harnesses at the back. Press the locking tabs and gently pull connectors out. Avoid pulling wires directly to prevent damage. Label wires if planning to reinstall or replace the stereo later.
Conclusion
Taking out a Pioneer car stereo is easy with the right steps. Start with removing the trim, then unscrew the stereo carefully. Use the right tools to prevent damage. Disconnect the wires gently. Remember the wire locations for reinstallation. Handling everything with care ensures no parts get lost.
Practice makes perfect. With patience, anyone can do it. Follow these steps and your stereo removal will be smooth. Have confidence in your skills. Enjoy your DIY success.