How to Hook Up Car Stereo to Wall Outlet: Easy DIY Guide
Have you ever wanted to enjoy your car stereo’s powerful sound right inside your home or garage? Connecting your car stereo to a wall outlet might sound tricky, but it’s easier than you think.
With the right steps and a bit of care, you can bring your favorite tunes to any room using your car stereo. In this guide, you’ll learn exactly how to make it work safely and effectively. Keep reading, and soon you’ll be blasting your music like never before.
Tools And Materials Needed
Setting up a car stereo to run from a wall outlet requires specific tools and materials. Having the right items ensures safety and proper functioning. This section covers the basic tools and materials you need before starting the project.
Essential Tools
- Wire stripper – removes insulation from wires cleanly
- Multimeter – checks voltage and continuity
- Screwdriver set – for opening and securing components
- Soldering iron – for strong and durable wire connections
- Heat shrink tubing – protects and insulates wire joints
- Electrical tape – adds extra insulation and secures wires
- Crimping tool – for attaching connectors to wires
Required Materials
- Car stereo unit – the device to power
- 12V DC power supply with wall plug – converts AC to DC power
- Power adapter cable – connects power supply to stereo
- Ground wire – ensures proper grounding for safety
- Fuse holder and fuse – protects the stereo from electrical surges
- Speaker wires – connect stereo to speakers if needed
- Connectors and terminals – for secure and easy wire connections
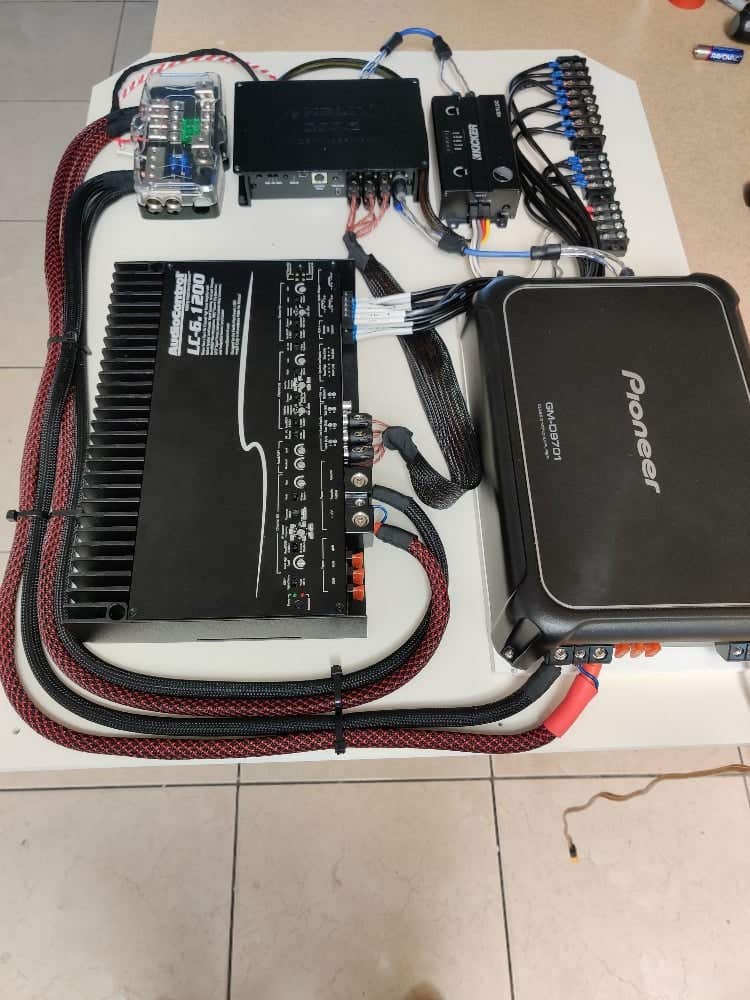
Credit: www.diymobileaudio.com
Safety Precautions
Safety should be your top priority when hooking up a car stereo to a wall outlet. Mistakes can lead to electrical shocks, damage to your equipment, or even fire hazards. Understanding key safety precautions helps you protect yourself and ensure your project goes smoothly.
Handling Electrical Components
Always disconnect power before touching any wires or components. Use insulated tools to reduce the risk of electric shock. Keep your work area dry—water and electricity don’t mix.
Check the voltage rating on your car stereo and match it carefully with the power supply. Using a power adapter designed for automotive electronics is crucial. Avoid makeshift solutions like plugging directly into a wall socket without a proper converter; this can fry your stereo or cause sparks.
Have you ever grabbed a wire only to get a sudden shock? That’s a clear sign of skipping safety steps. Wearing rubber gloves and safety glasses can prevent injury during your setup.
Avoiding Common Hazards
Never overload your power outlet with multiple devices at once. This can cause overheating and trip your circuit breaker. Use a surge protector to guard against unexpected voltage spikes.
Keep flammable materials away from your workbench. Sparks or overheating wires near paper or cloth can start fires quickly. Inspect all cables for fraying or damage before use.
Pay attention to proper grounding. An ungrounded stereo system can cause buzzing sounds and increase the risk of electric shock. Simple grounding checks can save you from bigger problems later.
- Double-check all connections before powering on.
- Use a multimeter to confirm voltage and polarity.
- Don’t rush—take your time to avoid mistakes.
Understanding Car Stereo Power Requirements
Before you plug your car stereo into a wall outlet, it’s essential to understand what powers it. Car stereos run on a different electrical system than household devices, so knowing their power needs prevents damage and ensures smooth operation.
Understanding the power requirements helps you choose the right adapter or power supply. It also keeps your stereo safe from electrical issues. Let’s break down the key aspects you must consider.
Voltage And Current Specs
Car stereos typically require 12 volts DC to operate, matching a car battery’s output. Household outlets provide 120 volts AC (or 230 volts in some countries), which is far too high and in the wrong form for your stereo.
Current is just as important as voltage. Your stereo might draw anywhere from 5 to 20 amps depending on its features and volume levels. Check the label or manual for exact numbers to avoid underpowering or overpowering your device.
Ignoring these specs can cause your stereo to malfunction or even get permanently damaged. Have you ever tried running a device on the wrong voltage and ended up with a blown fuse? Avoid that hassle by verifying your stereo’s requirements first.
Power Supply Options
The easiest way to power a car stereo from a wall outlet is using a DC power supply or adapter designed for 12V devices. These adapters convert AC from your wall into the 12V DC your stereo needs.
Look for power supplies that match both voltage and current specs of your stereo. A supply rated slightly higher in amps than your stereo’s maximum draw is safer, giving you some headroom.
- Use regulated power supplies to maintain stable voltage and protect your stereo.
- Check if the power supply has built-in protections like overcurrent and short-circuit safeguards.
- Consider power supplies with adjustable voltage if you want flexibility for other devices.
By choosing the right power supply, you’ll get clear sound without interruptions or risk. How confident are you that your current setup meets these electrical needs? Taking time here can save you money and frustration later.
Selecting A Suitable Power Adapter
Selecting the right power adapter is crucial when hooking up your car stereo to a wall outlet. Using an incorrect adapter can damage your stereo or cause it to malfunction. Understanding the key factors like voltage and amperage will help you find a safe and efficient power source.
Choosing The Right Voltage
Your car stereo is designed to run on a specific voltage, usually 12 volts DC. Connecting it to a power adapter with a higher or lower voltage can harm the internal components.
Look for a power adapter that matches the stereo’s voltage requirements exactly. Many adapters list their output voltage on the label. If the voltage isn’t right, the stereo might not turn on or could get damaged over time.
Ask yourself: Have you checked the voltage rating on your stereo’s manual or the back panel? That’s where you’ll find the exact number you need.
Checking Amperage Ratings
Amperage shows how much current the power adapter can supply. Your car stereo needs a certain amount of current to run properly, and the adapter must meet or exceed this value.
Choosing an adapter with a higher amperage than required is safe because the stereo will only draw what it needs. But using an adapter with too low amperage can cause overheating or shutdowns.
To find this info, check the stereo’s specifications for its current draw, usually listed in amps or milliamps. Then pick a power adapter that can provide at least that much current.
Wiring The Stereo To The Power Source
Wiring the stereo to the power source is essential for proper function. This step ensures the stereo gets the right electricity safely. It requires attention to detail and correct connections. Avoid mistakes that can cause damage or hazards.
Connecting Power Wires
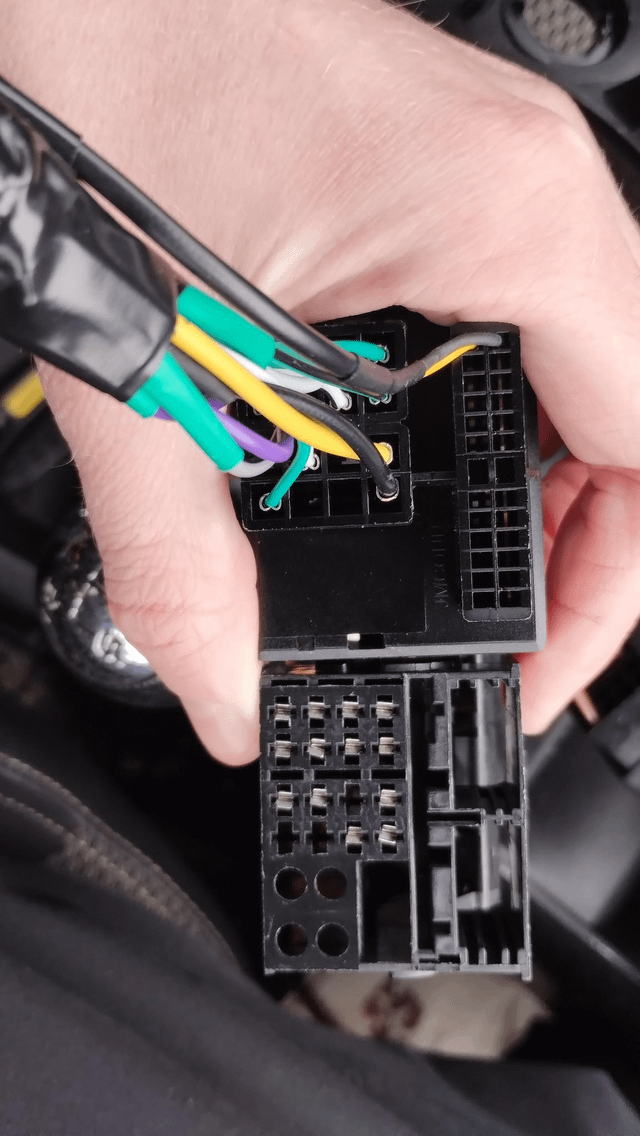
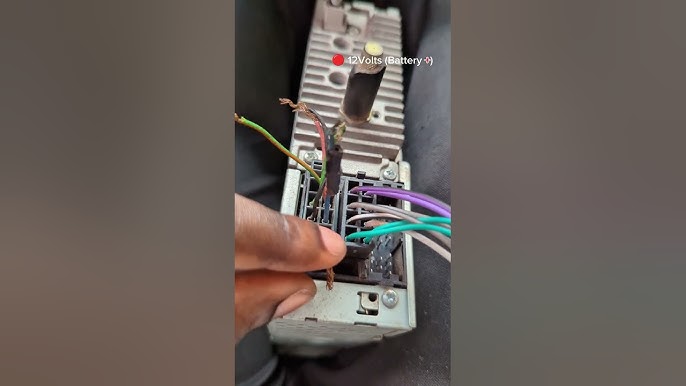
Locate the power wire from the stereo. It is usually red and thicker than others. Connect this wire to a suitable power source. Use a wall outlet adapter designed for car stereos. Ensure the adapter matches the stereo’s voltage and current needs.
Strip about half an inch of insulation from the wire end. Twist the wire strands to prevent fraying. Attach the wire securely to the positive terminal of the power adapter. Use electrical tape or wire nuts to secure the connection. Avoid loose connections that can cause sparks or failure.
Securing Ground Connections
The ground wire is often black or brown. It completes the electrical circuit safely. Connect the ground wire to a reliable grounding point. This can be a metal part of the adapter or a dedicated ground terminal.
Make sure the ground connection is clean and free of paint or rust. Use a ring terminal or strong clamp for a firm connection. Secure the wire with screws or bolts if possible. A poor ground can cause noise or damage to the stereo.
Testing The Setup
Testing the setup is a crucial part after connecting a car stereo to a wall outlet. This step ensures the stereo receives the correct power and works safely. It helps avoid damage to the stereo or electrical hazards. Follow these simple checks to confirm everything runs smoothly.
Powering On Safely
Before turning on the stereo, double-check all wiring connections. Ensure the power supply matches the stereo’s voltage needs. Use a multimeter to verify correct voltage at the output. Keep the volume low at first to prevent speaker damage. Turn on the stereo and listen for any unusual sounds. Watch for warning lights or error messages on the unit.
Troubleshooting Tips
- No power? Recheck the power cord and outlet connection.
- Fuse blown? Replace it with the exact type and rating.
- Sound issues? Inspect speaker wires for loose or crossed connections.
- Static or noise? Try changing the power supply or use a noise filter.
- Stereo resets? Confirm the power source delivers steady voltage without drops.
Take your time testing each function. Small fixes can prevent big problems later.
Mounting And Final Adjustments
After securely mounting your car stereo and connecting it to a wall outlet, the final steps involve organizing your cables neatly and fine-tuning the sound output. These last touches not only improve the appearance but also enhance performance and safety. Paying attention to these details ensures a clean setup and a better listening experience.
Organizing Cables
Keeping cables tidy prevents tangling and reduces the risk of electrical shorts. Use cable ties or Velcro straps to bundle wires together and keep them close to the wall or mounting surface. Labeling each cable can save you time if you need to troubleshoot or adjust connections later.
Consider using cable clips or adhesive mounts to guide wires along a neat path. This approach avoids clutter and keeps the area safe from tripping hazards. Have you noticed how much easier it is to manage your setup when cables are well-organized?
Optimizing Sound Output
Sound quality depends heavily on speaker placement and stereo settings. Adjust your stereo’s equalizer to match the room’s acoustics—boost bass slightly if the sound feels flat, or reduce treble if it’s too sharp. Experiment with volume levels to find the sweet spot without distortion.
Test the sound by playing different types of music. Pay attention to any echoes or muffled tones and reposition speakers if needed. Small tweaks can make a big difference in how your favorite songs come to life.

Credit: www.amazon.com
Common Mistakes To Avoid
Hooking up a car stereo to a wall outlet can be a handy way to test or enjoy your system indoors. However, there are a few common mistakes that can cause damage or poor performance. Avoiding these pitfalls will save you time, money, and frustration.
Incorrect Voltage Use
Using the wrong voltage is a frequent error that can fry your stereo or cause it to malfunction. Car stereos typically require a 12V DC power supply. Plugging it into a standard AC wall outlet without a proper adapter can destroy your device instantly.
Many people overlook checking the voltage rating on their power supply. Always verify that the output matches the stereo’s requirements. If you use a power adapter that outputs higher or lower voltage, your stereo might not turn on or could suffer permanent damage.
Think about your own setup: have you checked the voltage label on the stereo or power supply? If not, take a moment to confirm it before connecting anything.
Poor Grounding Issues
Grounding may seem like a small detail, but it’s crucial for safe and clear sound. Without proper grounding, you might experience buzzing noises or even risk electrical shocks.
Sometimes, people skip connecting the ground wire, assuming it’s optional. But a missing or loose ground can lead to interference and unstable performance.
To avoid this, ensure the ground wire is securely attached to a clean, metal surface on your power supply or outlet box. Double-check all connections for tightness before powering up. Have you ever noticed a hum or static? It might be your system telling you it needs better grounding.

Credit: www.amazon.com
Frequently Asked Questions
Can You Connect A Car Stereo To A Wall Outlet?
Yes, you can connect a car stereo to a wall outlet. You’ll need a power converter or adapter. This device will convert the 120V AC from the wall outlet to 12V DC. Ensure the adapter’s power rating matches the stereo’s requirements to avoid damage.
What Equipment Is Needed For The Connection?
To connect a car stereo to a wall outlet, you’ll need a power adapter. Additionally, have speaker wires, an antenna adapter, and audio cables. Ensure the power adapter provides the correct voltage and amperage to protect your stereo from power issues.
Is It Safe To Power A Car Stereo Indoors?
Yes, it’s safe if done correctly. Use a proper power adapter that matches the stereo’s requirements. Ensure all connections are secure to prevent short circuits. Avoid overloading the adapter, and consult your stereo’s manual for specific power guidelines.
How Do I Choose The Right Power Adapter?
Choose a power adapter that converts 120V AC to 12V DC. Ensure its output matches your stereo’s voltage and amperage needs. Check the stereo’s manual for specific requirements. A mismatched adapter can cause performance issues or damage the stereo.
Conclusion
Connecting a car stereo to a wall outlet is simple and safe. Use the right power adapter to match your stereo’s needs. Check all connections twice before turning the device on. Avoid using damaged wires or loose plugs. This setup lets you enjoy car stereo sound indoors.
Keep these steps in mind for a smooth experience. Now, you can play your favorite music anytime at home.