How to Install a Car Stereo Pioneer: Easy Steps for Perfect Sound
Ready to upgrade your car’s sound system with a Pioneer stereo? Installing a new car stereo might seem tricky, but with the right steps, you can do it yourself and enjoy better music while driving.
Imagine controlling your favorite tunes effortlessly and boosting your driving experience—without paying for expensive professional help. In this guide, you’ll find simple, clear instructions to install your Pioneer car stereo quickly and safely. Keep reading, and by the end, you’ll have your new stereo set up like a pro.
Credit: www.subaruforester.org
Choosing The Right Pioneer Stereo
Choosing the right Pioneer stereo can transform your driving experience. It’s not just about picking a brand name but finding a model that fits your needs and your car perfectly. Before you make a purchase, consider what features matter most and whether the stereo will work seamlessly with your vehicle.
Key Features To Consider
Think about how you want to use your car stereo. Are you after crisp sound quality, Bluetooth connectivity, or maybe smartphone integration? Pioneer offers models with touchscreens, voice control, and even support for Apple CarPlay and Android Auto.
Don’t overlook the basics like the number of preamp outputs if you plan to add external amplifiers or subwoofers. Also, look at the user interface—is it easy to navigate while driving? You want controls that won’t distract you from the road.
- Bluetooth and hands-free calling
- Smartphone compatibility (Apple CarPlay, Android Auto)
- Sound customization options (equalizer, crossover settings)
- Screen size and touch responsiveness
- Expandable system support (amplifiers, subwoofers)
Compatibility With Your Vehicle
Not every stereo fits every car. Check the size and shape of your dashboard to ensure the Pioneer stereo will fit without extra modifications. Single-DIN and double-DIN sizes are common, but your car’s design dictates what works.
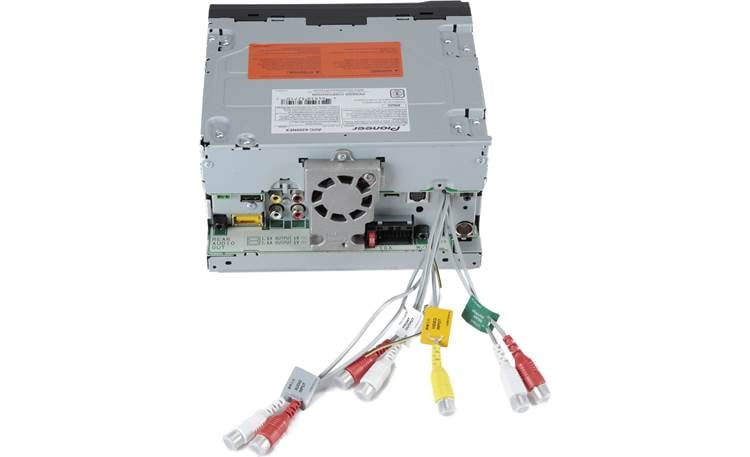
Look into your vehicle’s wiring harness and antenna connections. Some Pioneer models come with adapters, but others may require additional parts or professional installation. Have you checked if your car supports steering wheel controls with the new stereo? This can maintain convenience and safety.
Remember, a perfect fit means easier installation and a cleaner look. It also prevents potential electrical issues that arise from incompatible wiring.
Credit: www.crutchfield.ca
Gathering Necessary Tools
Before you dive into installing your new Pioneer car stereo, gathering all the necessary tools is crucial. Having the right tools on hand not only speeds up the process but also helps avoid damage to your vehicle’s interior or the stereo unit itself. Let’s break down what you’ll need to get started smoothly.
Basic Tools Required
- Screwdrivers:Both flathead and Phillips screwdrivers are essential for removing panels and securing the stereo.
- Wire Strippers:You’ll need these to strip the insulation from wires for proper connections.
- Socket Wrench Set:Useful for loosening bolts that hold the old stereo or mounting brackets in place.
- Panel Removal Tool:A plastic pry tool helps you remove trim panels without scratching or breaking them.
- Electrical Tape:To safely insulate wire connections after wiring the stereo.
Having these basics ready will make your installation safer and quicker. Do you have a favorite screwdriver or tool that always makes projects easier? This is the time to bring it out.
Optional Accessories For Installation
- Multimeter:Handy for testing electrical connections and ensuring proper voltage before finalizing wiring.
- Wiring Harness Adapter:This can simplify connecting your new stereo to the car’s wiring without cutting factory wires.
- Dash Kit:If your car’s dashboard doesn’t fit the Pioneer stereo perfectly, a dash kit will help create a clean, professional look.
- Heat Shrink Tubing:Offers a more durable and neat finish to wire connections compared to electrical tape.
- Zip Ties:Use these to organize wires and keep them from dangling or interfering with other components.
Consider these optional tools based on your comfort level and the specifics of your car model. Have you ever skipped a tool only to regret it later? It’s better to prepare than pause your work halfway.
Preparing Your Vehicle
Getting your vehicle ready before installing a Pioneer car stereo is a crucial step that can save you from headaches down the road. Proper preparation ensures safety and makes the installation process smoother. You’ll want to create a workspace that’s organized and free of distractions.
Disconnecting The Battery
Before you touch any wires or remove the old stereo, disconnect your car battery. This step is vital to prevent electrical shocks and protect the vehicle’s electronic system. Grab a wrench, usually a 10mm size, to loosen the negative terminal first—the one marked with a minus (-) sign.
Once it’s loose, carefully lift the cable off the terminal and tuck it away so it doesn’t accidentally touch the battery again. This simple safety measure stops any power flow and keeps you safe during the whole project. Have you ever skipped this step and faced issues? It’s a risk not worth taking.
Removing The Old Stereo
Removing your car’s old stereo can be tricky, depending on the model and dashboard design. Start by checking if your stereo has retaining screws or clips—these hold the unit in place. Use a screwdriver or the appropriate removal tools to carefully take out these fasteners.
Next, gently pull the stereo out of the dashboard enough to access the wiring at the back. Don’t yank it; applying steady, gentle force avoids breaking any plastic parts. You might find connectors with clips—press or lift these carefully to unplug the stereo without damaging the wires.
Keep track of how the cables connect to the old unit, maybe even take a photo for reference. This helps when attaching the new Pioneer stereo. What’s your experience with removing car stereos—easy or frustrating? Knowing what to expect saves time and effort.
Wiring The New Stereo
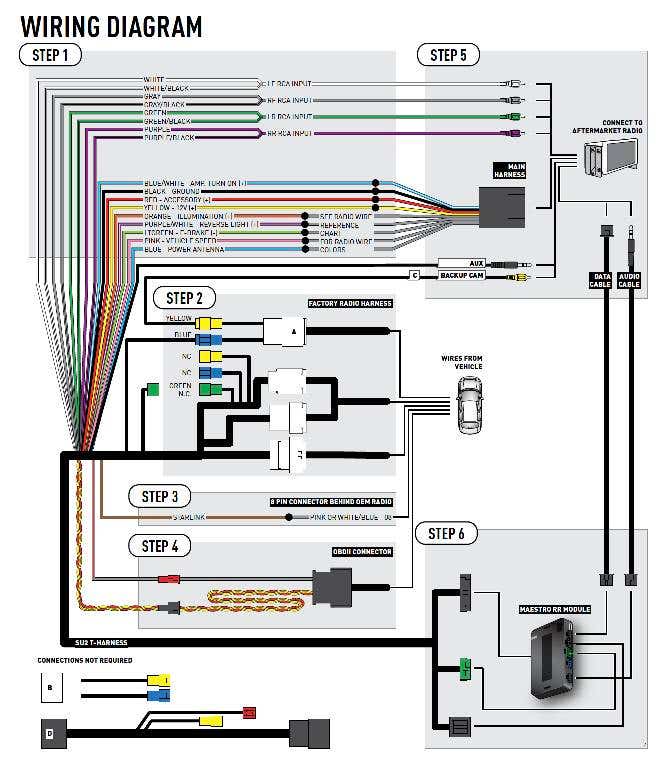
Wiring the new stereo is an important part of installing your Pioneer car stereo. This step ensures the stereo gets power and connects to your car’s speakers. Proper wiring helps avoid damage and poor sound quality.
Careful attention to wire colors and connections makes the process easier. Take time to match wires correctly and use the right adapters for a secure fit.
Identifying Wire Colors
Car stereo wires come in different colors. Each color has a specific purpose. Knowing these colors helps connect wires properly without confusion.
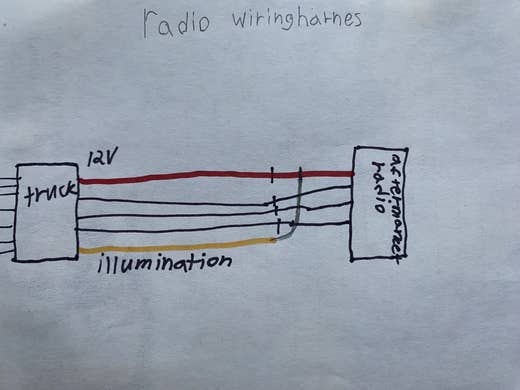
- Red:Power from the ignition switch
- Yellow:Constant power from the battery
- Black:Ground wire
- Blue:Power antenna or amplifier turn-on
- White and White/Black:Front left speaker (+ and -)
- Gray and Gray/Black:Front right speaker (+ and -)
- Green and Green/Black:Rear left speaker (+ and -)
- Purple and Purple/Black:Rear right speaker (+ and -)
Check your car’s wiring diagram or the Pioneer manual for exact colors. Wires may differ by model or car brand.
Connecting Harnesses And Adapters
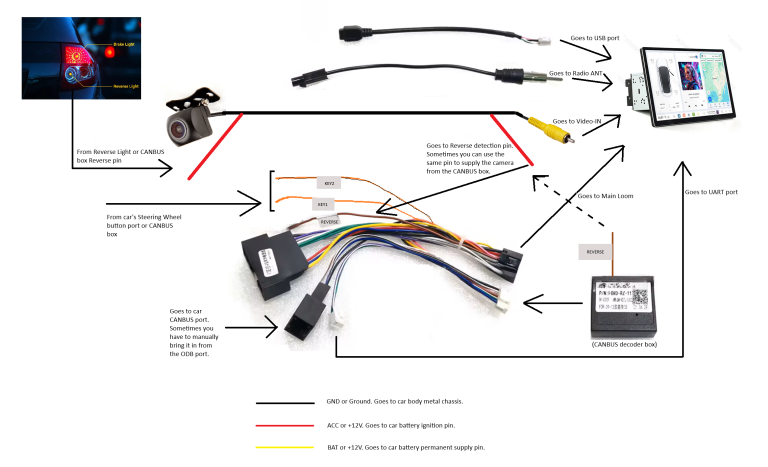
Use wiring harnesses to connect the stereo to your car’s wiring. Harnesses simplify the process and protect wires from damage.
Match the harness wires to the stereo wires by color. Use crimp connectors or solder for secure joins. Avoid twisting wires without connectors.
Adapters are necessary if your car has a special connector. They fit between the harness and the car’s wiring. This prevents cutting factory wires.
Double-check all connections before finalizing. Loose or wrong connections can cause the stereo not to work or create noise.
Mounting The Pioneer Stereo
Mounting the Pioneer stereo correctly is essential for a secure and professional installation. This step ensures the unit fits well and stays in place during driving. Proper mounting also protects the stereo from damage and prevents rattling noises.
Securing The Unit In The Dash
Start by sliding the Pioneer stereo into the dash opening carefully. Make sure the mounting brackets align with the dash holes. Use screws or clips provided with the stereo to fasten it firmly. Tighten screws evenly to avoid tilting the unit. Avoid overtightening to prevent damage to the stereo or dash.
Testing The Fit And Function
After securing the unit, check the stereo’s fit in the dash. It should sit flush without gaps or wobbling. Turn on the car’s power and test the stereo functions. Check volume control, radio reception, and CD or USB playback. Confirm all buttons respond correctly and the display is clear. Adjust the unit if any part feels loose or unresponsive.
Finalizing The Installation
After securing your new Pioneer car stereo in place, the final steps are crucial to ensure everything functions smoothly. This phase involves carefully reconnecting your vehicle’s battery and fine-tuning the audio settings to match your preferences. Taking time here can make the difference between a good sound system and an exceptional one tailored just for you.
Reconnecting The Battery
Before reconnecting, double-check all wiring connections to avoid shorts or loose ends. Make sure the stereo harness and antenna are firmly attached. Once confident, reconnect your car’s negative battery terminal securely.
After reconnecting, turn on your car and test the stereo’s power. If it doesn’t turn on, immediately disconnect the battery and review your connections again. This simple step saved me hours of troubleshooting when I installed my first Pioneer stereo.
Configuring Audio Settings
With your stereo powered up, dive into the audio settings menu. Adjust the bass, treble, balance, and fade to suit your car’s acoustics and your listening preferences. Pioneer stereos usually come with presets—try these to quickly find a sound profile you like.
Don’t forget to explore features like equalizer settings and speaker size options. These small tweaks can dramatically improve clarity and reduce distortion. Have you ever noticed how a slight change in bass or balance can transform your favorite songs? Take your time experimenting until it feels just right.
Troubleshooting Common Issues
Installing a Pioneer car stereo is exciting but can bring challenges. Troubleshooting common issues saves time and frustration. Knowing how to fix typical problems helps keep the system working smoothly. Below are solutions for frequent problems encountered during installation.
No Power Or Sound
Check the fuse first. A blown fuse often causes no power. Make sure the stereo is properly connected to the battery and ignition wires.
Inspect the wiring harness. Loose or incorrect connections can block power or sound. Use a multimeter to test for voltage at the stereo’s power wires.
Verify the ground wire is secure. A bad ground can stop the stereo from working. Attach the ground wire to a clean metal surface.
Adjust the volume and mute settings. Sometimes the stereo is on but muted or set too low.
Compatibility Problems
Confirm the stereo fits your car model. Some Pioneer units need adapters for factory wiring or dash kits.
Check speaker impedance and power ratings. Mismatched speakers may cause poor sound or damage.
Verify compatibility with steering wheel controls. Many cars need an interface module for these features to work.
Update the stereo firmware if available. New updates fix bugs and improve compatibility.

Credit: www.amazon.ca
Frequently Asked Questions
How Do I Prepare For Installing A Car Stereo?
To prepare, gather necessary tools like screwdrivers, wire strippers, and connectors. Disconnect the car battery to ensure safety. Review the car’s wiring diagram and the stereo’s manual. This helps ensure compatibility and eases installation. Having all tools and information ready saves time and prevents errors during the process.
What Tools Are Needed For Installation?
For installation, you’ll need screwdrivers, wire strippers, and a panel removal tool. Having these tools ensures you can safely and efficiently install the stereo. A crimping tool and electrical tape may also be useful. Ensure all tools are within reach before starting the installation process.
How Do I Connect The Wiring Harness?
To connect the wiring harness, match the wires by color. Securely crimp or solder them together, ensuring a firm connection. Use electrical tape or heat shrink tubing to insulate the connections. This prevents short circuits and ensures the stereo functions correctly.
Double-check connections before finalizing the installation.
Why Disconnect The Battery Before Installation?
Disconnecting the battery prevents electrical shorts and potential injury. It ensures safety during installation by eliminating the risk of electric shock. This simple step protects both you and the vehicle’s electrical system. Always disconnect the negative terminal first to safely depower the car’s electronics.
Conclusion
Installing a Pioneer car stereo is simple with clear steps. Take time to connect wires carefully and test the system. Double-check all connections before finalizing the setup. A good stereo makes driving more enjoyable and safe. Keep your tools ready and follow instructions closely.
Enjoy your music with better sound on the road. This guide helps you install confidently and correctly. You will feel proud of your new stereo setup.