How to Connect Amp to Car Stereo: Easy Steps for Perfect Sound
Are you looking to boost your car’s sound system but don’t know how to connect an amp to your car stereo? You’re in the right place.
Connecting an amplifier can seem tricky, but once you get it right, the difference in sound quality is incredible. Imagine driving with clear, powerful music filling every inch of your car. In this guide, you’ll learn simple, step-by-step instructions to hook up your amp safely and effectively.
Keep reading, and by the end, you’ll have the confidence to upgrade your car audio like a pro.

Credit: www.amazon.com
Choosing The Right Amplifier
Choosing the right amplifier for your car stereo is key to great sound quality. The amplifier boosts audio signals, making music louder and clearer. Picking the right type and size ensures your system works well without damage or distortion. Consider power needs, space, and speaker compatibility before buying.
Types Of Car Amplifiers
There are three main types of car amplifiers:
- Class A/B:Common and reliable. Good balance of sound quality and power efficiency.
- Class D:Compact and very efficient. Great for subwoofers and limited space.
- Class A:High sound quality but less efficient. Usually more expensive and larger.
Choose based on your sound preferences and power needs.
Matching Amplifier Power To Speakers
Amplifier power must match speaker power handling. Too little power causes distortion. Too much power can damage speakers.
Check these specs:
- RMS power rating of amplifier
- RMS power rating of speakers
- Speaker impedance (ohms)
Match RMS power closely to ensure clear sound and protect your equipment.
Considering Space And Installation
Car space limits amplifier size and placement. Measure available area before purchase.
Think about ventilation to avoid overheating. Some amplifiers need more airflow.
Wiring must reach amp location without stretching or damage. Choose a spot near the stereo or battery for easy connection.
Gathering Necessary Tools And Materials
Before you dive into connecting your amplifier to your car stereo, gathering the right tools and materials is crucial. Having everything ready prevents interruptions and makes the installation smoother. It also helps you avoid costly mistakes that come from using the wrong equipment or missing parts.
Essential Wiring Kits
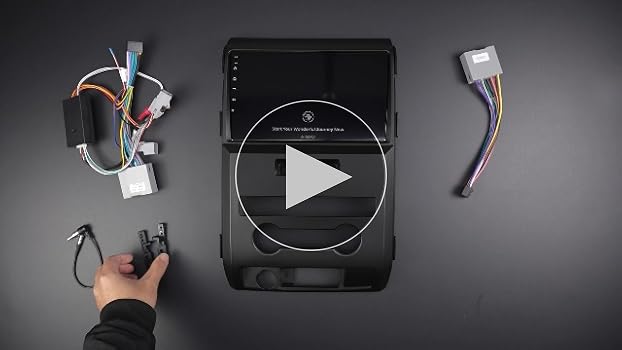
Look for a wiring kit designed specifically for car amplifiers. These kits usually include power cables, ground cables, RCA cables, and speaker wires. A good kit will also have a fuse holder and fuse to protect your system.
Choosing the correct gauge for your wires matters. Thicker wires carry more current safely, which is vital for a powerful amp. Don’t settle for cheap cables; they can cause performance issues or even damage your equipment.
Required Tools For Installation
Gather basic hand tools like wire strippers, crimpers, and screwdrivers. These will help you strip insulation cleanly, secure connections tightly, and mount components securely.
Multimeters are also handy to check your connections and voltage levels. If you don’t have one yet, investing in a simple multimeter can save you a lot of troubleshooting time.
Safety Equipment
Safety glasses protect your eyes from sparks or debris while working under the dashboard or near wiring. Gloves can protect your hands from sharp edges and hot surfaces.
Disconnect your car battery before starting the installation. This simple step prevents electrical shorts and protects you from shocks. Have a fire extinguisher nearby just in case—better safe than sorry!
Preparing your car stereo system is a crucial first step before connecting an amplifier. It ensures safety and helps you avoid mistakes that could damage your equipment. Taking time to get this right can save you frustration and protect your vehicle’s electronics.
Disconnecting The Battery
Start by disconnecting your car’s battery. This prevents any electrical shorts or shocks while you work on your stereo system. Simply use a wrench to remove the negative terminal cable from the battery, and make sure it’s completely detached before proceeding.
Have you ever wondered why this step is so important? Even a small spark can fry your stereo or amp, so it’s better to be safe than sorry.
Removing The Stereo Unit
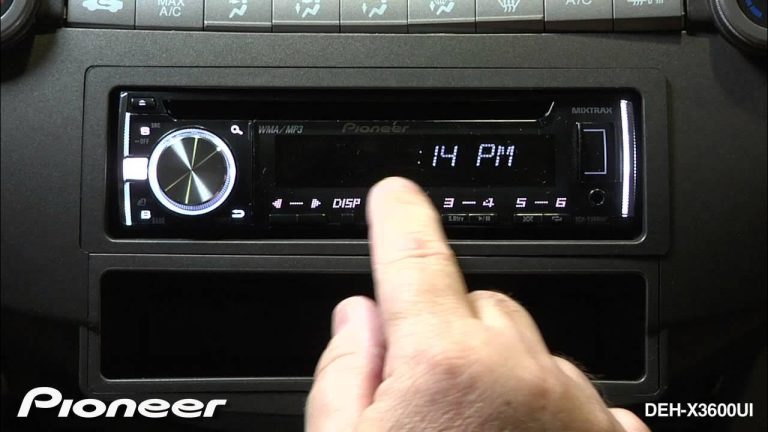
Next, carefully remove the stereo unit from your dashboard. This usually involves unscrewing the mounting screws and gently pulling the unit out. Use a panel removal tool if necessary to avoid damaging your dashboard or trim.
Keep track of all screws and clips—you’ll need them to reinstall the stereo later. Also, make a note of how the stereo fits so reconnecting everything is easier.
Identifying Speaker And Power Wires
With the stereo unit out, you can now identify the speaker and power wires. Look for wire colors and labels—usually, power wires are red or yellow, and speaker wires come in pairs with different colors. Consult your car’s wiring diagram or manual if you’re unsure.
Mark these wires with tape or labels to avoid confusion. Knowing exactly which wire does what will make connecting your amplifier much smoother and safer.
Preparing Your Car Stereo System
Credit: www.mazda3revolution.com
Wiring The Amplifier
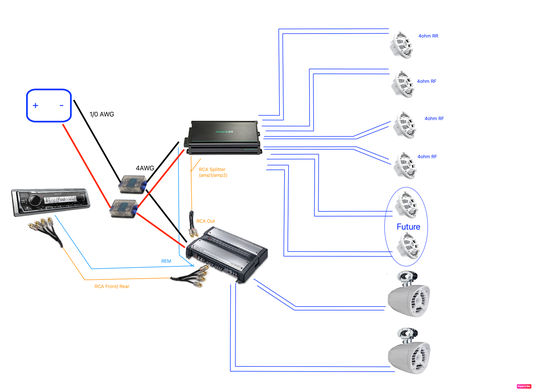
Wiring your amplifier correctly is crucial for getting the best sound quality and ensuring safety. Each wire plays a specific role in delivering power, signal, and control to your amp. Taking time to connect every wire properly will save you headaches and protect your car’s electrical system.
Running Power Cable From Battery
Start by choosing a power cable thick enough to handle your amplifier’s current draw. Thicker cables reduce voltage drops and keep your amp running smoothly.
Run the cable from the positive terminal of your car battery through the firewall, using a grommet to prevent damage from sharp edges. Don’t forget to add an inline fuse within 18 inches of the battery to protect against short circuits.
Connecting Ground Wire
Your amplifier needs a solid ground connection to work properly. Use the same gauge wire as your power cable and attach it to a clean, unpainted metal surface on your car’s chassis.
A poor ground can cause noise issues and power fluctuations, so sanding off paint and rust before securing the wire is a smart move. Keep the ground wire as short as possible for the best performance.
Installing The Remote Turn-on Wire
This thin wire tells your amplifier when to power on and off. Usually, it connects to the remote turn-on lead from your car stereo or head unit.
Make sure this wire is securely connected and insulated to avoid accidental shorts. Without it, your amp won’t switch on with your stereo, leaving you wondering why it’s silent.
Connecting Rca Cables
RCA cables carry the audio signal from your stereo to the amplifier. Select high-quality, shielded cables to minimize interference and noise.
Route them away from power cables to reduce the chance of static or buzzing sounds. Connect the RCA plugs firmly to the corresponding inputs on your amp.
Hooking Up Speaker Wires
Speaker wires carry amplified sound to your speakers or subwoofers. Use wires rated for car audio and match the polarity—positive to positive, negative to negative—to avoid phase issues.
Strip the wire ends cleanly and secure them tightly to the amplifier’s speaker terminals. Loose connections can cause distortion or even damage your equipment.
Securing The Amplifier
Securing the amplifier is a crucial step in connecting it to your car stereo. If the amp isn’t mounted properly, it can shift during driving, causing damage to the wiring or the unit itself. Taking time to secure it correctly ensures safety and maintains sound quality over time.
Choosing The Installation Location
Pick a spot that offers good ventilation to prevent the amplifier from overheating. Avoid areas directly exposed to moisture or dirt, such as near the car’s floor or engine bay. Consider places like the trunk, under a seat, or on the back of the rear seats.
Think about accessibility too. You want the amp within reach for adjustments or future maintenance without having to remove half your car interior. Ask yourself: Is this location both safe and convenient for wiring and cooling?
Mounting The Amplifier Safely
Use sturdy screws and brackets designed for automotive use to fix the amp firmly. Avoid using adhesive tapes or weak fasteners—they won’t hold up against vibrations and bumps on the road. If possible, mount the amplifier on a flat surface to ensure stability.
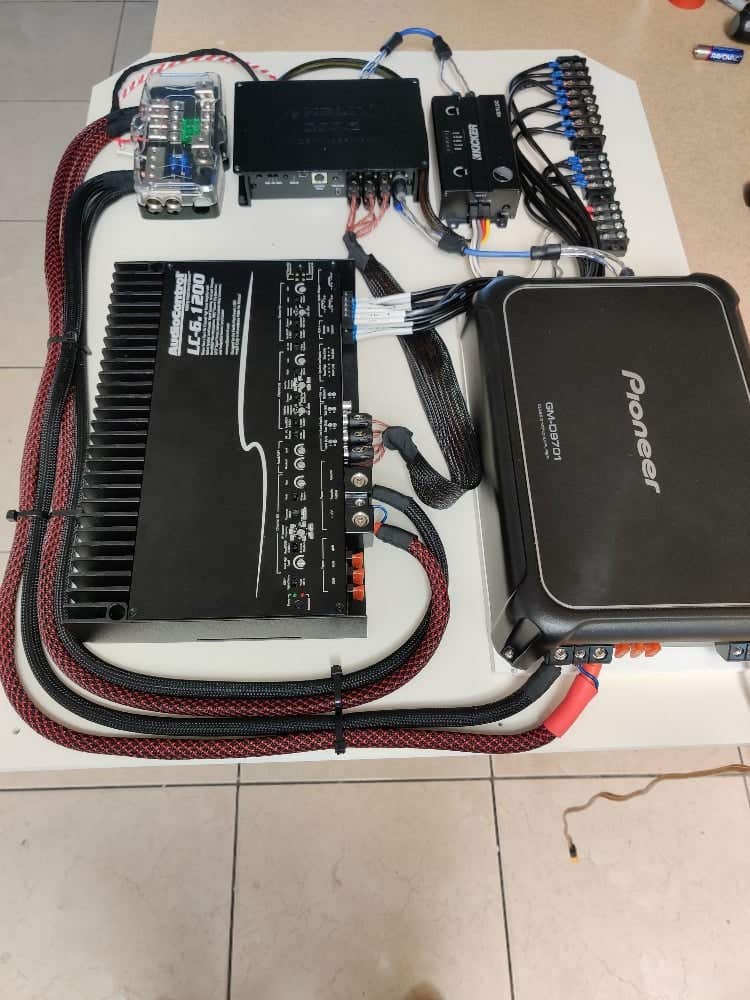
Make sure all cables have enough slack to prevent tension but aren’t loose enough to get snagged or pinched. Double-check that no wires are touching sharp metal edges which could cause shorts. Think of your amp as a delicate device that needs a secure home to perform its best.
Configuring The Amplifier Settings
Configuring the amplifier settings is essential for clear and powerful sound. Proper adjustments ensure the best audio quality and prevent damage to your car stereo system. Each setting plays a key role in shaping the sound output.
Adjusting Gain And Bass Boost
Gain controls the amplifier’s input level. Set the gain too high, and the sound will distort. Set it too low, and the volume will be weak. Start with the gain at the lowest setting and increase it slowly until the sound is clear and loud.
Bass boost adds extra low frequencies to enhance bass sounds. Use it carefully because too much bass boost can cause distortion or damage speakers. Adjust bass boost to fit your music style and listening preference.
Setting Crossover Frequencies
Crossover frequencies direct sound to the right speakers. High frequencies go to tweeters, while low frequencies go to woofers or subwoofers. Set the crossover frequency based on your speaker types to avoid sound overlap or gaps.
Use these common crossover points as a guide:
- Subwoofers: 80Hz or lower
- Woofers: 80Hz to 250Hz
- Tweeters: 2500Hz and above
Adjust the crossover setting to balance the sound and improve clarity.
Testing Sound Output
After setting gain, bass boost, and crossovers, test the sound output. Play different music genres to check clarity and volume. Listen for distortion, rattles, or uneven sound levels.
Make small adjustments to settings based on what you hear. Testing helps fine-tune your amplifier for the best listening experience.
Troubleshooting Common Issues
Troubleshooting common issues helps keep your amp and car stereo working well. Problems can stop sound or cause bad audio quality. Fixing these issues quickly makes your music sound clear and strong. Understanding the causes helps solve the problems fast.
No Power Or Sound
Check if the amp is getting power. Look at the fuse and battery connection. Make sure all wires are tight and connected right. Test the remote turn-on wire; it tells the amp to start. If no sound comes out, check speaker wires for breaks or loose ends.
Distorted Audio
Distorted sound means the music is unclear or fuzzy. Lower the volume on the amp and stereo to see if it improves. Check speaker impedance; wrong size can cause distortion. Verify that all cables are in good shape without cuts or damage. Adjust bass and treble settings to balance sound quality.
Overheating Problems
Amps get hot but should not overheat. Ensure the amp has space for air to flow around it. Avoid placing it under direct sunlight or near heat sources. Check that speaker impedance matches amp requirements. Turn off the amp after long use to let it cool down.
Maintaining Your Amplifier
Keeping your amplifier in good shape is essential for a great sound experience and longer gear life. Regular upkeep helps you spot issues early and avoid costly repairs. Small actions can save you from big headaches down the road.
Regular Cleaning
Dust and dirt can build up on your amplifier and cause it to overheat or malfunction. Use a soft, dry cloth to wipe down the surface every few weeks. Avoid spraying cleaners directly on the amp; instead, lightly dampen the cloth if needed.
Don’t forget to clean the cooling fans and vents. Blocked airflow can cause your amp to run hotter than it should, affecting performance. Have you checked your amp’s cooling system lately?
Checking Wiring Connections
Loose or corroded wires can lead to poor sound quality or even damage your amplifier. Take time to inspect all the wiring connections regularly. Make sure the power, ground, and speaker wires are tight and free from corrosion.
Look for any exposed wires or frayed insulation that could cause shorts. If you find any, replace or repair them immediately. Have you ever had a loose wire ruin your listening session?
Preventing Overloads
Overloading your amplifier can cause it to shut down or fail completely. Know your amp’s limits and avoid pushing it too hard with high volume or incompatible speakers. Use the recommended fuse size to protect the system from power spikes.
Consider installing a voltage regulator or capacitor if your car’s electrical system is unstable. These small additions can prevent sudden surges that stress your amp. Are you giving your amplifier the right environment to perform at its best?
Credit: www.diymobileaudio.com
Frequently Asked Questions
How Do I Choose The Right Amp For My Car?
Selecting the right amp depends on your stereo’s power needs and speaker compatibility. Consider the RMS power rating, impedance, and channel configuration. Ensure the amp matches your stereo’s specifications for optimal performance and sound quality. Researching user reviews and consulting with audio professionals can also help you make an informed decision.
What Tools Do I Need To Connect An Amp?
You’ll need a wiring kit, including power, ground, and RCA cables. A wire stripper, crimping tool, and screwdriver are essential. Check that you have fuses and connectors appropriate for your setup. Having these tools ready ensures a smooth installation process and helps avoid any potential issues during the connection.
Can I Connect An Amp To A Factory Stereo?
Yes, you can connect an amp to a factory stereo using a line output converter (LOC). The LOC converts speaker-level signals to RCA signals for the amp. Ensure all connections are secure to prevent any audio issues. This method allows you to enhance sound without replacing your factory stereo.
How Do I Run Power Cables For The Amp?
Run the power cable from the battery to the amp, avoiding sharp edges. Use a grommet when passing through the firewall. Secure the cable with zip ties to prevent movement. This ensures a safe connection and reduces the risk of electrical issues in your vehicle’s audio setup.
Conclusion
Connecting an amp to your car stereo can boost sound quality a lot. Follow each step carefully to avoid mistakes. Double-check all wires and connections before turning on the system. Use the right tools for a safe and clean setup.
Take your time, and enjoy clearer, louder music on the road. Simple steps make a big difference in your car audio experience. Now, your ride sounds better and more powerful than before.