How to Connect Aux to Pioneer Car Stereo: Easy Guide
Master Automotive Systems Engineer & Performance Vehicle Specialist at CarSpeedNest Automotive Testing Lab · ASE Certified Master Technician, Mobile Electronics Certified Professional (MECP Master), Certified Dyno Diagnostic Specialist · 14+ years in dyno testing, electronic sensor calibration, automotive wiring harnesses, and precision drivetrain maintenance
Are you tired of struggling to play your favorite music through your Pioneer car stereo? Connecting an aux cable might seem simple, but if you’re not sure how to do it right, you could miss out on crystal-clear sound and seamless control.
In this guide, you’ll discover easy steps to connect your aux to your Pioneer car stereo quickly and correctly. Imagine having your playlist, podcasts, and calls come through your car speakers without any hassle. Keep reading, and you’ll be enjoying your tunes like a pro in no time.

Credit: www.youtube.com
Check Your Pioneer Stereo Model
Before you try connecting an aux cable to your Pioneer car stereo, it’s crucial to check the exact model you own. Different models offer different input options, and knowing your stereo’s capabilities will save you from frustration. It can also help you decide if you need additional adapters or cables to get the connection just right.
Locate Aux Input
Start by looking carefully at the front and back of your stereo unit. Many Pioneer models have a small, circular 3.5mm aux input on the front panel. Sometimes, it might be hidden behind a flip-down door or tucked near the USB port.
If you don’t see an obvious aux input on the face of your stereo, check the back. Some older or higher-end models only offer aux ports on the rear, which means you’ll need to route the cable through your dashboard or glove compartment.
Identify Compatible Ports
Not all Pioneer stereos use a standard 3.5mm aux input. Some models rely on RCA ports or even proprietary connectors for auxiliary input. Look up your model number online or in the user manual to see what ports are supported.
- 3.5mm Aux Input:The easiest and most common port, compatible with most smartphones and MP3 players.
- RCA Inputs:These require an RCA to 3.5mm cable or adapter for connection.
- USB Port:Some newer models allow audio playback through USB instead of aux.
- Proprietary Inputs:Certain Pioneer units may need special cables or adapters sold by the manufacturer.
Have you checked your stereo’s model yet? Understanding your specific ports will make connecting your device straightforward, so you can enjoy your music without extra hassle.
Gather Required Accessories
Gathering the right accessories is essential for connecting an aux to your Pioneer car stereo. Without the correct tools, the process can become frustrating or impossible. Knowing what you need saves time and ensures a smooth setup.
Start by identifying the type of connection your car stereo supports. Some models have a dedicated aux input, while others might require adapters. Having the proper cables and converters ready makes the connection reliable and clear.
Aux Cable Types
Aux cables come in different forms. The most common is the 3.5mm stereo cable. It has a small plug similar to headphone jacks. This cable fits easily into the aux port of many stereos.
Other types include RCA cables, which have red and white plugs. These are common in older Pioneer models or home audio systems. Knowing your stereo’s input helps you pick the right cable.
- 3.5mm to 3.5mm stereo cable
- 3.5mm to RCA cable
- RCA to RCA cable
Adapters And Converters
Adapters may be necessary if your stereo lacks a direct aux input. For example, some Pioneer stereos use a USB port or a CD changer port for audio input. In such cases, an adapter converts the signal to aux.
Converters can change digital signals to analog, making them compatible with your stereo. Choose an adapter that matches your stereo’s input type. This avoids damage and keeps sound quality clear.
- USB to aux adapter
- CD changer port adapter
- Digital-to-analog audio converter
Prepare Your Devices
Before you connect your auxiliary cable to your Pioneer car stereo, it’s important to prepare your devices properly. Taking a few simple steps can save you from frustrating sound issues or damage to your equipment. Proper preparation ensures a smooth and clear audio experience every time.
Power Off Stereo
Start by turning off your Pioneer car stereo completely. This helps prevent any electrical surges or static noise when you plug in the aux cable. It also allows the stereo to recognize the new input source without confusion.
Have you ever connected an aux cable while the stereo was on and heard a loud pop? That’s what you want to avoid. Powering off gives you a clean slate to work from.
Set Device Volume
Before connecting your phone or music player, set its volume to about 50%. This prevents sudden loud sounds that can harm your car speakers or startle you. You can always adjust it later once the connection is secure.
Keeping the volume mid-level also helps avoid distortion or crackling noises. It’s a simple habit that makes your listening experience much better.

Credit: www.youtube.com
Connect Aux Cable To Stereo
Connecting an aux cable to your Pioneer car stereo is a straightforward way to play music from your phone or other devices. This simple connection lets you enjoy your favorite playlists with clear sound quality. Knowing how to properly connect the aux cable ensures a smooth listening experience without interruptions.
Insert Aux Cable Properly
Start by locating the aux input on your Pioneer stereo. It is usually marked as “AUX” and may be on the front panel or inside the glove compartment. Make sure your aux cable’s jack matches the input size—typically 3.5mm.
Hold the aux cable firmly and push it straight into the input until you feel it click or fit snugly. Avoid forcing it at an angle, which can damage the port or cable. Have you ever noticed how a loose connection can cause static or cutouts? Proper insertion helps prevent this.
Secure Connection
After inserting the cable, gently tug it to confirm it is secure. A loose connection can disrupt audio playback or cause intermittent sound. If your cable or port feels loose, try a different cable or inspect the port for dirt or debris.
You might also want to check your stereo’s settings to ensure it’s set to the aux input. This step is crucial because even a perfect connection won’t work if the stereo is on the wrong source. Have you ever spent minutes troubleshooting only to realize the source input was off?
Connect Aux Cable To Audio Source
Connecting the aux cable to your audio source is a crucial step to ensure clear and uninterrupted sound through your Pioneer car stereo. It’s not just about plugging in; you want to make sure the device sends the right signal to your stereo. Paying attention to your device and its settings can make all the difference in your listening experience.
Plug Into Phone Or Mp3 Player
Start by locating the headphone or audio output jack on your phone or MP3 player. This is usually a small, round port labeled with a headphone icon or “audio out.”
Firmly insert one end of the aux cable into this port. A loose connection can cause static or no sound at all, so make sure it clicks into place.
Think about your last drive when the music cut out suddenly. Chances are, the cable wasn’t fully plugged in. Avoid that frustration by double-checking this simple step before hitting the road.
Check Device Settings
Once the cable is connected, open your device’s audio or music player settings. Some phones or MP3 players require you to select “Aux” or “External device” as the audio output.
Make sure your volume is turned up—not muted—and that any Bluetooth or wireless connections are turned off to avoid conflicts.
Have you ever wondered why your music plays through the phone speaker even after plugging in the aux cable? This usually happens if the device defaults to Bluetooth or internal speakers. Adjusting these settings puts your audio where it belongs: through your Pioneer stereo.

Credit: www.aliexpress.com
Select Aux Mode On Stereo
Selecting the aux mode on your Pioneer car stereo is essential to enjoy music or audio from your external device. This step tells the stereo to switch from radio or CD to the aux input, allowing your device’s sound to play through the car speakers. Let’s look at how you can easily activate aux mode using your stereo controls and confirm that the aux input is working properly.
Use Stereo Controls
Locate the “Source” or “Mode” button on your Pioneer stereo. This button cycles through available audio inputs like FM, AM, CD, Bluetooth, and Aux. Press it repeatedly until you see “AUX” displayed on the screen.
Some models may have a dedicated “Aux” button—if yours does, simply press it once. If your stereo has a touchscreen, tap the input selection area and choose “Aux” from the menu. This quick action switches your stereo to aux mode without fuss.
Confirm Aux Input Active
After selecting aux mode, check that your external device is connected properly to the aux port. If you don’t hear any sound, try raising the volume on both your device and the stereo. Sometimes the stereo will show a message like “Aux In” or an icon confirming the input is active.
If nothing plays, unplug and reconnect the aux cable to ensure a solid connection. Testing with a different device or cable can help rule out hardware issues. Have you ever been stuck wondering why no sound comes through after switching to aux? These checks usually solve the problem quickly.
Adjust Sound Settings
Adjusting the sound settings is important for the best audio experience. It helps balance the volume and improve sound clarity. Small tweaks make a big difference when playing music through your Pioneer car stereo.
Set Volume Levels
Start by setting the volume at a moderate level. Avoid maximum volume to prevent distortion. Adjust the volume on both your device and the car stereo. Make sure the sound is clear and comfortable for listening. Check for any sudden changes in loudness.
Tune Audio Quality
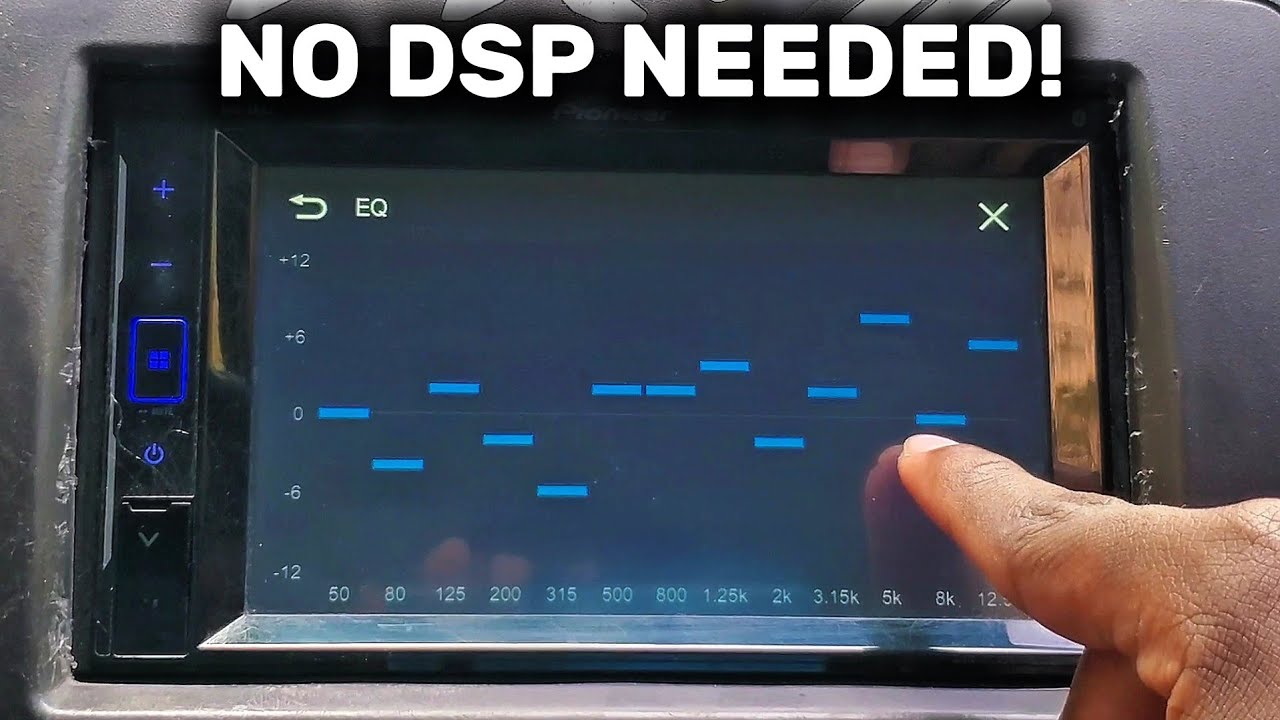
Use the equalizer settings on your Pioneer stereo to enhance sound quality. Adjust bass, treble, and midrange levels according to your preference. Increase bass for deeper sounds and treble for clearer highs. Keep midrange balanced for natural voice tones. Test different settings with various songs to find what sounds best.
Troubleshoot Common Issues
Connecting an AUX cable to your Pioneer car stereo usually goes smoothly, but sometimes issues pop up that can be frustrating. Troubleshooting these common problems quickly can save you time and keep your music flowing. Let’s look at some typical challenges and how you can fix them effectively.
No Sound
If you plug in your AUX cable and hear nothing, start by checking the volume on both your car stereo and the connected device. It’s easy to overlook that your phone or MP3 player might be muted or set to very low volume.
Also, ensure the stereo is set to the correct input source, often labeled as “AUX” or “Line In.” If you still get no sound, try using a different AUX cable or test your device with another speaker to rule out hardware issues.
Static Or Noise
Static or crackling sounds during playback can ruin your listening experience. This often happens due to poor cable quality or interference from other electronic devices in the car.
Try moving the cable away from power cords or chargers to reduce interference. Cleaning the AUX port gently with a dry cloth can also help if dust or debris is causing the noise.
Loose Connections
A common cause of audio problems is a loose connection either at the AUX port or the cable plug. When the connection isn’t secure, sound may cut in and out or be distorted.
- Check that the AUX plug fits snugly into the stereo’s input jack.
- Inspect the cable for any bends or damage that could affect connection quality.
- Try gently wiggling the plug to see if sound cuts off, indicating a loose fit.
Have you ever found that a simple cable swap fixed your problem instantly? Sometimes the solution is easier than you think.
Frequently Asked Questions
How Do I Connect An Aux Cable To A Pioneer Car Stereo?
To connect an aux cable, locate the aux input on your Pioneer stereo. Plug one end into your device and the other into the stereo’s aux port. Select the aux source on the stereo to start playing audio from your device.
Can All Pioneer Car Stereos Support Aux Connections?
Most Pioneer car stereos have an aux input, but not all models do. Check your stereo’s manual or look for an aux port on the front or back. If unavailable, consider using an adapter or Bluetooth connection instead.
What Type Of Aux Cable Is Needed For Pioneer Stereos?
A standard 3. 5mm male-to-male aux cable works for most Pioneer stereos. Ensure the cable is compatible with your device’s headphone jack or audio output. High-quality cables help maintain clear sound and reduce interference.
How To Troubleshoot If Aux Connection Doesn’t Work On Pioneer Stereo?
If the aux connection fails, check cable connections and volume levels. Ensure the stereo is set to aux mode. Try a different aux cable or device to isolate the issue. Resetting the stereo or updating firmware can also help.
Conclusion
Connecting an aux cable to your Pioneer car stereo is simple and quick. Just follow the steps carefully, and you will enjoy your music in no time. Make sure to check the cable and stereo ports for a good fit.
Keep your device volume moderate to avoid sound issues. Enjoy clear and crisp audio while driving safely. Now, your favorite songs are just a plug away. Try it today and make your car rides more fun.

Similar Posts