How to Install 3 Way Speakers in Car: Ultimate Step-by-Step Guide
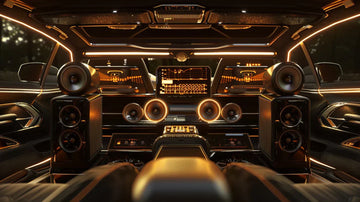
Want to upgrade your car’s sound system and enjoy crystal-clear music every time you drive? Installing 3 way speakers can transform your listening experience with richer highs, deeper mids, and powerful bass.
But if you’re worried it might be too complicated or time-consuming, don’t be. In this guide, you’ll find simple, step-by-step instructions that anyone can follow. By the end, you’ll have your new speakers installed and ready to blast your favorite tunes.
Keep reading to discover how easy it is to bring concert-quality sound right into your car.
Credit: www.toyotanation.com
Choosing The Right 3 Way Speakers
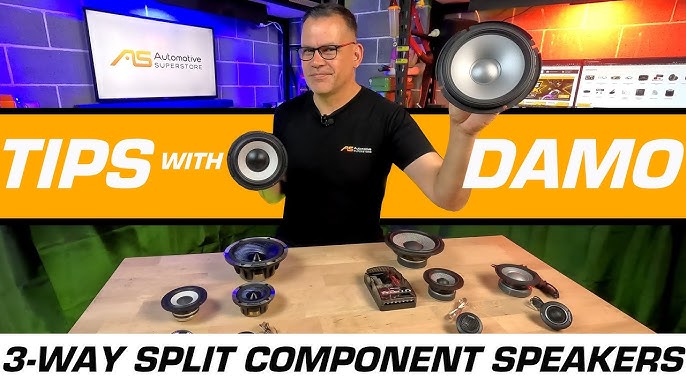
Choosing the right 3 way speakers is key for great sound in your car. These speakers have three drivers to cover bass, midrange, and treble. Picking the right ones ensures clear and balanced audio. Focus on size, power, and build quality for best results.
Speaker Size And Compatibility
Measure your car’s speaker openings before buying. Common sizes include 6×9, 6.5, and 5.25 inches. Make sure the speaker fits without modification. Check if the speaker matches your car’s mounting depth. Compatibility avoids installation problems and sound loss.
Power Handling And Sensitivity
Power handling shows how much power the speaker can take. Check both RMS and peak power ratings. Match speaker power with your amplifier’s output. Sensitivity measures how loud speakers play with less power. Higher sensitivity means louder sound with less energy.
Material And Build Quality
Speaker parts affect sound and durability. Look for cones made of polypropylene or woven fabric. These materials resist moisture and heat well. Surrounds should be rubber or foam for flexibility and strength. Strong magnets and quality voice coils improve performance.
Gathering Necessary Tools And Materials
Before installing 3 way speakers in your car, gather all the necessary tools and materials. Proper preparation saves time and prevents mistakes. Having the right equipment ensures a smooth installation. It also protects your car’s electrical system and your safety.
Essential Installation Tools
- Screwdrivers (Phillips and flathead) for removing panels
- Wire stripper to prepare speaker wires
- Crimping tool for secure wire connections
- Electric drill with bits for mounting speakers
- Panel removal tool to avoid damaging interior parts
- Multimeter to test electrical connections
Wiring And Connectors
- Speaker wire, preferably 16 or 18 gauge
- Butt connectors or quick splice connectors for joining wires
- Electrical tape for insulating connections
- Heat shrink tubing for extra protection
- Wire loom to organize and protect wires
Safety Equipment
- Gloves to protect your hands from sharp edges
- Safety glasses to guard your eyes during drilling
- Mask to avoid inhaling dust or debris
- Work light for better visibility inside the car
Preparing Your Car For Installation
Preparing your car for installing 3 way speakers sets the foundation for a smooth and successful upgrade. Taking the right steps before installation can save you time and prevent damage to your vehicle’s electrical system and interior. Let’s look at how to get your car ready, starting with safety and clearing the space for new speakers.
Disconnecting The Battery
Before you touch any wires or speaker mounts, disconnect your car’s battery. This simple safety step stops electrical shorts and protects both you and your vehicle’s electronics.
Locate the negative terminal on your battery and use a wrench to loosen the clamp. Remove the cable and keep it away from the battery to avoid accidental contact.
Have you ever experienced a blown fuse or unexpected sparks while working on your car? Disconnecting the battery eliminates those risks completely.
Removing Old Speakers
Next, you need to carefully remove the existing speakers. This clears the area for your new 3 way speakers and lets you inspect the mounts and wiring.
Start by taking off any door panels or speaker grilles. Use a screwdriver or panel removal tool to avoid damaging clips or trim pieces.
Once exposed, unscrew the old speakers and gently disconnect their wiring. Label the wires if necessary to keep track of polarity and connections.
Cleaning Speaker Mounts
After removing the old speakers, clean the speaker mounts thoroughly. Dust, dirt, and rust can affect the fit and sound quality of your new speakers.
Use a cloth or brush to clear debris, and apply a bit of rust remover if needed. Wipe down the surface to ensure a smooth, secure mounting area.
Have you noticed how a clean surface changes the way a speaker sits? A tight fit reduces vibrations and improves sound clarity.
Wiring The 3 Way Speakers
Wiring the 3 way speakers in your car ensures clear sound from each driver. Proper wiring separates signals for tweeters, midrange, and woofers. This step requires attention to detail and care for safety.
Identifying Speaker Wires
Locate the wires coming from your car’s head unit or amplifier. Speaker wires usually come in pairs with different colors or markings. Use a multimeter or speaker tester to find positive and negative wires.
- Positive wire often has a stripe or brighter color.
- Negative wire is usually plain or darker.
- Label each wire to avoid confusion later.
Connecting Crossovers
Crossovers split audio signals into highs, mids, and lows for each speaker type. Connect the input wires from the amplifier to the crossover input. Then, connect the crossover outputs to the matching speaker wires.
- High output to tweeter wires.
- Mid output to midrange wires.
- Low output to woofer wires.
- Match polarity to avoid sound distortion.
Securing And Insulating Wires
Use wire connectors or solder joints for strong connections. Wrap connections with electrical tape or heat shrink tubing. Secure wires away from moving parts and sharp edges to prevent damage.
- Bundle wires neatly with zip ties.
- Check all connections before finalizing.
- Test sound to confirm proper wiring.
Mounting The Speakers
Mounting the speakers correctly is key to getting the best sound from your 3-way car audio system. Each speaker type—tweeters, midrange, and woofers—needs a specific spot and solid support to perform well. Paying attention to their placement and how you secure them will make a noticeable difference in sound clarity and bass response.
Positioning Tweeters, Midrange, And Woofers
Tweeters handle the high frequencies, so place them where your ears can catch crisp, clear sound. Common spots include the A-pillars or the upper corners of the doors. Avoid putting them too low or behind obstructions.
Midrange speakers deliver vocals and most instruments. They work best near ear level, usually in the door panels. Try to face them toward the listening area for balanced sound.
Woofers produce the bass. Mount these lower in the doors or rear panels where they have space to move air. Make sure the location allows enough depth for the speaker cone to function properly.
Installing Speaker Brackets
Speaker brackets provide a strong base and proper angle for your speakers. Use brackets designed for your car model to ensure a snug fit. If none are available, custom brackets made from MDF or plastic can work well.
Before drilling or screwing, test fit the brackets to check for clearance with window mechanisms and door locks. Make sure the bracket doesn’t interfere with any moving parts. A secure bracket reduces vibrations and improves sound quality.
Securing Speakers Firmly
Loose speakers cause rattling and degrade sound. Use screws or bolts that fit the speaker mounting holes exactly. Avoid overtightening to prevent damage to the speaker frame.
Adding foam or rubber gaskets between the speaker and mounting surface can reduce vibrations. Check that the speaker sits flush against the bracket or panel for the best seal and sound projection.
Have you ever noticed how a poorly mounted speaker sounds muddy or tinny? Taking your time to secure them correctly will save you from frustration and improve your car audio experience dramatically.
Testing And Fine-tuning Sound
Testing and fine-tuning sound is a vital part of installing 3 way speakers in your car. It ensures the audio system performs at its best. This process helps identify any issues and optimize sound quality. Proper testing brings out clear highs, rich mids, and deep bass.
Reconnecting The Battery
First, reconnect the car battery to power the audio system. Ensure all speaker wires are secure before restoring power. This step activates the system for testing. Always take safety precautions to avoid short circuits or damage.
Running Sound Tests
Play various music tracks to check speaker performance. Use songs with different frequencies to test highs, mids, and lows. Listen carefully for distortion, imbalance, or weak spots. Walk around the car to hear sound from different angles. Note any areas needing adjustment.
Adjusting Crossover Settings
The crossover controls how sound divides between speakers. Adjust the crossover points for tweeters, midrange, and woofers. Set frequencies so each speaker handles sounds it suits best. Fine-tune volume levels to balance the overall sound. Small changes can improve clarity and reduce distortion.
Troubleshooting Common Issues
Troubleshooting common issues when installing 3 way speakers in your car can save you time and frustration. Problems like distorted sound, no sound output, or rattling noises are frequent but often easy to fix. Understanding these issues will help you enjoy the full potential of your audio system.
Distorted Sound
If your sound is distorted, first check the speaker connections. Loose or corroded wires can cause poor audio quality. Make sure the wires are firmly attached and clean any corrosion you find.
Next, consider the amplifier settings. Too much gain or incorrect equalizer settings can easily distort sound. Try lowering the gain or resetting the EQ to flat and listen again.
Sometimes, distortion happens because the speakers are not rated for the power your system provides. Verify that your amplifier’s output matches your speakers’ power handling. Using mismatched equipment can damage your speakers and ruin sound quality.
No Sound Output
When your speakers produce no sound, start by checking all wiring connections from the head unit to the speakers. A single loose or disconnected wire can cut off audio completely.
Next, inspect the fuses in your car’s audio system. A blown fuse might be the culprit behind the silence. Replace any blown fuses with the correct rating and test the system again.
Also, verify your head unit settings. Sometimes the audio output can be muted or set to a different source. Double-check the volume level and source selection to ensure your speakers receive audio signals.
Rattling And Vibrations
Rattling noises often come from loose speaker mounts or door panels. Check that all screws and clips securing the speakers and panels are tight. Adding foam or rubber gaskets between the speaker and mounting surface can also reduce vibrations.
Another common cause is the speaker cone itself vibrating against an obstruction. Inspect the speaker for any damage or debris and clear the area if needed.
Consider the speaker’s placement as well. Placing speakers too close to loose parts inside the door or dashboard can cause unwanted vibrations. Experiment with repositioning or adding insulation to reduce noise.
Credit: www.diymobileaudio.com
Maintaining Your 3 Way Speakers
Maintaining your 3 way speakers keeps them working well and sounding great. Proper care helps avoid damage and extends speaker life. Small efforts can prevent big problems later. Stay attentive to cleanliness, moisture, and connection quality to enjoy clear sound every drive.
Regular Cleaning Tips
Dust and dirt reduce speaker quality. Use a soft brush or cloth to clean speaker grills gently. Avoid wet cloths that can damage speaker parts. Clean your speakers every few weeks to keep them fresh. Remove debris carefully to avoid scratching surfaces.
Protecting From Moisture
Moisture can harm speaker components and cause rust. Keep your car interior dry and well-ventilated. Use moisture absorbers or dehumidifiers if needed. Avoid parking in damp places for long periods. Quickly dry any spills near the speakers to prevent damage.
Checking Connections Periodically
Loose or corroded wires cause poor sound or no sound. Inspect speaker wires every few months. Tighten any loose connections with care. Look for signs of corrosion or frayed cables. Replace damaged wires promptly to maintain sound quality and safety.

Credit: www.youtube.com
Frequently Asked Questions
What Are 3-way Speakers In A Car?
3-way speakers divide sound into three frequency ranges: low, mid, and high. This ensures clear audio quality. The setup typically includes a woofer, mid-range driver, and tweeter. This configuration provides a richer sound experience compared to standard speakers. They are ideal for audiophiles seeking enhanced in-car audio performance.
How Do 3-way Speakers Improve Sound Quality?
3-way speakers enhance sound by separating frequencies across three drivers. This reduces distortion and provides clarity. The woofer handles bass, mid-range manages vocals, and tweeter deals with high frequencies. This configuration ensures balanced audio output, making music sound more detailed and dynamic in your car.
What Tools Are Needed For Installation?
To install 3-way speakers, you’ll need a screwdriver, wire strippers, and electrical tape. A multimeter is also helpful for testing connections. Having a panel removal tool can ease the process. Ensure you have the speaker manual for specific guidance. These tools help in ensuring a smooth installation.
Can I Install 3-way Speakers Myself?
Yes, you can install 3-way speakers yourself with basic tools. Follow the speaker manual carefully. Ensure you disconnect the car battery before starting. Properly connect wires and test for sound output. If unsure, consult a professional to avoid damage and ensure optimal performance.
Conclusion
Installing 3 way speakers in your car can improve sound quality a lot. Follow each step carefully for the best results. Take your time and check all connections twice. Good speakers make your music clearer and richer. Enjoy your upgraded car audio experience every time you drive.
Remember, patience and care bring great sound. Now, your car sounds better than ever.