How to Rewire Speakers in a Car: Easy Steps for Perfect Sound
Are your car speakers not sounding as clear or powerful as they used to? Sometimes, the problem isn’t the speakers themselves but the wiring behind them.
If you want to boost your car’s audio quality and enjoy your favorite music like never before, learning how to rewire your car speakers is a smart move. In this guide, you’ll discover simple steps to fix or upgrade your speaker wiring, even if you have no prior experience.
By the end, you’ll have the confidence to transform your car’s sound system and turn every drive into an amazing audio experience. Ready to get started? Let’s dive in!
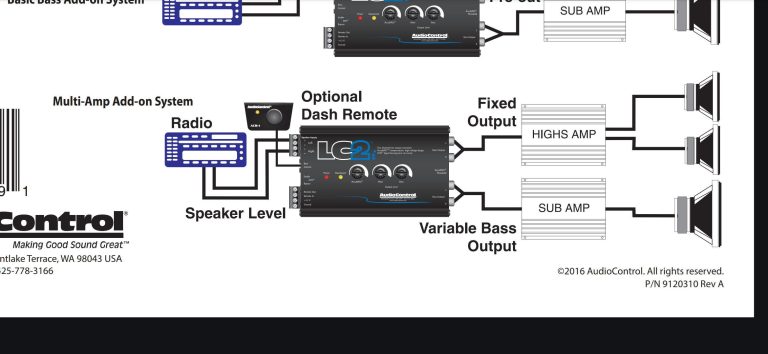
Credit: www.allpar.com
Tools And Materials Needed
Before rewiring car speakers, gather all necessary tools and materials. Having the right items ensures a smooth and safe process. It helps avoid delays and mistakes. Prepare everything in advance for efficient work.
Essential Tools For Rewiring
- Wire strippers – remove insulation from wires cleanly
- Crimping tool – secure connectors to wires firmly
- Screwdrivers – both flathead and Phillips for removing panels
- Multimeter – test electrical connections and continuity
- Electrical tape – insulate and protect wire joints
- Panel removal tool – prevent damage to car interior
- Heat shrink tubing – protect and seal wire connections
Choosing The Right Speaker Wire
Select speaker wire with appropriate gauge size. Thicker wires carry sound signals better over longer distances. Use 16 or 18 gauge wire for most car audio setups.
Opt for oxygen-free copper wire for better sound quality. Quality wire reduces signal loss and interference. Choose wire with clear or colored insulation to identify polarity easily.
Additional Supplies
- Wire connectors – quick and secure wire joining
- Zip ties – organize and secure wiring neatly
- Foam or cloth – protect speakers and car panels
- Cleaning cloth – wipe dust and dirt before installation
- Work gloves – protect hands from sharp edges
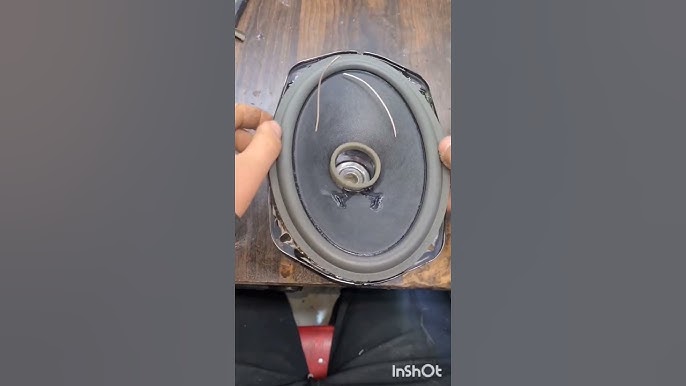
Credit: www.diymobileaudio.com
Preparing Your Car
Preparing your car is the first crucial step before rewiring your speakers. Skipping this part can lead to electrical shorts or damage to your car’s audio system. Taking the time to set up your workspace and ensure safety will save you headaches down the road.
Disconnecting The Battery
Always start by disconnecting your car battery. This prevents any accidental electrical shocks or shorts while you work on the wiring. Use a wrench to loosen the negative terminal first, then the positive one.
Have you ever experienced a fuse blowing mid-installation? Disconnecting the battery stops that from happening and protects your car’s electronics. It’s a simple step that many overlook but is absolutely essential.
Accessing The Speakers
Next, locate the speakers you want to rewire. This often means removing door panels or dashboard covers. Use a trim removal tool to avoid damaging clips or plastic pieces.
Be patient when prying panels off; rushing can break tabs and increase repair costs. Once panels are off, you’ll clearly see the speaker mounts and wiring harnesses. This is your gateway to the rewiring process.
Removing Old Wiring
After exposing the speakers, carefully disconnect the old wiring. Check if the wires are soldered or just plugged into connectors. Use a wire cutter or stripper to remove old wires without damaging the speaker terminals.
Keep track of how the wires were connected. Taking a photo before removal can be a lifesaver. Removing old wiring cleanly helps ensure your new setup will work flawlessly and look tidy.
Speaker Wiring Basics
Before you start rewiring your car speakers, it’s crucial to understand the basics of speaker wiring. Getting the wiring right affects sound quality and prevents damage to your audio system. Let’s break down key concepts that will help you handle speaker wiring confidently.
Understanding Speaker Terminals
Speaker terminals are the connection points where wires attach to your speakers. Usually, you’ll find two terminals labeled positive (+) and negative (−). These markings help you connect wires correctly and maintain proper signal flow.
Most car speakers use spring clips, push tabs, or screw terminals. Make sure the wires fit snugly to avoid loose connections that can cause static or loss of sound. If you’ve ever heard crackling or intermittent sound, it might be due to poor terminal contact.
Wire Polarity And Its Importance
Wire polarity means keeping the positive wire connected to the positive terminal and the negative wire to the negative terminal. Mixing these up reverses the speaker’s phase, which can lead to weak or distorted sound.
Imagine two speakers pushing air in opposite directions at the same time—that’s what happens when polarity is reversed. You might notice a loss in bass or an odd hollow sound. Always use color-coded wires or mark them to avoid confusion during installation.
Common Wiring Configurations
Car speakers often use one of these wiring setups:
- Single Wiring:One positive and one negative wire run from the head unit or amplifier to each speaker. This is the simplest setup.
- Parallel Wiring:Speakers share the same positive and negative wires, which can increase the load on your amplifier.
- Series Wiring:Connects speakers in a chain, positive to negative, affecting overall resistance and sound output.
Choosing the right configuration depends on your system’s design and amplifier specs. Have you checked your amplifier’s manual for recommended speaker impedance? That’s a key step to avoid overloading your system.
Step-by-step Rewiring Process
Rewiring your car speakers can improve sound quality and fix connection problems. The process involves careful measurement, wire preparation, secure connections, and testing. Follow these clear steps to rewire your speakers safely and effectively.
Measuring And Cutting Wire
Start by measuring the distance from the speaker to the amplifier or head unit. Add a few extra inches to the length for flexibility. Use a wire cutter to trim the speaker wire to the right size. Avoid using wires that are too short or too long.
Stripping And Connecting Wires
Strip about half an inch of insulation from each wire end using a wire stripper. Be careful not to damage the metal wire inside. Match the positive and negative wires from the speaker to the amplifier. Twist the exposed wire strands tightly to ensure a good connection.
Securing Connections
Use electrical tape or heat shrink tubing to cover the connected wires. This prevents short circuits and protects the connection from moisture. For stronger joints, use solder or crimp connectors. Make sure the wires are firmly attached and do not pull apart easily.
Testing The Wiring
Turn on the car audio system and play music at a low volume. Listen for clear sound from the rewired speaker. Check for static, buzzing, or no sound at all. If you notice issues, recheck the wire connections and polarity. Proper testing ensures your rewiring is successful.
Troubleshooting Common Issues
Troubleshooting common issues while rewiring your car speakers can save you time and frustration. Problems like no sound, distorted audio, or annoying noise often stem from simple mistakes. Understanding these issues helps you fix them quickly and enjoy clear sound without extra costs.
No Sound Or Distorted Audio
If your speakers produce no sound or distorted audio, the first thing to check is the wiring connections. A single wire reversed or loose can cause the speaker to malfunction. Have you ever found that one speaker was silent while others worked fine? That’s often a wiring polarity issue.
Also, test your speaker with a known good source. Sometimes the problem lies in the head unit or amplifier, not the wiring. Try swapping wires between speakers to see if the issue moves with the wire or stays with the speaker itself.
Loose Connections
Loose connections are a common culprit behind intermittent sound problems. Even if the wires look connected, they might not be making proper contact. Wiggle the wires gently while playing music and listen for crackling or cuts in sound.
Make sure to strip the wire ends properly and twist them before connecting. Using solder or quality connectors can prevent loose connections from developing over time. Have you ever found that a quick tightening fixed your audio problem? That’s the kind of simple fix to try first.
Interference And Noise
Interference shows up as static, buzzing, or humming noises in your speakers. This usually happens when speaker wires run too close to power cables or electronic devices. You can reduce noise by rerouting wires away from sources of interference.
Shielded speaker wires or twisted pair cables also help minimize unwanted noise. Another trick is to check your car’s grounding points; a poor ground can cause significant audio interference. Have you ever noticed noise disappear after grounding a component properly? It’s a small step that makes a big difference.
Enhancing Sound Quality
Improving your car’s sound quality goes beyond just installing new speakers. The wiring plays a crucial role in how clear and powerful your audio feels inside the cabin. Small changes in your speaker wiring setup can make a big difference in sound performance.
Upgrading Speaker Wire
Using thicker, high-quality speaker wire reduces resistance and signal loss. This means your speakers get more accurate power and deliver clearer sound. I once replaced my factory thin wires with 16-gauge oxygen-free copper cables, and the improvement in bass and clarity was immediate.
Look for wires labeled as OFC (oxygen-free copper) and at least 16-gauge thickness. Avoid cheap wires that cause interference or degrade over time. Spending a little more here pays off in sound fidelity.
Proper Wire Routing
How you route your wires inside the car affects sound quality and safety. Keep your speaker wires away from power cables and the engine bay to reduce electrical noise and interference.
Use wire clips or zip ties to secure the cables neatly along the car’s frame. This prevents vibrations and damage that can cause crackling or signal loss. Have you checked if your wires are tangled or rubbing against metal parts? Straightening them out can improve your audio experience.
Adding Sound Dampening
Sound dampening materials inside the doors and panels reduce road noise and vibrations. This allows your speakers to perform without distortion caused by rattling surfaces.
Materials like foam or butyl rubber mats are easy to install and make a noticeable difference. When I added sound dampening to my car doors, the sound became richer and more immersive without turning up the volume.
Consider adding dampening where your speakers mount to minimize unwanted vibrations. Your ears will thank you for it.

Credit: www.reddit.com
Frequently Asked Questions
How Do I Start Rewiring Car Speakers?
To start rewiring car speakers, first disconnect the car battery. This ensures safety during the process. Then, remove the panels and existing speaker wiring. Carefully follow your car’s wiring diagram for accuracy. Lastly, connect the new wires securely to the speakers.
What Tools Do I Need For Speaker Rewiring?
You’ll need a screwdriver, wire cutters, wire strippers, and a multimeter. These tools help in safely removing panels, cutting wires, and testing connections. Additionally, having a crimping tool and electrical tape is beneficial for securing and insulating the wires.
How Do I Identify Speaker Wire Polarity?
To identify speaker wire polarity, check the wire markings. Usually, the positive wire has a stripe or distinct color. Alternatively, use a multimeter to test the connections. Ensuring correct polarity is crucial for proper speaker function and sound quality.
Can I Use Any Wire For Car Speakers?
It’s best to use speaker-specific wires for optimal performance. Standard electrical wires may not handle audio signals well. Speaker wires are designed to carry audio frequencies efficiently. Using the correct gauge ensures better sound quality and prevents potential damage.
Conclusion
Rewiring car speakers can improve sound quality a lot. Take your time and follow each step carefully. Double-check all connections to avoid any issues. Use the right tools for a safe, clean job. Enjoy clearer music and better audio experience in your car.
Small efforts bring big sound improvements. Your car’s audio system will thank you. Keep learning and experimenting with your setup. Sound matters, and now you know how to enhance it.