How to Wire a Amplifier to a Car Stereo: Step-by-Step Guide
Master Automotive Systems Engineer & Performance Vehicle Specialist at CarSpeedNest Automotive Testing Lab · ASE Certified Master Technician, Mobile Electronics Certified Professional (MECP Master), Certified Dyno Diagnostic Specialist · 14+ years in dyno testing, electronic sensor calibration, automotive wiring harnesses, and precision drivetrain maintenance
If you want to boost your car’s sound quality, wiring an amplifier to your car stereo is the key. But maybe you’re not sure where to start or worried about making a mistake.
Don’t worry—this guide will walk you through every step in a clear, simple way. By the time you finish reading, you’ll know exactly how to connect your amplifier and enjoy powerful, crystal-clear sound on every drive. Ready to take your car audio to the next level?
Let’s dive in.
Credit: www.diymobileaudio.com
Tools And Materials Needed
Before wiring an amplifier to a car stereo, gather the right tools and materials. This preparation saves time and avoids mistakes. Having everything ready ensures a smooth installation process.
Using proper tools makes wiring safer and easier. The right materials guarantee good connections and sound quality. Here is a list of essential items you need.
Basic Tools
- Screwdrivers (flathead and Phillips) for removing panels
- Wire stripper to remove insulation cleanly
- Crimping tool for secure wire connections
- Socket wrench set for loosening bolts
- Multimeter to check voltage and continuity
- Electrical tape for insulating wires
Wiring Materials
- Amplifier wiring kit with power, ground, and remote wires
- Speaker wire to connect the amplifier to speakers
- Fuse holder and fuse to protect the electrical system
- Ring terminals for solid connections to battery and ground
- Heat shrink tubing to cover and protect wire joints
Additional Supplies
- Cable ties to organize and secure wires
- Wire loom or conduit to protect wires from damage
- Panel removal tool to avoid damaging trim
- Cleaning cloth to wipe dust and debris before installation
Choosing The Right Amplifier
Choosing the right amplifier is crucial for getting the best sound from your car stereo system. It affects not only the audio quality but also how well your components work together. Picking the wrong amplifier can lead to weak performance or even damage your equipment.
Matching Amplifier To Car Stereo
Your amplifier should complement your car stereo’s output and speaker setup. Check the stereo’s preamp output voltage and the number of channels it supports. If your stereo has only two channels, a mono or 2-channel amplifier might be the best fit, but for more complex systems, consider multi-channel amps.
Think about the type of music you listen to. Are you after crisp highs or booming bass? This preference influences whether you need an amplifier that focuses on clarity or one that can power a subwoofer effectively.
Power Ratings And Compatibility
Power ratings tell you how much power an amplifier can deliver to your speakers, usually measured in watts RMS. Make sure the amplifier’s power output matches the speaker’s power handling capacity to avoid distortion or damage.
Also, pay attention to impedance ratings. An amplifier designed for 4-ohm speakers may not perform well if your subwoofer is 2-ohm. Matching these specs ensures your system runs efficiently and sounds its best.
Have you checked if your amplifier supports the voltage your car’s electrical system provides? A mismatch here can cause electrical issues or poor amplifier performance. Taking time to verify these details saves frustration down the road.
Preparing The Car Stereo System
Preparing the car stereo system is essential before wiring an amplifier. It ensures safety and makes the installation process smoother. Proper preparation helps avoid damage to the stereo or the vehicle’s electrical system.
Start by making sure the car is off and the keys are removed from the ignition. This prevents any accidental electrical shorts or shocks during the work. Taking time to prepare the system reduces risks and protects your equipment.
Disconnecting The Battery
Always disconnect the car battery before starting any electrical work. This step stops current flow and avoids short circuits. Use a wrench to loosen the negative terminal clamp. Remove the clamp carefully and set it aside.
Keep the battery disconnected until all wiring is complete. This simple action protects both you and the car’s electronics. Reconnect the battery only after testing the new amplifier setup.
Removing The Stereo Unit
Remove the stereo unit to access wiring and connect the amplifier properly. First, remove any trim panels around the stereo. Use trim removal tools to avoid damage to the dashboard.
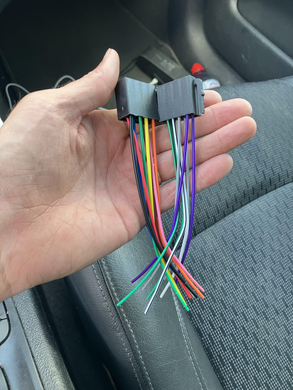
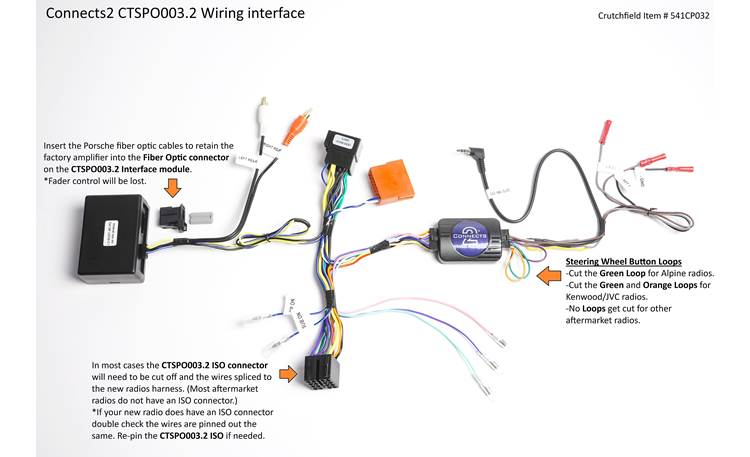
Locate and remove the screws or bolts holding the stereo. Gently pull the stereo out of the dash. Disconnect the wiring harness and antenna cable from the back of the unit.
Handle all connectors with care to prevent breaking pins or wires. Keep screws and parts organized for reassembly after wiring the amplifier.
Credit: www.crutchfield.ca
Running Power And Ground Wires
Running power and ground wires is a key step to connect your amplifier to the car stereo. Proper wiring ensures the amplifier receives enough power and works safely. It also prevents electrical problems like shorts or noise. Paying attention to wire quality and routing can improve sound and avoid damage.
Locating A Suitable Power Source
Find a power source that provides constant 12 volts from the car battery. The positive terminal of the battery is the best option. Avoid using wires that only work when the ignition is on. Use a thick gauge wire to carry enough current to the amplifier. Longer wires may need thicker cables to prevent power loss.
Selecting A Grounding Point
Choose a clean metal spot on the car’s chassis for the ground wire. The area should be free of paint, dirt, and rust. Sand the spot if needed to ensure good metal-to-metal contact. Use a short wire to connect the amplifier ground to this point. A poor ground can cause noise or weak amplifier performance.
Installing A Fuse Holder
Install a fuse holder on the power wire close to the battery terminal. The fuse protects the amplifier and car from electrical faults. Use a fuse that matches the amplifier’s current needs. Secure the fuse holder firmly to avoid loose connections. Check the fuse regularly and replace it if blown.
Connecting The Remote Turn-on Wire
Connecting the remote turn-on wire is a key step in wiring an amplifier to a car stereo. This wire tells the amplifier to turn on and off with the stereo. Without this connection, the amplifier will not power up correctly. It ensures the amp only runs when the stereo is active, protecting your car battery.
The remote turn-on wire is usually thin and blue. It connects the stereo’s remote turn-on lead to the amplifier’s remote turn-on terminal. Proper connection avoids noise and signal issues in the sound system.
Locate The Remote Turn-on Wire On The Stereo
Check the stereo’s wiring harness or manual. Find the blue wire labeled “remote turn-on” or “remote.” This wire sends a 12-volt signal to the amplifier.
Use a multimeter to verify the wire carries 12 volts when the stereo is on. This step ensures you use the correct wire.
Connect The Remote Wire To The Amplifier
Strip a small section of insulation from the wire. Connect it securely to the amplifier’s remote turn-on terminal. Use a crimp connector or solder for a strong connection.
Do not connect this wire to the power or ground terminals. Only the remote turn-on terminal on the amplifier should receive this signal.
Secure And Insulate The Connection
Cover the connection with electrical tape or heat shrink tubing. This prevents short circuits and protects the wire from damage.
Route the wire away from sharp edges and moving parts inside the car. Proper wire management improves system reliability and safety.

Credit: stingersolutions.com
Wiring The Rca Cables
Wiring the RCA cables correctly is crucial to getting clear and powerful sound from your amplifier to your car stereo. These cables carry the audio signal from the head unit to the amplifier, so any mistake here can cause noise, distortion, or no sound at all. Paying attention to how you identify and route these cables can save you frustration and improve your listening experience.
Identifying Rca Outputs
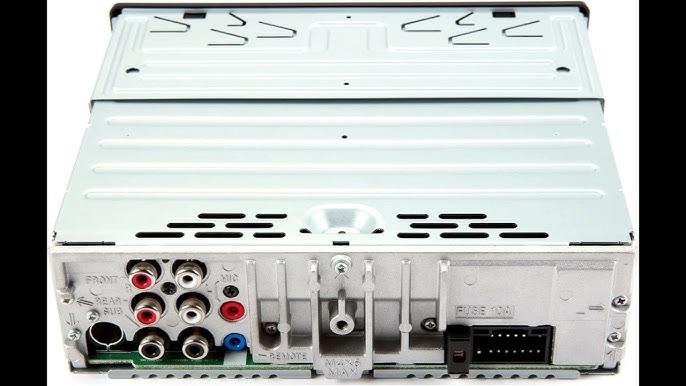
Look at the back of your car stereo head unit to find the RCA output jacks. They are typically color-coded: red for the right audio channel and white or black for the left. Some systems may have multiple pairs, so check your manual to know which pair is meant for your amplifier.
If your stereo doesn’t have RCA outputs, you might need a line output converter to connect the amplifier. This little device converts speaker-level signals into RCA-level signals. Have you checked if your stereo has these outputs before buying cables? It can save you money and effort.
Routing Rca Cables Properly
Run your RCA cables away from power cables to avoid picking up unwanted noise or interference. Power cables create electrical fields that can cause a humming sound in your speakers if RCA cables are too close. Try to keep RCA cables on the opposite side of the vehicle from the power wires.
Use zip ties or cable clips to secure the RCA cables along the vehicle’s frame. This prevents them from moving around and getting damaged. Remember, loose cables can cause intermittent sound issues that are hard to diagnose.
When routing, avoid sharp bends or pinching the cables under panels. This can damage the internal shielding and lead to signal loss. Do you have a flashlight handy? It helps you see hidden paths behind the dashboard and under seats for a clean cable run.
Speaker Wire Connections
Speaker wire connections are the backbone of your car stereo’s sound quality. Without proper wiring, even the best amplifier can’t deliver crisp, powerful audio. Ensuring clean, secure connections can make a noticeable difference in your listening experience.
Choosing The Right Gauge Wire
Choosing the right gauge wire affects both sound quality and safety. Thicker wires (lower gauge numbers) carry more current and reduce power loss, especially over longer distances. For most car audio setups, 16 or 14 gauge wire works well, but if your amplifier is more powerful or the run is long, 12 gauge is a safer bet.
Think about your setup’s distance. If your wires run more than 20 feet, stepping up to a thicker gauge prevents voltage drops. Also, consider the amplifier’s power rating: higher wattage amps demand thicker wires to handle the current.
Connecting To Amplifier And Speakers
Start by stripping about half an inch of insulation off the wire ends to expose the copper. Make sure you don’t nick or damage the wire strands, as this weakens the connection. Twist the strands tightly to avoid fraying before attaching them.
Match the positive (+) terminal on your amplifier to the positive terminal on your speaker, and do the same for the negative (-) terminals. Reversing polarity can cause phase issues, which often make the bass sound thin or hollow. Secure connections with either screw terminals or crimp connectors to avoid loose wires that cause static or dropouts.
Double-check your work by gently tugging each wire to ensure it’s firmly in place. Have you ever experienced unexpected crackling or buzzing? It’s often a loose wire sneaking into your system. Taking the time to connect properly prevents headaches down the road.
Mounting The Amplifier
Mounting the amplifier is a crucial step in wiring it to your car stereo. It affects not only the sound quality but also the safety and longevity of your equipment. Taking time to choose the right spot and secure the amplifier properly will save you from headaches down the road.
Selecting A Location
Pick a spot with enough airflow to prevent overheating. Avoid areas near heat sources like the engine or exhaust system. A common place is under a seat or in the trunk, but make sure it’s dry and clean.
Think about accessibility for wiring and future adjustments. Can you easily reach the amplifier to check connections or tweak settings? If you struggle to access it, you might avoid maintenance and miss signs of trouble.
Securing The Amplifier
Use sturdy brackets or mounting kits designed for car amplifiers. A loose amplifier can cause noise and damage to wires. Tighten screws firmly but don’t strip them by over-tightening.
Consider vibration dampening pads if your car has a rough ride. These can protect your amplifier from shocks that might loosen internal components. Have you noticed any rattling sounds from your amp area? Securing it well often solves that issue.
Testing And Troubleshooting
Testing and troubleshooting ensure your amplifier and car stereo work well together. Proper checks help avoid damage and improve sound. This section guides you through powering the system, checking sound quality, and fixing common problems.
Powering On The System
Turn on your car’s ignition to start the stereo and amplifier. Watch for any warning lights on the amplifier. Listen for any unusual noises or clicks. Make sure the amplifier’s power LED lights up. Check that all connections are secure and tight. Use a multimeter to verify voltage at the amplifier terminals.
Checking For Sound Quality
Play music with a wide range of frequencies. Listen closely to the bass, mids, and highs. Check for clear, distortion-free sound from all speakers. Adjust the amplifier’s gain and crossover settings for balance. Make sure the subwoofer produces deep, clean bass without rattling. Move around the car to confirm consistent sound quality.
Resolving Common Issues
- No power:Check fuse and wiring connections again.
- No sound:Verify RCA cables and speaker wires.
- Distorted sound:Lower amplifier gain or check speaker impedance.
- Amplifier shuts off:Inspect for overheating or loose ground wire.
- Noise or hum:Ensure proper grounding and avoid cable interference.
Frequently Asked Questions
How Do I Connect An Amplifier To A Car Stereo?
To connect an amplifier, run a power wire from the battery to the amp. Connect the amp’s remote wire to the stereo’s remote turn-on lead. Use RCA cables to link the stereo’s output to the amplifier’s input for clear sound transmission.
What Tools Are Needed To Wire A Car Amplifier?
You’ll need a wire stripper, crimping tool, screwdrivers, electrical tape, and a drill. Also, have amplifier wiring kits handy, including power, ground, RCA, and speaker wires for a smooth installation process.
Can I Wire An Amplifier Without Rca Cables?
Yes, if your stereo has speaker-level outputs, you can use speaker wire adapters. These convert speaker signals for the amplifier input. However, RCA cables provide better sound quality and are recommended when available.
Where Should I Ground My Car Amplifier?
Ground the amplifier to a clean, unpainted metal surface close to the amp. This ensures a solid connection and prevents electrical noise or interference in your audio system.
Conclusion
Wiring an amplifier to your car stereo enhances sound quality. Follow each step carefully. Ensure you have all necessary tools ready. Safety should always be your priority. Double-check connections to avoid any issues. Keep wires organized for a neat installation.
Seek help if unsure about any step. A well-installed amplifier offers a satisfying audio experience. Enjoy your favorite music with improved clarity and depth. Remember, practice makes perfect. With patience, you can achieve great results. Your car rides will become more enjoyable.
Happy listening!

Similar Posts